Carving a flower
For carving flowers in wood, you usually use a special tool, such as a fine chisel. You can also use a Dremel tool. With either tool, you can bring out some of the most intricate details of a flower. You can also switch between different Dremel accessories and chisel sizes to get the best results. In this post, you’ll learn how to create fantastic wooden flower artwork. Let’s start whittling flowers!
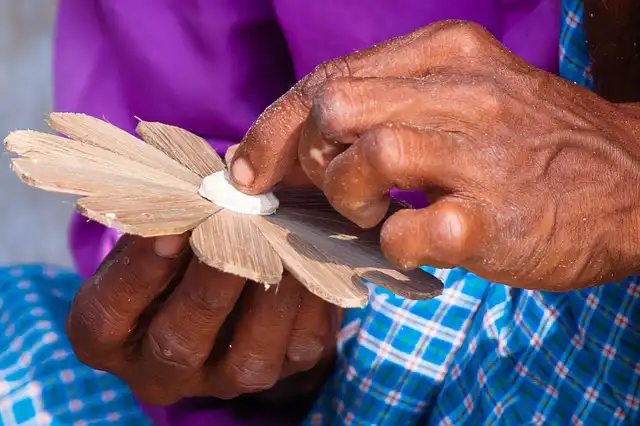
How to carve a flower out of wood: a wooden rose?
- Use the V tool to remove excess material outside your carved lines.
- Leave the petal shapes alone and carve the background.
- Do not go deep under the wood using a V-tool.
- Go all the way around, clearing excess material
- Go back with your gouge and use the edge to carve. Using the stop cut press directly into the bark. You can do this with a gouge that matches the petals. For better results, use the corner of the tool. You will be cutting and releasing the fibers at the same time.
- Follow the petals’ outer edge and push the flower’s background.
- Push the petals individually so that they look like they are coming forward.
- Carve the center of the flower.
- Work on the petal details.
- Shape the center part.
- Finish with details and painting.
Designing your flower
You can choose from endless flower designs on Pinterest, Etsy, and Amazon. However, you can still make your own. You do not have to be a professional designer for good designs; try to make something you can always refer to.
Choosing the wood to use
As much as you can have a specific wood type for your flower, research the types of wood that make flowers better. Even if you have your own choice, make the best out of it. It can be hardwood but make sure it is hard enough for shaping. If it is softwood, be careful to use tools that damage your flower.
Step-by-step guide: How to whittle a flower
Tools
- Pencil
- Compass
- Ruler
- Eraser
- Wood mallet
- Chisels
- Scrap piece of wood
Method
- Safety comes first. Put on your proactive clothing, including safety glasses, goggles, safety shoes, and a face mask.
- Gather your tools and materials for the project. Do not forget an eraser just in case you make mistakes.
- Get ready to draw. You do not have to be very good at drawing. If you are not that good, keep drawing until you have something you like.
- Grab a piece of paper and draw one small circle for the flower ovule. That is the central part of the flower. Make one big circle for references at the end of the flower petal. Divide the circle as you wish and find a coin with the same radius. Draw the end of the flower with it, and you have a basic shape for the flower. Make some chamfer for a 3D look at it. That makes the flower more realistic.
- Transfer the drawing to the working piece. Get a Xuan paper and put it on the drawing. Follow the lines with the pencil and rotate the rice paper with the pencil markdown to the workpiece. Transfer your flower to a piece of wood.
- Find the right gouge for the job and make the curve with one or two lightweight hits with the wooden mallet. Continue hitting until you set the lines.
- Keep your relief cut to 85, not 90 degrees, so that by going down, you make some mistakes easier to fix. You can easily remove it when done and make the final 90 degrees cut.
- Get the lines ready and start working on your depth. Start removing the material, taking the shape of the flower.
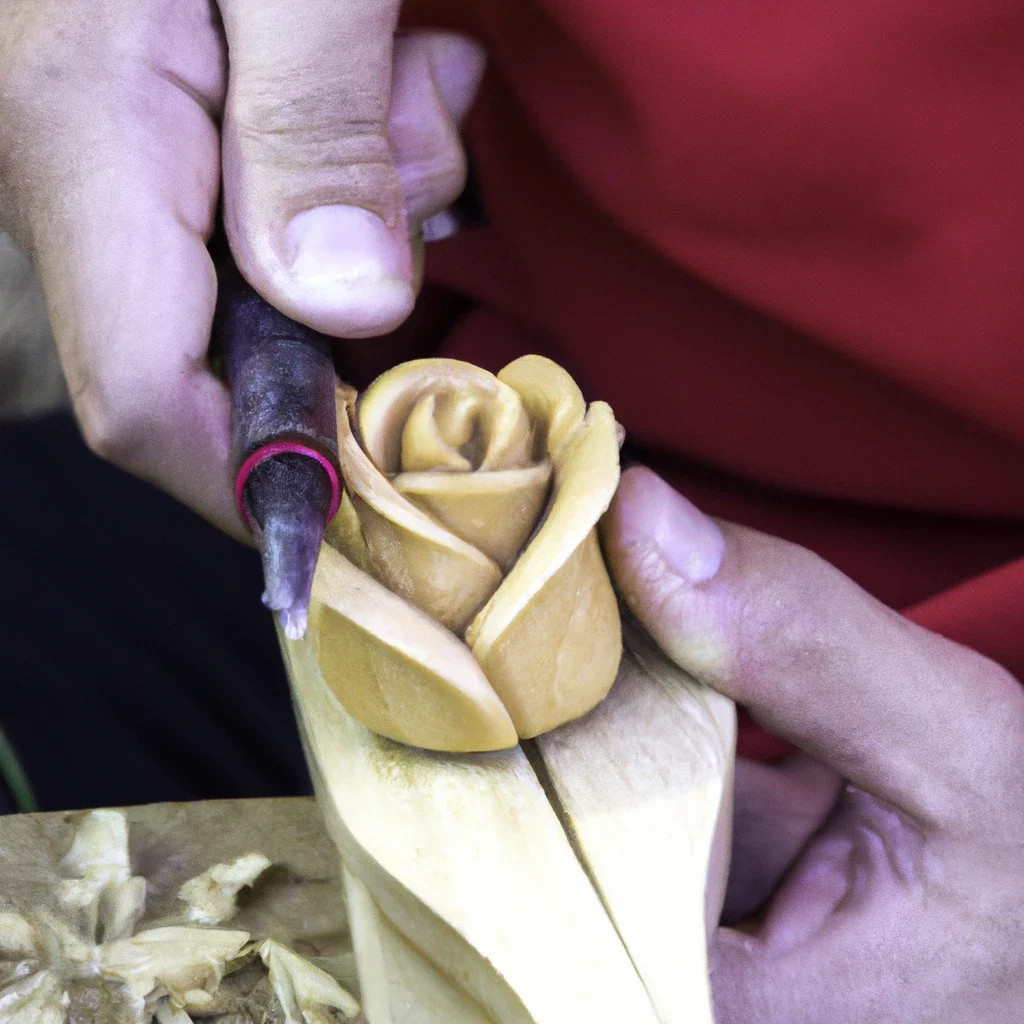
- When done removing materials and straight lines, take a gouge and start making the inside part of the petal. Carve it your way and a finish to the petal. Do not forget to work with the grain.
- Go back to the center of the flower. Start working with the grain. That is the front and back motioning. You get the depth of your choice. Work on the four sides and be careful with the carving; otherwise, you will destroy it.
- The last step is working on the chamfering of the edge of the flower as you make it more live. That is the 3D look. Refer to the picture.
- Prepare the finish. Boiled linseed oil and beeswax make a better finish. For a more precise finish, use the gouge. Some flowers have more details. When it comes to the finish, keep trying different finishing methods on future projects to get to know how they look and what you prefer.
The finish
There are endless options of finish that you can apply to your wooden flowers, depending on the type of wood used. You can use any paint and ink to dye sola wood flowers. Acrylic paint is easy to work with and comes with various color selections, and it is readily available at your local craft store. Mix the paint into the water using a trusty fork and start whisking.
How long do sola wood flowers last?
Sola flowers are a natural product and 100% biodegradable, sustainable material. They last forever and are eco-friendly and sustainable. They are from the renewable wood of a marshy plant, making them last a lifetime. They look like real flowers.
Can you make wood flowers with Cricut?
Although the flowers are made with any cutting machine, you can also use the Cricut. You are allowed to use wood on the Cricut maker machine. Whichever material you choose, make sure it does not have knots. If there is a knot, ensure the knife blade does not go through the knot when cutting your pattern. Cricut-brand basswood gives you better results.
How do you carve a daisy?
- Make stop cuts between the stems and the flowers using #5 gouge. Remove material from the top of both stems next to the flowers and lower the right one. Redraw the leaves as you lower the stems more. Move the leaves higher.
- Draw the stems onto the back of the flowers, and extend up from the edges of the petals. Make stop cuts on both sides of the stems and remove wood from alongside the stems to the centerline using a #3 gouge. Round the stems with a carving knife and keep the left stem on top of the right. Lower the leaves and leave the stem the same size.
- Round the center of the flowers and make stop cuts around the centers. Taper the petals from the middle to the center using a #5 gouge. Carve from the middle to the outer edges and keep the left flower behind the right. Be careful when working on the petals since you can damage the overlapping ones. Make stop cuts on each petal from the center to the edge, and undercut the sides of each petal. Work out to the edge and the back.
- Work on the details of the flowers. Push and turn the punch in the middle of the flower center. Make a second circle next to the first one. Use the tip of a detail knife to make three cuts where three circles meet. Carve a small inverted pyramid.
- Paint the flowers and burn along each petal. Paint the petals and avoid covering the wood burned details. Paint the circles and dry brush on the stems with a different color as a highlight. Glue up the pin back to the back of the flowers. Allow the paint to dry and buff with a soft cloth.
Conclusion on wood flower carving
In summary, flowers do not have to be flowers. They can be any shape or design. You can even create a design from multiple flowers. You can cut out the design from the wood and decorate it with wood burning tools. The possibilities are practically endless. Carving flowers is a fun and inexpensive way to express yourself and your art.

- Grain and Sheen: Teak Oil versus Danish Oil Uncovered - January 10, 2024
- The Cherry on Top: Crafting the Perfect Cutting Board - January 9, 2024
- Polyurethane Water-Based vs Oil-Based: Choosing the Right Finish - January 8, 2024
