Horse Chestnut wood is a beautiful, desirable hardwood for many different reasons, and it’s quite popular in decorating, furniture making, and even musical instruments. If you are interested in horse chestnut wood, you might be asking yourself why you should carve your horse chestnut trees.
What is horse chestnut wood?
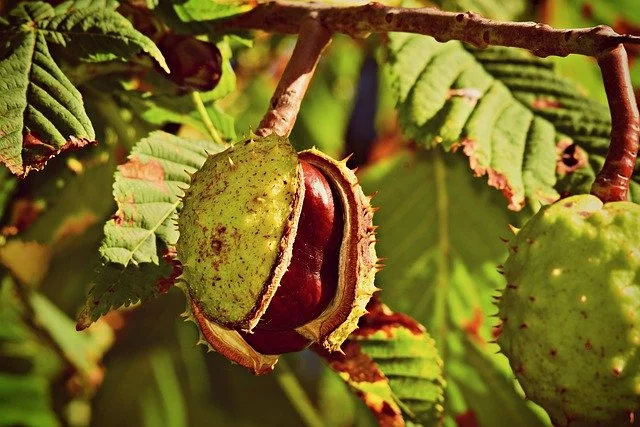
Horse chestnut wood is a type of wood from ornamental trees. Although it is excellent for carving, it is not a better choice for building since it is a weaker wood and is not rot-resistant. What makes it a beautiful type of wood is its creamy color.
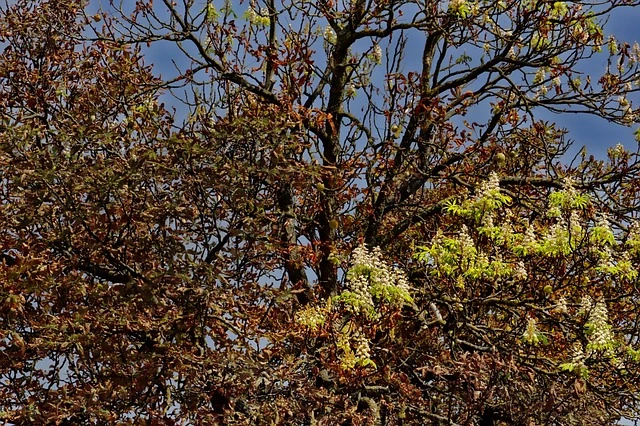
There are multiple types of horse chestnut trees, including buckeye native to the U.S. Horse chestnut originated from Europe and Japan. Horse chestnut is quick to grow, has an ornamental shape, and has large and distinctive leaves.
It has beautiful flowers that grow in spring. That is how the tree gives your ornaments an attractive, light, creamy color. As much as the color is beautiful, it varies depending on when the tree fell. Sometimes it comes in white if it is cut in winter.
As time goes on, it turns yellow. The Japanese type is darker than the rest of the wood. It also comes with a waiver grain that makes it beautiful for veneers. Horse chestnut wood has a fine grain and a soft texture, making it easy to use. However, it has a low density that makes other woodworkers dislike it.
Horse Chestnut Wood is not ideal for building and construction since the wood is weak and absorbs moisture. Workability makes it easy to turn, carving, veneer, and cabinetry. It is for carving bowls and other storage pieces for fruit.
It also makes racket grips, broom handles, kitchen utensils, boxes, and toys. Although soft, it is easy to cut, plane, chisel, sand, and polish. It has a close-grained hardwood with a smooth, silky texture.
Is horse chestnut wood easy to work with?
Horse chestnut wood is easy to work with since it is soft, and you only have to know the ideal items to make. However, its low density and interlocked grain sometimes lead to fuzzy surfaces like Aspen and cottonwood. Despite the setbacks, it glues and finishes well.
Although there are health risks associated with any wood dust, there are no further health reactions associated with horse chestnut. The wood is ideal for making handles and kitchen utensils and is easy to cut, plane, chisel, sand, and polish.
Despite the soft wood, as it is a close-grained hardwood with a smooth silky, it still makes excellent items. As much as you should be careful of the wood texture, the overall workability is good.
Pricing/Availability
Horse chestnut wood is not regularly available in North America. Availability is limited to its natural range in Europe, with moderate prices. Due to its scarcity, it should have a high price tag. That is not the case since it has specific items to make. Sometimes chestnut wood is not affordable due to its minimal availability. However, chestnut wood veneers are more affordable and remain beautiful.
Is Horse Chestnut good for carving?

Although chestnut wood easily tears, it remains an easy wood for carving. Keep the cutting edges sharp to avoid disappointments. It is absorbent and stains well; you can also finish it with a high polish. Horse chestnut wood has a smooth and soft texture and a pale and creamy color for great carving.
How do you carve horse chestnut wood?
- Gather your materials and tools.
- Invest your time learning to sharpen your tools for precise cuts. Sharp tools make cuts easy and fast. Take your time studying the chestnut wood and take small cuts.
- Put on your safety gear. That includes a dust mask and safety goggles.
- Grab the material with both hands and a well-sharpened knife.
- The wood is a little stringy, and if the wood piece is exposed to a lot of heat, it becomes more brittle than what you are used to. Although it is harder than basswood, it cuts with ease. It does not hold sharp detail very well, so you must watch out for the wormholes.
Sanding and staining
Before sanding, for precision, all surfaces should be clean and free from all dirt and oils. Prep sanding with finer grits. Do not start using fine sandpaper chest wood. Prepare the surface using medium paper first. After that, you are allowed to proceed to finer grades. If the woods are hard, start sanding following the grain.
Use a #120-150 grit paper before staining and work up to #220 grit paper. If the wood is too soft to sand, start with #120 and finish with sandpaper less than #220 for water-based and 180 grit for oil-based stains. If the chestnut wood is hard, start with #120 and finish sand no finer than #180 for water-based and #150 grit for oil-based stains.
Avoid over sanding; otherwise, you may seal the wood so much that it will not take a finish. End-grains are areas where the wood is cut against the grain, such as the front side of a table, soaking up more stain than other surfaces. Give the end-grain areas more sanding to control the absorption of wood stain.
You can use an orbital power sander and a dust bag as you prep the wood surface and buff out between topcoats. Make sure you are using the correct grade of sandpaper when buffing. Hand sanding the final topcoats ensures the safety of your material.
Using an orbital sander when distress sanding flat painted surfaces sometimes damages the wood, and it digs in as you apply pressure to get through the paint, which takes away the wood surface’s natural look.
Apply a clear coat
A clear coat seals and protects the wood’s surface. Oil-based polyurethane is a better product for sealing. Make a homemade sealer by thinning the polyurethane with mineral spirits, and use this for your first coat. Follow up with two coats of undiluted polyurethane from the can. Sand the surface once again, and apply your final clear coat. You should also see our guide on how to Carve Kauri Wood
Cleaning the Surface
- Make sure you are working in a well-ventilated area. There has to be minimal dust for precision. Good lighting helps you notice and eliminate streaks and bubbles in your work.
- Sand the surface with medium-grit sandpaper.
- Large projects require the use of an electric sander or sanding block.
- Sand again with fine and extra fine-grit sandpaper. Smooth out blemishes. A smooth surface gives you a clear coat.
- Get rid of the dust using a shop vac.
- Wipe down the surface with a damp cloth with mineral spirits. Getting rid of traces of the cloth’s material left behind. Go over the wood surface for the last time with a dry tack cloth.

- Grain and Sheen: Teak Oil versus Danish Oil Uncovered - January 10, 2024
- The Cherry on Top: Crafting the Perfect Cutting Board - January 9, 2024
- Polyurethane Water-Based vs Oil-Based: Choosing the Right Finish - January 8, 2024