How to join 2 pieces of wood side by side
Trying to join two pieces of wood side by side for wood carving can be tricky, especially if you are unsure how to proceed. I remember watching a carpenter I had hired try to do this, to fix furniture the kids had broken. I regretted it the minute I peeped to see how he was getting along. The edges were rough, and the entire piece looked lop-sided. I’m no expert myself, but I could tell things had taken a left turn.
This article will examine how to join two pieces of wood side by side for wood carving. I quickly realized the value of someone who knows their way around wood joining. The furniture had to be handed over to someone who knew what they were doing to salvage as much as possible. Let’s dive in, shall we?
List of things that you may need to use:
- Plywood strips
- A clamp
- Glue is ideal for joining wood.
- A dowel jig
- A pocket hole jig
- Splines
- Salt
- A table saw
- Clamps
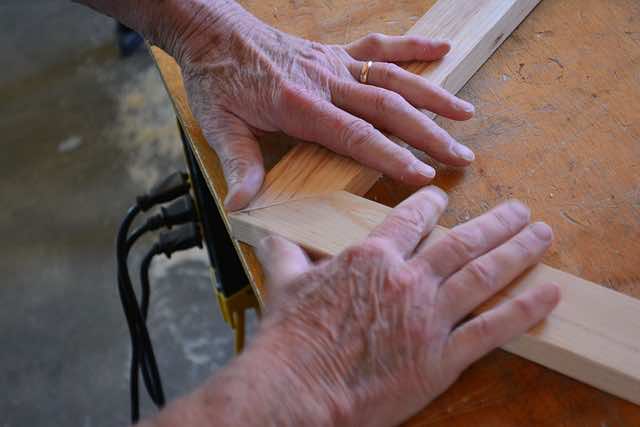
Step By Step Process.
- Identify where you need to join the pieces and mark them to become more accurate as you work. Chalk works well in this instance.
- Apply glue on one end.
- Apply glue on the other side
- Then assemble them to the piece that you are working on. Make sure to apply pressure on the pieces as you fix the screws.
- Make sure to allow the glue to dry before you screw the pieces together.
- Clamp the pieces together tightly so that they dry in the right place
Or
- Apply glue on one face of the wood
- Sprinkle salt to ensure no wood movement when you place the second piece.
- Place the second piece of wood over the first, ensuring to align the two pieces properly.
- Keep them together until the glue dries appropriately.
Or you can make an edge joint.
- Arrange the wood pieces so you are ready to stick them together. When doing this, ensure that the side you want visible is facing the right direction.
- Ensure that you have straight edges. If they are not, run them through the table saw using a sharp blade.
- Apply the wood glue and spread it around evenly.
- Do the same for the other edge.
- Place the two edges that you want to join together between clamps.
- As you apply pressure, you should see beads of glue popping up at the top of the joint line.
- Wipe away excess adhesive so that you remain with a smooth surface.
Or you can use a dowel joint for an invisible joint Mark the dowel positions on both pieces of wood.
- Position doweling jig
- over the marks that you’ve made and also drill holes 1/16inches which should be more profound than half the dowel length
- Put glue inside the holes
- Insert the dowels
- Clamp the two pieces of wood together to a flat surface
- Please wait for it to dry.
How Long it will take
Generally, all types of glue need to be given up to 24 hours to dry. It would help if you allowed the glue to dry properly so that you are not trying to repair the joint.
While 24 hours may not be necessary for many types of glue, it’s a safety net. The amount of time also largely depends on the type of adhesive used. If you use PVA wood glue, you will need up to one hour for the glue to stick. However, you will still need up to 24 hours to cure correctly.
Expected Results
Working with a larger piece of wood for your carving will be much easier. You can get more comprehensive panels that would typically be difficult to find. Also, wood joints together using wood glue are strong. You may hear the saying that wood glue forms a stronger bond than wood itself. This is meant to give you peace of mind for your carvings.
Things to look out for
- Always make sure the edges are straight and can be aligned without leaving any gaps. You can do this by creating clean edges on a table saw. Cracks will cause the glue to not stick to the surfaces and end up drying out alone without sticking the wood together.
- You may also want to look out for the grain of the wood and align it before you do any joining and carving.
- It is also important to mark your boards before. You observe which you will glue sides together and the good side to face up and which side should face down. This is made to avoid confusion when placing the two pieces of wood together.
- The clamps will hold the boards down, allowing the glue to dry. Also, ensure that the clamps stretch across the boards’ width to keep them in place as you work. However, this is impossible if they don’t span across the boards entirely.
- Since glues work differently, it may be a good idea to test it out on scrap wood before taking it to the actual piece you are working on. This will help you know how much glue needs to be used and how long it will take to dry. This will also help estimate the amount of time required and the area that a certain amount of glue will cover.
How to join two pieces of wood side by side
You can join two pieces of wood side by side by cutting a groove in one. Insert a tongue from the second wood into the groove created in the first. The result is two boards that appear to be one wide board. You can use the following woodworking joints to join two pieces of wood:
- Jigsaw key
- Dovetail joint
- Meander key
- Dovetail key
- Mortise and tenon joint
- Dowel joint.
Conclusion
Joining two pieces of wood together does not need to be a hassle that gives you sleepless nights. It can be hard to find a piece of wood large enough for the carving you want to make, and gluing another piece of wood can make your life easier.
Using strong wood glue is an easy way to join two pieces of wood side by side for wood carving. We hope this helps you as you work. Happy carving! Be sure to see our posts on How to check if a wood carving is going to split & How to remove big chunks of wood when carving.

- Grain and Sheen: Teak Oil versus Danish Oil Uncovered - January 10, 2024
- The Cherry on Top: Crafting the Perfect Cutting Board - January 9, 2024
- Polyurethane Water-Based vs Oil-Based: Choosing the Right Finish - January 8, 2024