Wood rope molding
Looking to add a touch of elegance and sophistication to your woodworking projects? Look no further than the art of carving rope patterns in wood. This intricate technique creates a stunning effect to make your pieces stand out.
Legend has it that the inspiration for rope carving came from a sailor stranded on a deserted island with only his knife and a few ropes. To pass the time, he began carving intricate patterns into the rope, creating designs that eventually inspired the art of rope carving in wood.
Whether you’re a seasoned woodworker or just starting, carving rope patterns in wood is a skill that’s worth learning. It adds a touch of class to your projects and is a fantastic way to challenge yourself and take your woodworking skills to the next level.
So why not try it and see what beautiful creations you can create? With the art of carving rope patterns in wood, you can elevate your woodworking game and impress everyone with your unique and intricate designs.
Choose a wood that you can carve
To choose the best type of wood, know the intended purpose of the wood. Hardwood absorbs little moisture. Rope patterns should be durable and not break on the first bite. However, not all hardwood is for rope patterns. Making a rope out of hardwood like Oak or Ash resists moisture well but rapid staining in contact with oils.
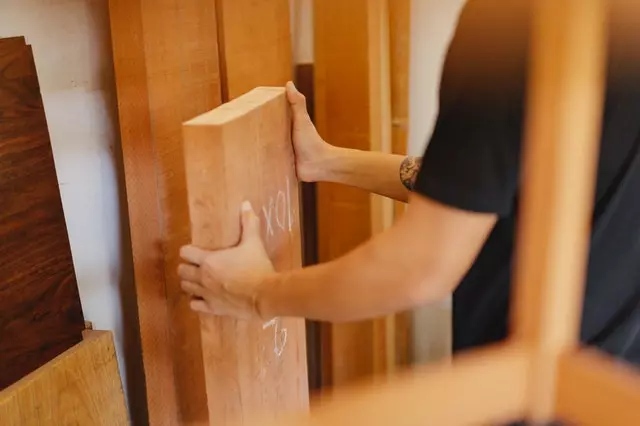
Consider softwood
Softwood is easy to carve and does not dull knives. When you get the blade of your tool dull by using the wrong wood type, chances are high that you will not make precise cuts. Using softwood will help prolong the lifespan of the carver’s tool. Wood-like basswood or pine produce quality work with little effort. They are easy to carve and bring less damage to carving tools.
Hardwood, like white oak, is difficult to work with and has a high rate of damaging the carving tools. It also causes injuries to the user as blade slippage is frequent on those hard and dense materials.
Pay attention to the wood grain direction.
The wood grain direction decides the finish. It can be tedious to carve on the wood across the wood grain. The chances are high when carving through hardwood. Strike the blade toward the wood grain for a quick and easy project. It results in an easier and more comfortable carving experience.
However, you cannot do away with cutting across the wood grain altogether since it has its advantages. It brings a more refined and polished finish. Softwoods give better results when used both along or across the wood grain. Run a quick test to see what works best for you.
Safety and allergies
Ensure the wood is safe and causes no allergies. Not all woods are safe to work with. Some woods are toxic and can cause skin irritations. Wood such as oak, pine are safe for carving.
Smell
Avoid carving on wood that has a strong smell. Some woods emit odors that can cause headaches. Selling wood artwork that emits a strong odor affects business.
Avoid defects when wood carving.
Before starting to carve, inspect the raw woodblock for defects. You do not need perfection. It does not have to be perfect, but you should tell yourself whether the wood is usable. Sometimes, an imperfection appears on the surface of the wood and goes deeper inside the material.
What is rope molding?
Rope molding is molding in a pattern twisted like the strands of a rope. Rope moldings make furniture, chair rails, drawer fronts, crown moldings, and cabinets. Make use of precision machines to produce rope trim molding.
Each wood rope trim piece is sanded, stained, and assembled. Rope moldings come with various wood options, configurations, and diameters. Look for the perfect rope moldings for any project or design.
Carving the rope molding
Cut the morning blank.
The blank is 1/4 inches (6mm) half-round or bead molding. You might have your molding tool and a bit, or you can buy one. Cut 45° miters on the ends of the pieces to fit around your project. Do not nail it in place yet. Stop each length of carved rope a little short of the corners. A rope never looks natural wrapped around a sharp right angle.
Mark the blank
Set dividers to twice the width of the molding and step out units that represent the twists of the rope. If you intend to make long lengths use a template marked with a dozen divisions. Work from the center of each strip of molding toward the corners, stopping short of the miters. Use a pencil or marker to make the marks easily visible.
Roughout the rope twists.
Carve diagonally between each twist with а 1/4″ (6mm) 60° V-tool. The groove has to be a smooth S shape. Cut lightly before the first division, then cut up and over the molding. Cut down to the finish beyond the division on the far side.
The start and end of the V groove are shallow, but the middle part is about 1/8″ (3mm) deep. Repeat along with the molding. Make the cuts similar using the same fluid movement.
Round the corners of the V groove.
Use a 3/16™ (5mm) #5 gouge upside down. Cut along the grain and shape one side of the groove. Turn the molding around to carve the other side. There is no need to sand since the rope looks natural with a few light facets. However, ensure all the cuts are clean and finished and remove the pencil marks.
How to mark your blank
Make use of a pen or a marker. Do not use estimates but correct measurements. When tracing out a pattern on wood, mark the lines first.
Rope Twists
When making rope twists on the wood, lay out a pattern on paper using a ruler and pencil. Roll the pattern paper around the round wood rod and line up the diagonal lines. Make a form to hold your workpiece with two half-round cuts.
Line the half rounds with leather or fabric to avoid scratching your work. Use a coping saw to cut through the diagonal pattern. Achieve the desired depth of the carving relief and use appropriate size gauges to carve. Show the carving tool marks to enhance the rustic feel of the furniture.
Carving a loop of rope
Soak thin and prone to break areas on a carving using super glue. The fumes are an eye irritant, so be careful when carving. When carving small figures under six inches, some areas can be weak, like coils of rope.
Cut out the shape you need in two matching pieces of wood. Make a groove along the inside of the two pieces to accept the steel wire reinforcing piece. You may use the epoxy mix to secure the wire and fill any voids to ensure rigidity. Clamp them together.
You can make the groove only where you cross the grain or go around the piece for strength. Using two pliers works better.
Scrap wood to practice
Do not experiment on your project wood. Make use of the small scraps. Whatever you need to sample from cuts, shapes to finish.
Tools you will need
- Gouges
- Chisels
How to get the rope pattern
You choose to make your pattern or get them online. If you are creative, you might find it funny to make your own. If you do not have time, you can buy one or download it for free.
Using a knife to whittle
A simple pocket knife makes a great whittling tool. It is easy to carry and found almost anywhere. Pocket knives with several different blades give you variety in your cuts.
They have a larger handle for more control and often stay sharper longer. These are easier to sharpen and are better at detailed work, like feathers and beaks. Be careful because these are fixed blades. The knife is useful when whittling spoons. The curved blade helps cut the bowl of spoons and ladles.
How do you carve spirals in wood?
- Mark the pattern on the wood.
- Define the diagonals.
- Round the flute
- Finish.
- It’s important to use a dry iron, as a steam iron could damage the wood or cause the towels to become too wet.
- If the wood is severely twisted, it may take several repetitions of the ironing process to straighten it out fully.
- To prevent the wood from warping again in the future, it’s important to store it in a dry, stable environment.
How do you make twisted wood?
To make twisted wood, moisten it by wrapping it in one or two damp towels. Make sure the entire warped area is covered.
Next, place the covered wood on an ironing board and heat the iron to its highest setting.
Press the iron over the warped surface for about 30 seconds. Repeat this process as needed until the wood begins to straighten out.
Be careful not to burn the wood, and avoid applying too much pressure with the iron. With these steps, you can straighten out twisted wood and restore it to its natural shape.
- Start by moistening the wood by wrapping it in towels.
- Moisten one or two large towels and wrap them around the wood.
- Make sure that the entire warped area is covered.
- Place the covered wood on an ironing board.
- Heat the iron to its highest setting.
- Press the iron over the warped surface.
- Repeat as needed.

- Grain and Sheen: Teak Oil versus Danish Oil Uncovered - January 10, 2024
- The Cherry on Top: Crafting the Perfect Cutting Board - January 9, 2024
- Polyurethane Water-Based vs Oil-Based: Choosing the Right Finish - January 8, 2024
