Mastering the art of woodworking requires advanced techniques that involve using specialized tools and materials for shaping and bending wood. Properly using routers and idle and carving tools is critical to creating quality woodworking projects. This article will introduce you to ten advanced woodworking techniques essential for any professional woodworker. By mastering these techniques, you can take your woodworking skills to the next level and create stunning, intricate pieces that will impress you.
1. Inlay Techniques
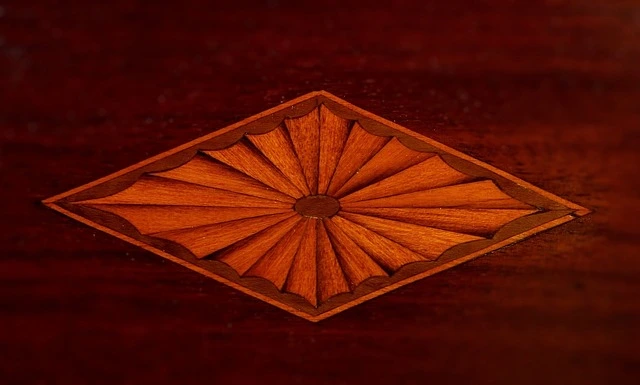
The concept of inlay and its history in woodworking
The first inlay works are traced back to the Egyptian dynasty, around 3000 BC. They could create works of inlay materials of different types and colors, such as glass, ivory, obsidian, quartz, and wood. It started to spread across Asia manor around 300 AD. That decorative art involves inserting pieces of various materials into a base surface to form designs.
Cutting inlays can be difficult. It requires patience and artistry skills. Inlays make ornamental designs and patterns by setting into a shallow ground or surface material of a different color or type. Inlay techniques include enamelwork, furniture decoration, lacquer, and metalwork.
Types of inlay
Marquetry
Although Marquetry’s classification as an inlay is contestable, it remains part of Marquetry involves cutting vast pieces of veneers and placing them over the surface of an object. The process of marquetry involves laying veneers, or thin pieces of wood, onto the base wood without cutting into it.
Sand and finish the veneers, coating them with varnish, waxes, or polishes for a smooth surface over the design. No cutting is done to the base piece, like during an inlay, although the finished product of both techniques often appears similar.
Marquetry is just like painting in wood. Pictures can depict life arrangements up to figural compositions. These are often used in smaller works or as a focal point in a larger compositions.
Marquetry uses different wood types with contrasting colors laid next to each other to create a composition. Marquetry starts with a design for a composition on paper which is then translated into a wooden veneer.
Marquetry is like sculpting, crafting intricate designs into a hard surface that requires manipulation. Marquetry works in furniture and decorative arts. Furniture pieces feature inlaid marquetry sections, although some fine pieces are veneered with marquetry. The more marquetry is incorporated into a wood piece, and better it is executed. It becomes valuable and more collectible.
Parquetry
Parquetry is made of one or two types of wood and relies more on contrasting the wood grains than the colors. Parquetry can include many types of wood in different colors with different grains. Parquetry is less complicated than marquetry but easier to cut because it relies on repeating, linear patterns rather than intricate and individual shapes and forms.
Some forms of parquetry are as impressive and skillful as marquetry. Parquetry designs include squares, lozenges, and triangles.
One of the most common parquetry styles is the herringbone pattern for flooring. Parquetry gives a more decorative finish. Regarding floorboards, it creates large, diagonal squares, depending on the grain of the wood.
Step-by-step instructions for creating inlay patterns
- Select Your Base and Inlay: Choose a base material and an inlay material that complement each other. Consider the colors, patterns and textures of the materials to ensure a harmonious and striking design.
- Cut the Inlay: Cut the material into your desired shape using a sharp knife or a scroll saw.
- Attach the Inlay Temporarily: Position the inlay piece onto the base material and attach it temporarily using masking or double-sided tape.
- Trace the Inlay onto the Base: Trace the outline of the inlay piece onto the base material using a pencil or a marking knife.
- Cut into the Traced Lines: Use a sharp knife or chisel to carefully cut into the traced lines, removing a shallow base material layer to create a recess for the inlay.
- Remove the Inlay and Cut Out the Base Material: Remove the inlay piece and use a chisel or a router to cut out the recessed area of the base material to the same depth as the inlay.
- Sand the Base and Edges: Use sandpaper to smooth out the base material and the edges of the recessed area.
- Check the Fit: Ensure the inlay piece fits snugly into the recessed area.
- Mix Wood Dust into Glue: Mix some wood dust from the base material into wood glue to create a custom filler that matches the color and texture of the base.
- Apply Glue and Attach: Apply the glue to the recessed area and attach the inlay piece, pressing it firmly into place.
- Make Adjustments: Use a chisel, a scraper, or sandpaper to make any necessary adjustments to the fit or the finish.
Tips and tricks for achieving a professional-looking inlay
Inlay is a woodworking technique that involves cutting a recess into a surface and fitting a contrasting material into the recess to create a decorative pattern or design. Here are some tips and tricks to help you achieve a professional-looking inlay:
- Plan Your Cutting Sequence: Plan your cutting sequence and set up the depth and distance of your router to ensure that your inlay fits perfectly into the recess.
- Inlay Straight Lines First: Start by inlaying straight lines and advance to circular or oval shapes. This will help you develop your skills and gain confidence.
- Use a Sharp Knife: Use a sharp knife to cut your inlay material to the correct size and shape. A dull knife can result in uneven cuts and a sloppy inlay.
- Inlay with Confidence: Inlay your material with confidence to achieve beautiful results. Take your time and work carefully to ensure the inlay fits snugly and flush with the surface.
- Finish Your Inlay: Once it is complete, cut it to length, glue it into place, and flush it to the surface. Sand and finish your inlay to match the surrounding surface for a seamless and professional-looking result.
2. Intarsia
Intarsia and its significance in woodworking
Intarsia woodworking is an art creation of a mosaic-like picture from pieces of wood. It makes use of different species of wood. Color and different sizes are from using a scroll saw. Select the grain pattern and direction of each piece.
Before gluing together the final assembly, the woodworker sand and shape each piece. Different colors and materials appear inlaid in one another and fit together like a jigsaw puzzle.
Materials and tools needed for intarsia
Amongst the tools and supplies needed for the whale Intarsia are the scroll saw, a band-saw, a sander for contouring, an air compressor, a carving tool, and a wood burner. Add sanding drums for the drill press, a bench-top belt sander with a disc sander on the side, and a flex drum sander mounted on a motor shaft.
These additions make the shaping easier and faster. The small bench-top band saw is for quickly cutting bigger pieces into smaller ones. A small pneumatic sanding drum is on another motor shaft.
Instructions for creating intarsia patterns
Intarsia is a woodworking technique that involves cutting and fitting pieces of different colored woods together to create a mosaic-like picture. Here are step-by-step instructions on how to create intarsia patterns:
- Choose a Pattern: Select one suitable for your skill level and the type of wood you work with. The pattern should show the direction of the wood grain and the types of wood to be used.
- Select Your Woods: Choose the woods you want to use for your intarsia project. Select woods with different colors and grains to create a beautiful effect.
- Cut Your Wood Pieces: Cut your wood pieces using a scroll saw or band saw. Cut each piece slightly larger than the finished size of the pattern to allow room for sanding and shaping.
- Sand and Shape Your Wood Pieces: Sand and shape each piece to fit tightly against the next piece. Contour the wood pieces and sand the edges to create the desired depth.
- Assemble Your Intarsia Pattern: Fit the wooden pieces together and glue them to each other or a backing board. Ensure that the pieces are flush and fit together tightly.
- Apply a Finish: Apply a finish to your intarsia pattern to protect it from wear and tear and enhance its natural beauty. Choose a finish suitable for the type of wood you are working with and the environment in which the project will be displayed.
Advice on finishing and protecting intarsia projects
- Sand and Clean Your Intarsia Project: Sand all surfaces of your intarsia project to ensure they are smooth and free of rough spots. Clean the project with a soft cloth to remove any dust or debris.
- Apply a Sealer: Apply a sealer to the sides and top of your intarsia project to help seal the wood and protect it from moisture and other environmental factors. Use a clear sealer that will not yellow or darken the wood.
- Apply a Finish: Apply a finish to your intarsia project to enhance its natural beauty and protect it from wear and tear. Choose a finish suitable for the type of wood you are working with and the environment in which the project will be displayed.
- Display Your Intarsia Project: Once your intarsia project is complete, display it in a place where it will be protected from direct sunlight, moisture, and other environmental factors.
3. Carving Techniques
The art of woodcarving
Wood carving is a type of woodworking that uses knives, chisels, and other hand-held wood carving tools to create figures or designs in pieces of wood. Woodcarvers involve making items like duck decoys, cufflinks, and epic three-dimensional storybook scenes to furniture, home decor, and life-sized sculptures of animals or people.
Wood carving uses a cutting tool in one hand or a chisel by two hands or with one hand on a chisel and one hand on a mallet. That is how you get a wooden figure or the sculptural ornamentation of a wooden object. The finished product comes from individual sculptures to hand-worked moldings composing part of a tracery.
The different types of carving
Chip carving
Chip carving is a style of carving in which knives or chisels remove small chips of the material from a flat surface in a single piece. This was a transfer to metal work a technique already used in woodcarving.
Chip carving is beautiful, distinctive, and decorative. It embellishes an existing item, like a box or a piece of furniture, rather than creating something new. Any project that works on a flat slab works.
Once you master the cuts, handle the tools properly and thoroughly understand the technique to make chip carving simple. Any type of wood carving is simple once you master the craft.
Relief carving
Relief carving is a woodworking technique in which figures or patterns are carved in a flat panel of wood. The figures project slightly from the background rather than standing freely. Depending on the degree of projection, reliefs may be as high or medium relief.
Relief carving is also known as carving pictures in wood. The process involves removing wood from a flat wood panel so that an object appears to rise out of the wood. Relief carving begins with a design idea, put to paper as a master pattern transferred to the wood surface. Relief carving is done with hand tools, chisels, and gouges, which require a mallet to drive them through the wood.
Remove wood from the panel around the objects traced onto it from the pattern, the objects stand up from the background wood. Model the wood objects as soon as the background. Trim the object edges to the pattern lines.
Instructions for creating a carving project
- Decide what you want to carve. Prepare yourself by making it clear what you want to carve.
- Make a scale drawing or plan for that carving. Sketch the object you want to rough out. If you do not want details in your carving, sketch only the profile of the subject of your carving. Sketch your subject from both sides, front and back. Work from a photograph. Sketch will keep you on track as you do your roughed-out carving.
- Find a piece of wood that suits that carving. That refers to size and material. Choose the wood type you want to use. Basswood and pine are easier woods to carve. Mahogany is less affordable and harder to carve, but the quality of the wood is amazing. For beginners, get started with cheaper, easier-to-carve wood.
- Transfer your drawing or plan to the piece of wood.
- Roughing out or grounding and using a power carving tool such as a Dremel with a cutting attachment to bring out the rough shape of your subject (Ertenaltools.com). Making a rough out requires the skill to carve a piece to keep the basic shape of the object in place. Use plenty of room for another carver to add your style.
- Move to model.
- Work on the details of your carving.
- Work on finishing. Sand your roughed-out carving with light-grain sandpaper. Work towards a smooth, finished look. You may not add any stain or varnish, since this is the basis for someone else to finish. The wood piece should leave your shop looking finished, even with the details and the final coat of paint or varnish.
Tips for safety and maintaining carving tools
Wood carving tools are essential for creating intricate designs and patterns in woodwork. Proper maintenance of these tools is essential to ensure they last longer and perform better. Here are some tips for safety and maintaining carving tools:
- Properly Store Your Carving Tools: When not used, store your wood carving tools safely and dryly. Keep them away from children and pets.
- Clean Your Carving Tools Before Sharpening: Before sharpening and using your tools, clean them up properly to remove any dirt or debris. Use a soft cloth and some linseed oil to wipe them down.
- Keep Your Blades Sharp: Use a sharpening stone and a strop to sharpen your chisels, gouges, and veiners. Maintain a sharp edge on your blades using a leather strop.
- Use the Right Tools: Always use the right tools for the job. Using the wrong tool can cause damage to the wood and the tool.
- Work in a Well-Lit Area: Work in a well-lit area to avoid eye strain and to see your work.
4. Veneering
Veneering and its role in woodworking
In woodworking, veneer refers to thin slices of wood and sometimes bark. These can be thinner than 3 mm. Trey is glued onto core panels to produce flat panels such as doors, tops, and panels for cabinets, parquet floors, and furniture. They also work in marquetry. Plywood has three or more layers of veneer (Hardwood Distributors.org).
Each is glued with its grain at right angles to adjacent layers for strength. Veneer beading is a thin layer of decorative edging around objects, such as jewelry boxes. It is also used to replace decorative papers. It produces flat panels such as doors, tops, and panels for cabinets and parquet floors. Veneer gives stunning patterns that would be impossible to achieve with solid wood.
Different types of veneers and how to choose the right one for a project
Raw Wood Veneer
A raw veneer is a veneer that has no backing on it. It works on either side, as they look the same until you apply a finish. When slicing, one side of the veneer is compressed, and the other stretched, so they can accept stain differently. It is durable and works on flat and curved surfaces. The grain is not matched during manufacture. If you want to create a specific finish, choose a different type of veneer.
Laid-Up Veneer
A laid-up veneer is pieces of raw veneer attached to create larger pieces. It can be to your specific size, design, and shape, but it takes time to.
Backed Wood Veneer
The backed veneer uses other materials such as paper, phenolic, cloth, and foil, making it stronger and more versatile. The second material is attached to one side of the veneer. The grains in the panels are matched during manufacture. They can be applied to flat or curved surfaces as it is more flexible than raw wood veneer and less likely to crack.
Laminated Veneer
It is from fast-growing species and consists of several slices of wood laminated together. Wood is then sliced opposite from the initial wood slices so that its edges become the grain of the reconstituted veneer. That is how you get a flexible veneer that can be shaped and bent.
Instructions for preparing and applying veneer
Veneering covers a wooden surface with a thin layer of decorative wood veneer. Here are step-by-step instructions for preparing and applying veneer:
- Choose Your Materials: Select the type of veneer and substrate ant for your project. You can choose from various natural wood veneers, such as maple, oak, or cherry, and various substrates, such as plywood or MDF.
- Cut Your Veneer to Size: Cut the veneer to the exact size of the substrate you cover. Use a sharp utility knife or veneer saw to cut the veneer.
- Apply Contact Cement to the Substrate: Apply a layer of contact cement to the substrate with a brush or roller. Follow the manufacturer’s instructions for the correct application.
- Apply Contact Cement to the Veneer: Apply a layer of contact cement to the back of the veneer with a brush or roller. Allow the cement to dry until it is tacky to the touch.
- Align the Veneer: Place a sheet of wax paper over the substrate and align the veneer. Slowly lower the veneer onto the substrate, avoiding any bubbles or wrinkles.
- Smooth Out the Veneer: Use a veneer roller to smooth out the veneer and remove any air bubbles or wrinkles.
- Allow Time to Dry: The veneer can dry completely according to the manufacturer’s instructions.
- Trim the Edges: Use a sharp utility knife or veneer saw to trim the edges of the veneer to the exact size of the substrate.
Tips for achieving a seamless and professional-looking veneer application
Achieving a seamless and professional-looking veneer application is crucial for a high-quality woodworking project. Here are some tips to help you achieve a seamless and professional-looking veneer application:
- Use the Right Tools: The right tools are essential for a seamless and professional-looking veneer application. Ensure you have a sharp utility knife, a veneer saw, and a roller.
- Cut the Veneer Slightly Larger: When applying veneer to a project, cut it slightly larger than the actual size to allow for trimming and adjustment.
- Blend Veneers with Solid Wood: Blend natural wood veneers with solid wood to create a seamless and natural look. This will help to make the veneer application look more professional.
- Apply Veneer with a Roller: Apply the veneer with a roller to ensure a smooth and even application. Use a veneer saw to trim the excess veneer from the edges.
- Finish with Wax: Finish the veneer with a wax coat to protect the surface and enhance its natural beauty. This will help to create a seamless and professional-looking veneer application.
5. Bending and Shaping Wood (400 words)
Methods of bending and shaping wood
Kerfs
To bend wood with kerf cuts, adjust the saw blade to cut all but the last ⅛- to 3/16-inch of material. Make cut kerfs across the board every ½ inch, keeping these cuts spaced for best results. It gets a more flexible strip of wood that will bend inward and outward.
Water
Another method for bending wood involves soaking it in hot water until it becomes pliable. That way, you can clamp it to a form and allow it to dry. When cool and dry, it will take a curved shape.
Steam
Steam can be difficult and a material-intensive way to bend wood. It is the most effective way. The method requires building a long, thin box your place boards into for steaming. This is known as a steam box. It will have a small hinged door on one end for sliding boards in and out, and a port for attaching a hose from a steam cleaner (Highlandwoodworking.com). That may be a lot of effort, but steam-bending can be very effective.
Tools and materials needed
Gather steam-bending tools and materials. The steam box should be large enough for the wood· The steam cleaner should have a hose. Make sure you have clamps. The squeeze-style clamps are the best. Use waterproof and heat-resistant gloves, especially if bending the wood by steaming.
Step-by-step instructions for creating a bent or shaped wood project
Creating a bent or shaped wood project can add an artistic and unique touch to your woodworking project. Here are step-by-step instructions for creating a bent or shaped wood project:
- Gather the Materials: To bend or shape wood, you will need the following materials: a tub or container large enough to hold the wood, boiling water, and clamps.
- Soak the Wood: Put it in the tub and pour boiling water over it. Let it soak for at least an hour to make it pliable.
- Clamp the Wood: Remove the wood from the water and clamp it to the form or mold that you want it to take. This will help to keep it in the desired shape as it cools.
- Allow the Wood to Cool: Allow the wood to cool completely before removing it from the form. This may take several hours, depending on the size and thickness of the wood.
- Repeat the Process: If the wood dries and does not hold the desired shape, repeat the soaking process and clamp it to the form again.
Tips for achieving a smooth and professional finish
Achieving a smooth and professional finish is essential for any woodworking project. Here are some tips to help you achieve a smooth and professional finish:
- Sand Curved Surfaces: Sanding curved surfaces requires special attention. Use flexible sandpaper or a sanding sponge to sand curved surfaces gently and evenly.
- Treat All Areas Equally: When applying finishes, ensure that all areas are treated equally. Apply the same amount of finish to each area to ensure a uniform finish.
- Test Finishes: The actual colour of the finish can vary depending on the type of wood and how you prepared it for finishing. To test finishes, save scraps from your project and run them through the same sanding process before applying them.
- Sand with the Grain: When hand sanding or using a belt sander, always sand with the wood grain. This will help to prevent scratches and create a smooth finish.
- Apply Furniture Wax: After the stain dries, apply a coat of furniture wax to create a protective layer and enhance the shine of the finish.
6. Gilding
Gilding and its history in woodworking
Gilding is the art of decorating the whole or parts of the wood. The decorative effect of gilding applied to furniture goes back centuries of experience and traditions established in the past and has remained almost unchanged. In ancient times, gold was pulverized and reduced to thin sheets by a specialized craftsman. With these gold leaves, gilding techniques could be applied.
Materials and tools needed for gilding
Gilders cushion
That is a piece of MDF approximately 9 inches by 6 inches covered with a thick blanket and stretched over this is a soft calfskin leather. Keep it in position on the four edges of the board. There is a leather loop for your thumb when holding the cushion.
GILDERS knife
The knife is a scale tang knife with either a stainless steel or a carbon steel square blade with a dark wooden handle. It is flexible and not too sharp. This is for cutting the leaves of Gold Leaf into smaller pieces.
Gilders tip
It comes in various widths, with squirrel hair, pony hair, or badger hair, sandwiched between two pieces of thin cardboard.
Instructions for creating a gilded project
Creating a gilded project can add a touch of luxury and elegance to your woodworking project. Here are step-by-step instructions for creating a gilded project:
- Sand Your Surface: Sand the surface of the wood to prepare it for the gilding process. This will help the gilding adhesive to adhere to the surface and create a smooth finish.
- Obtain the Desired Effect: Decide on the effect you want to achieve with your gilded project. You can choose from various finishes such as matte, shiny, or antique.
- Seal the Surface: Apply a coat of sealant to the surface to prevent the wood from absorbing too much adhesive during gilding. This will help to ensure an even finish.
- Apply an Adhesive: Apply the gilding adhesive to the surface using a brush or roller. Follow the manufacturer’s instructions for the recommended drying time.
- Lay the Leaf: Lay the gold leaf or metal leaf onto the adhesive, ensuring it covers the entire surface. Use a brush or your fingers to smooth out any wrinkles or bubbles.
- Remove Excess Leaf Surface: Use a soft brush to remove any excess leaf surface. This will help to create a smooth and even finish.
- Apply Finishes: Apply any desired finishes to the gilded surface, such as varnish or lacquer. This will help to protect the gilding and create a polished finish.
- Seal the Gilding Surface: Finally, apply a final coat of sealant to the gilding surface to protect it from damage and preserve its beauty.
Advice on maintaining and preserving gilded surfaces
Gilded surfaces are delicate and require proper maintenance and preservation to maintain beauty and luster. Here are some tips for maintaining and preserving gilded surfaces:
- Use a Soft and Clean Cloth: When cleaning gilded surfaces, use a soft and clean white cotton cloth or cotton balls. Wet the cleaning material with cool water and dab it off on a dry piece before cleaning to avoid excess moisture.
- Avoid Abrasive Cleaners: Do not use abrasive cleaners or solvents on gilded surfaces as they can damage the surface and remove the gilding.
- Apply Varnish or Lacquer: To protect the gilded surface, apply a coat of varnish or lacquer. This will help to prevent damage from dampness, excessive heat, and everyday wear and tear.
- Avoid Direct Sunlight: Gilded surfaces should be kept away from direct sunlight, as exposure to UV rays can cause fading and damage to the surface.
- Handle with Care: Handle gilded surfaces carefully to avoid scratching or damaging the surface. Use gloves when handling gilded objects to prevent fingerprints and oils from transferring onto the surface.
7. Texturing
The concept of texturing wood
The texture is the degree of uniformity of the appearance of a wood surface. Grain is used with texture. Wood texture explains how a piece of wood feels. Different woods will feel smoother than others, and the wood’s surface texture is determined by the number of sanding and smoothing processes it has undergone. The wood texture is the lines that appear naturally in the wood.
Each of our woodwork textures is as different as they are beautiful. The surface texture distinguishes the wood from other visual elements, such as color and grade.
Different types of textures, such as carving and embossing
There are multiple ways to texture wood, including planed, rough-sawn, hand-hewn, and more. Choosing the texture and finish for your wood is a customization process. The wood finish determines the overall look and feel of the frame. Amongst the types of wood, textures are carving and embossing.
Step-by-step instructions for creating a textured wood project
Creating a textured wood project can add depth and interest to your woodworking project. Here are step-by-step instructions for creating a textured wood project:
- Sand and Grit Your Material: Sand and grit the surface of the wood to prepare it for the texturing process. This will help the medium to adhere to the wood and create a textured surface.
- Pour the Medium: Pour the texturing medium onto the wood, spreading it evenly with a brush or roller. Allow the medium to dry completely before proceeding to the next step.
- Paint Over the Medium: Once the medium has dried, paint over it with a color of your choice. Use a brush or roller to apply the paint evenly, ensuring the textured surface remains visible.
- Use a Variety of Tools: Use a variety of tools such as combs, brushes, and toothpicks to create different textures and patterns on the painted surface. Experiment with different comb sizes and tooth openings to create unique designs.
- Use Stamping Items: Use any item for stamping, such as leaves or bottle caps, to add texture and interest to the surface.
- Make a Stencil: Create a stencil with a design of your choice, and use it to add texture to the painted surface. Hold the stencil firmly while applying the medium with a brush or roller.
- Cut and Carve: Use a carving tool to cut and carve into the wood to create even more texture and depth.
- Sand Surfaces: Sand the wood surfaces to smooth out rough areas and create a polished finish.
- Press Cheesecloth or Tissue Paper: Put down some medium, then press cheesecloth or tissue paper into it to create a unique texture.
Tips for achieving a professional-looking texture
- Craft texture directly onto the wood you are working on or by applying it separately as an inlay or molding.
- Before finishing, sand your project or section with 240-grit sandpaper.
- Add more pressure which will make it look coarser.
8. Joinery Techniques
The importance of joinery in woodworking
Joints play a pivotal role in a woodworking project. Wood joinery allows cabinetmakers to assemble different components of a piece into a pleasing and structurally sound item. That is how you end up with quality work. Joinery is found almost everywhere in furniture, windows, doors, and flooring.
The different types of joints
Butt Joint
A butt joint is a wood joinery that involves joining one piece of wood butts into another at a right angle or square to the other board. Use mechanical fasteners for joining wall framing on construction sites.
Mitered Butt Joint
A mitered butt joint is just like a butt joint, except the two boards join at an angle instead of a square. It does not show any end grain, making it beautiful, but it is not that strong.
Half-Lap Joint
The half-lap joint is where half of the two boards joined are removed, so the two boards join together flush with one another. That weakens the strength of the two adjoining boards but is stronger than the butt joints.
Tongue and groove joint
When joining two boards square to one another along a long edge, you can butt the joint together and hold it with fasteners. However, the tongue and groove joint is much stronger and provides more adjoining surface areas.
Mortise and tenon joint
The mortise and tenon is a classic wood joinery method amongst the strongest and most elegant methods for joining wood. Learn methods for creating tight, beautiful mortise and tenon joints.
Instructions for creating a variety of joints
Creating strong and durable joints is essential for any woodworking project. Here are some instructions for creating a variety of joints:
- Fit Two Matching Surfaces: For most joints, two matching surfaces are required to create a strong connection. Use a plane, sandpaper, or other tools to ensure the surfaces match and fit together snugly.
- Clamp the Joint: Use clamps to keep the joint in place while working on it. This will help ensure the joint remains in the correct position, and the glue dries properly.
- Doweling: For dowel joints, drill corresponding holes in both surfaces and insert dowels to create a strong connection. Use dowel centers to ensure accurate alignment.
- Set the Joint: For joints such as mortise and tenon, set the joint by marking out the shape and using a chisel or saw to remove the waste wood. Fit the two parts together to ensure a tight fit.
- Layout the Joint: Use a layout method to ensure accurate placement and alignment for complex joints. This may involve making guides, and templates, or marking out the joint with a knife.
- Shape the Joint: Depending on the joint type, shape the joint using appropriate tools such as chisels, saws, or routers. Take care to create a tight and accurate joint that fits together snugly.
By following these instructions, you can create a variety of strong and durable joints in your woodworking projects. Remember to take your time and pay attention to the details to ensure a high-quality joint that will last for years to come.
Tips for achieving tight and secure joints
Achieving tight and secure joints is crucial for creating strong and durable woodworking projects. Here are some tips for achieving tight and secure joints:
- Use Strong Joinery: Choosing the right type of joinery is essential for achieving tight and secure joints. Mortise and tenon joints, dovetail joints, and box joints are all strong and durable options.
- Trim Each Piece Separately: For a tight joint, gradually trim the ends of each piece separately until both fit the deeper dadoes. This will help to ensure a tight fit and a strong joint.
- Cut a Tight-Fitting Tenon: A tenon is a protruding piece of wood that fits into a corresponding mortise to form a joint. Always cut a tight-fitting tenon for a sturdy joint.
- Ensure Flat Mating Surfaces: The mating surfaces of the joint must be flat and free from any bumps or imperfections. Use a plane or sandpaper to ensure a smooth and even surface.
- Test Fit Before Gluing: Before gluing the joint together, test fit the pieces to ensure a tight and secure fit. Make any necessary adjustments before applying glue.
- Use Clamps: Clamping the joint together while the glue dries will help to ensure a tight and secure joint. Use clamps that are appropriate for the size of the joint and apply even pressure.
By following these tips, you can achieve tight and secure joints in your woodworking projects. Remember to take your time and pay attention to the details to ensure a strong and durable joint.
9. Finishing Techniques
The concept of finishing wood
Wood finishing is the wood process of protecting and polishing wooden surfaces, making their appearance richer and deeper. Wood finishes improve the appearance of wood surfaces (Hipcouch.com).
Different types of finishes, such as oil and lacquer
Penetrating Finishes
Penetrating wood finishes give a more natural look as they enter deep into the surface of the wood. Use a rag to add a protective layer of wood oils for a better sheen and surface penetration.
Surface Finishes
Surface finishes are applied on the top of the wood to create a protective layer. Use it on furniture and materials exposed to a lot of wear and tear.
Oil finish
A finishing oil is a vegetable oil used for wood finishing. It makes your wood furniture weather or moisture-resistant. Finishing oils are easily applied, by wiping with a cloth.
Lacquer finish
Lacquer is a modern wood finish used on high-end furniture. It is fast drying, impervious to water, and maintains its transparency as it ages. Lacquer finishes do not yellow with age, protect well against liquids, and require little maintenance.
Instructions for applying a variety of finishes
Applying a finish to your woodworking project is essential for protecting the wood from damage and enhancing its appearance. Here are some instructions for applying a variety of finishes:
- Pick a Finish for Your Wood: There are many different types of finishes available, including oil-based, water-based, and varnish. Choose the type of finish that is appropriate for your project and follow the manufacturer’s instructions for application.
- Prepare the Surface: Before applying the finish, prepare the surface by sanding it smooth and removing any dust or debris.
- Apply the First Coat: Apply a thin, even coat of finish to the surface of the wood using a brush or cloth. Be sure to follow the manufacturer’s recommended drying time before applying a second coat.
- Sand the Finish: Once the first coat is dry, sand the surface of the wood lightly with a fine-grit sandpaper. This will help to smooth out any imperfections and provide a surface for the next coat to adhere to.
- Apply the Second Coat: If necessary, apply a second coat of finish following the same process as the first coat. Repeat this process until you achieve the desired level of protection and appearance.
- Sand Each Coat: Sand each coat lightly with a fine-grit sandpaper to smooth out any imperfections and provide a surface for the next coat to adhere to.
- Repeat the Process: Continue applying and sanding the finish until you have achieved the desired level of protection and appearance.
Tips for achieving a professional-looking finish
Achieving a professional-looking finish is essential for any woodworking project. Here are some tips for achieving a high-quality finish:
- Sand Your Surface: Proper sanding is crucial for achieving a smooth and even finish. Start with a coarse grit sandpaper and gradually work your way up to a fine grit sandpaper for the best results.
- Apply a Wood Finish: Choose a wood finish that is appropriate for your project and apply it evenly using a brush or cloth. Make sure to apply the finish in thin layers and let each layer dry completely before applying the next.
- Rub Out the Last Coat: After the final coat has dried, rub out the surface using sandpaper and abrasive compounds to achieve a smooth and polished finish.
- Use Reflective Light: Always apply a wood finish under reflective light to ensure an even and consistent finish. Natural light or a bright lamp can be used to provide the necessary lighting.
- Remove Any Imperfections: Before applying the final coat, inspect the surface for any imperfections such as scratches or dents. Use wood filler or putty to fill in any imperfections and sand the surface smooth before applying the final coat.
By following these tips, you can achieve a professional-looking finish on your woodworking projects. Remember to take your time, be patient, and pay attention to the details to achieve the best results.
10. Advanced Router Techniques
The versatility and importance of routers in woodworking
Although it is possible to build a piece of furniture without a router, the versatility of a wood router is hard to match. Learn to use a router, so that it becomes one of your go-to tools. Routers can be hand-held or permanently fixed in a router table for any chores. They may have fixed bases, which are for edge routing, or they may have a plunge-style base.
A router is a versatile tool as it can do many ordinary household jobs, such as cutting fancy edges for shelving, grooves for storm windows and weather stripping, circles and ovals with smooth edges, and round corners.
The different types of router bits
Standard bits include straight, ogee, and mortising bits. They may also include rabbeting bits, hinge mortising bits, round-over bits, half-round bits, and trimming bits. Some larger sets also include multiple sizes of common bits, like 1/4-inch and 1/2-inch radius bits.
Straight
Straight bits are the most frequently used type of router bit. They can be used in a wide variety of applications. Straight bits are used for cutting different types of square-shaped grooves. Straight bits can also be used for mortising in door hardware, or for grooving a channel where a decorative inlay can be inserted.
V-Groove
V-groove bits groove out a V-shaped profile in a piece of material for a decorative effect. V-groove bits can engrave designs in flat surfaces like signs or cabinet faces, create shallow grooves that run the length of a column, or make ridges in panels to produce a beadboard effect. These bits come in multiple diameters and V-groove angles that determine the width and depth of the groove. Some bits also have flat bottoms instead of sharp tips that limit the depth of the cut.
Rabbeting
Rabbeting bits form an L-shaped shoulder or square groove that runs against the grain, on the edge of a piece of material to form a rabbet joint. Use them in cabinetry construction to make drawers and cabinet backs and to join the tops of cabinets to cabinet sides.
Glue Joint
Glue joint bits are for joining two pieces of material by creating identical, adjoining tongues on the edge of both pieces. The notched cuts make plenty of surface area for gluing and form a tight-fitting joint that holds the pieces together while clamped. They are available in standard and mitered types. The standard glue joint joins squared edges, while the mitered bit is made with a 45-degree angle to join two mitered edges.
Instructions for creating a variety of router projects
Routers are versatile tools that can be used to create a wide range of woodworking projects. Here are some instructions for creating router projects:
- Gather Your Materials: Before you start your project, gather all the necessary materials, including the wood, router, router bits, and any other equipment or accessories.
- Familiarize Yourself with Routing Types: There are several types of routing techniques, such as edge routing, jointing, and plunge routing. Familiarize yourself with each technique and choose the one that is best suited for your project.
- Choose the Right Router Bit: Selecting the right router bit is crucial for achieving the desired cut. There are several types of router bits, including straight, chamfer, round-over, and cove bits. Choose the bit that is appropriate for your project.
- Equip Yourself with the Plunge Router Attachment: The plunge router attachment is essential for plunge routing techniques. Make sure you have the attachment and that it is properly installed.
- Hold the Router Slightly Slanted: Hold the router at a slight angle to achieve a smooth and even cut. Keep the router level and steady as you move it across the wood.
- Set the RPM and Move Slowly: Set the router’s RPM according to the manufacturer’s instructions and move the router slowly across the wood to achieve the desired cut. Moving too quickly can result in a rough cut and splintering.
By following these instructions, you can create a variety of woodworking projects using a router. Remember to always take proper safety precautions and to properly maintain your equipment to ensure safe and effective use.
Tips for safety and maintaining router bits
Routers are powerful tools used in woodworking that require proper safety precautions and maintenance to ensure they perform effectively. Here are some tips for using and maintaining router bits safely:
- Hold Both Hands on Router Handles: Always keep both hands on the router handles until the motor has stopped. This helps to ensure you have full control over the tool at all times.
- Avoid Overreaching: Overreaching can lead to losing your balance and compromising your safety. Keep your body in a stable position and avoid overextending your arms or reaching too far.
- Start Motor with Bit Above the Stock: When routing inside a workpiece, start the motor with the bit above the stock to prevent the bit from digging in and causing damage.
- Feed Wood Opposite to the Bit’s Rotation: Always feed the wood in the opposite direction of the bit’s rotation. This helps to prevent kickback and ensures a smooth, even cut.
- Hold the Bit in Good Light: Inspect the router bit before use and hold it in good light to check for any signs of wear or damage. Replace any damaged or worn bits to ensure safety and effective performance.
- Regular Maintenance: Regularly clean and sharpen your router bits to ensure they perform at their best. Follow the manufacturer’s guidelines for maintenance and avoid using damaged or worn bits.
By following these safety tips and properly maintaining your router bits, you can ensure safe and effective use of this powerful woodworking tool.
Conclusion
In summary, woodworking techniques for experts revolve around inlay techniques, marquetry, carving, veneering, bending and shaping wood, joinery techniques, gilding, finishing techniques, and the use of routers. Master the advanced techniques to complete professional quality woodworking projects. I assume you understand the types of all techniques, their importance to woodworking, instructions on how to use them, and maintenance tips.

- Grain and Sheen: Teak Oil versus Danish Oil Uncovered - January 10, 2024
- The Cherry on Top: Crafting the Perfect Cutting Board - January 9, 2024
- Polyurethane Water-Based vs Oil-Based: Choosing the Right Finish - January 8, 2024
