A friend of mine recently asked how to carve chess pieces. He recently started playing the game. Chess pieces have always been a part of my life. I have been an avid chess player since I was a child. You will find several chess boards and chess pieces at my house. There are also several chess apps on my phone. No matter what I buy, there is nothing more satisfying than a set you have made yourself.

Not only are the pieces designed precisely the way you want them, but you know who’s responsible if it’s not quite right. Plus, the best wooden chess sets are expensive. That’s why this should be your next wood carving project. So how do you get started carving your chessmen? This article is a beginner-friendly guide to designing and carving any chess piece. Let us take a look at how to whittle chess pieces.
Decisions to make before starting
Now that the idea has been formed, we must move to the design phase. There are a few things that you should get out of the way immediately. These will determine the direction of the next few steps. Determine the size of your chess pieces before you start. They range between 3 3/4 and 4 1/4 inches in King size[Source]. You can go as small as you would like, depending on the board you will use. It can also be based on the wood available or the size of your hand.
Shapes are just as important. Consider what sort of shape and look you are going for. There are several options. The main ones are “rounded” or “straight.” Perhaps a tiki chess set?
The choice of color can wait until later on in the carving project. Decide if you want to maintain the traditional “black and white” pieces or be more adventurous.
What sort of finish do you have in mind? You can go with a smooth finish or something rustic and raw. The beauty of wood carving is that it allows for both. This is where the shapes will make another appearance.
Finally, you also want to decide what wood you will be carving. Fortunately, we cover that in the next section.
Choosing the right type of wood for chess pieces
There are many kinds of wood that you can use for carving chess pieces. Some are more delicate than others. You can base your selection on the price of the wood, the look, weight, or ease of access. If you are still learning to carve, we urge you to consider the available wood options. Softwood may be easier to learn on than hardwood. Experienced people may not mind. Let’s help you choose the suitable wood for your chess set. Decide based on your level of carving competence.
Rosewood
Some of the earliest chess pieces ever made were made of rosewood. That is when chess was still Chatturanga by name, of course. The wood came from Chhattisgarh in India. Fortunately, you can purchase rosewood in other parts of the world nowadays. A rich hue characterizes it, often brownish with darker veining. That makes a lovely chess set, no matter what finish you go with.
Basswood
Basswood is light, soft, and easy to work on, even for beginners. It will give your chess pieces a granulated look. That is something to consider if you are going for a rustic finish. It is effortless to come by, which makes it one of the more affordable options.
Mahogany
Mahogany is a hardwood that is often used in furniture. I would only recommend it to those with some carving experience. The finished product will be incredibly durable.
Alder
It’s very grainy, which sometimes can make detailing challenging. It is neither expensive nor very economical and is more in midrange budget wood.
Balsa
Balsa is considered one of the strongest wood in the world. It is light but strong, making it an ideal candidate for your chess set.
Beech
Beech is a white color wood that sometimes colors reddish when growing on acid soil.
Cherry
Cherry wood is famous for its super bending properties. It’s not as hard as other types included on our list.
Hickory
Hickory is complex and robust. It is widely used for its best special feature of shock resistance.
Maple
Maple is strong and great in looks; it stains great. It’s very much attractive for its color, smooth grain, nice texture, and durability by nature.
Oak
Oak wood has excellent texture. Oak is a hardwood, but not as hard as maple. It is durable and stains well.
Pacific Albus
Pacific Albus has a fine texture which looks better with the art. And this wood is easy to glue and accessible for boring, turning, and sanding.
Pine
Pine is hard to detail because of its different grains. It’s pretty resinous and light in color. You will enjoy finishing off as it is easy to control or embossed lines.
Poplar Wood
Poplar is very easy to resize. Soft grains are perfect for wood art. It burns very easily, and it’s so accessible. The color is a light, hard surface, gouge resistant, and economical.
Redwood
Redwood will cost a little more because of its scarcity. It is hard and strong. Overall, a perfect condition for perfect pyrography.
Refer to our post on the best wood for pyrography for more information on each type.
Chess Wood Carving Patterns
Let’s get started wood carving chess pieces on by one.
Pawns: You are looking to achieve a square head or one that is completely rounded. The square head can be achieved with a chisel and some.
Bishops are easier to make if you have a mini lathe to hold the piece. It allows you to get that pointed tip head just right.
Knights: Knights can be brutal when carving a chess set. They are valuable members of your chess set. Allow more time for them. If you are a beginner, I will encourage you to go for the square kind of knight.
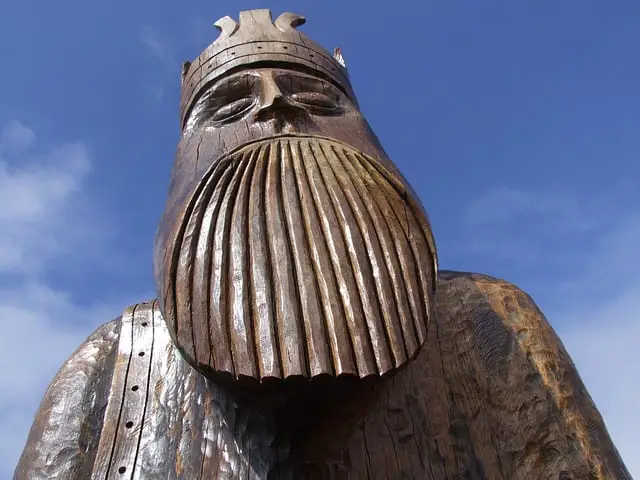
Queen: The queen will require the attention that all queens deserve. You can make an identical body to the king, then spend more time fine-tuning her. The crown requires a detailing knife. That will allow you to add other patterns if you want to.
King: If you took our previous tip, you would only need to make a few cuts to the king’s head to achieve that cross. I cannot tell you how often I have snapped it by mistake. Take your time.
Castle/Rook: The rook is easier than the king and queen. Work on the top part of the block at the end. You can use your detailing knife for this step. You’ll need a pair of these for your chess set.
Wood carving chess set patterns
If you need some pattern ideas, see the link below:
Required Tools
You will need the following tools and materials:
- A mini lathe.
- Chisels.
- Sanding paper.
- A vice.
- A detailing knife & Chipping knife.
- Wood.
- Pencil and ruler.
- Varnish.
The Process

The wood carving process will take 5-7 minutes to create each chess piece. Here is each step you will need to follow:
- Cut the wood into a small block suitable for one piece.
- Outline the shape of your piece on the block.
- Fasten it into a vice or the mini lathe.
- Cut the largest chunks and leave the last bit for details.
- Remove from the vice to finish the detailing by hand.
- Outline patterns in detail.
- Patiently finish the wood carving of each chess piece.
- Sand off any excess.
- Add a weight to the bottom of your piece. Paint the wood in your desired colors.
- Once dry, give it a vanishing finish if you want one.
Your chess set should be ready for a game. If you encounter any problems, we will be happy to help you find a solution for your chess pieces. If you make a tiki chess set, we would love to see it. Enjoy the project. Dare to be adventurous with the patterns of the chess pieces. Use the web and the resources below for more information and ideas to improve your chess piece set and its patterns. Now that you know how to carve your own chess pieces, what’s next? You may find more ideas in the videos below.
Video Resources for carving chess pieces
Recommended Books
Making Wooden Chess Sets

Wooden Chess Sets You Can Make

Woodturning Chessmen


- Grain and Sheen: Teak Oil versus Danish Oil Uncovered - January 10, 2024
- The Cherry on Top: Crafting the Perfect Cutting Board - January 9, 2024
- Polyurethane Water-Based vs Oil-Based: Choosing the Right Finish - January 8, 2024
