Are you having trouble cutting a groove in your woodworking project with a Dremel or rotary tool? Look no further! This post will show you how to cut a groove in wood with a Dremel in just a few minutes.
Stand guard for the wood to avoid breaking
Secure a spiral cutter attachment to the end of the rotary tool. The cutter is a circular guard that goes around the bit so you can hold it flush against your piece of wood. Slide the spiral cutter attachment over the end of the bit as you screw it onto the threading. The spiral cutter attachment should be tight against the tool’s body. That prevents it from coming loose.
Turn the Dremel on
When you have added proper attachments and accessories, plug the Dremel tool into a power supply. Please switch it on, set a speed limit, and use a test piece as you run the Dremel tool. Start slow and increase speed bit by bit.
Check that the Dremel is at the correct speed
Before you start cutting a groove in wood, make sure you read all the instructions concerning speed. The manual gives you the perfect speed for each application to stay safe and avoid damaging your item.
The manual gives you the correct speed for the specific material. As much as you have to match your speed with the material, you need to adjust the speed, and the material should not damage during the process. Use the Dremel speed chart for guidance.
Drill a tiny hole in the wood
Gather your materials and safety wear before you start drilling. These include a pencil, Dremel, Dremel drill bits, and safety glasses. You can start drilling holes using a smaller bit. They tend to make small starter holes that ease the process.
The Dremel kit comes with a steel drill bit used on soft materials such as wood. The high-speed, drill bits drill holes in soft materials, and carbide drill bits drill through hardwood. Drill bits are mounted on different sizes of shanks when you are using the Dremel for drilling holes. Investing in a Dremel multi chuck brings better results.
Invest in practice material of scrap wood that you practice on before you start working on your final project. As much as you can be an experienced woodworker, you cannot afford to drill your final project the first time out. Keep a dust brush or a vacuum cleaner when working. The workspace has to be clean always for accuracy.
Steps
- Measure and mark the chosen material. Mark the position you are going to drill a hole using a pencil.
- Ensure the Dremel tool is unplugged as you attach the appropriate-sized drill bit. Failure to unplug endangers the user. The drilling tool is dangerous when left on while changing bits.
- Start drilling the material with the marking being your guideline. Set the Dremel tool at a slow speed. Hold the Dremel perpendicular to the material throughout the process. As soon as you start drilling the hole, increase the speed to quicken the drilling process.
- Get rid of increased dust and excess material.
- If you intend to make more holes, repeat the process.
Use the Dremel to attach Dremel accessories
- Switch off the Dremel by unplugging the power cord from the wall outlet. Locate the collet lock button and hold it with your thumb. The collet lock button is close to the operating end of the Dremel.
- The collet nut substitutes the chuck on a drill. It secures the shafts of accessories. Turn the collet nut counterclockwise using a small wrench that fits the nut.
- Insert the shaft of the accessory into the center of the collet. Allow it to sit entirely into the Dremel. Twist the collet nut clockwise until it is hand tight and turn the nut another 1/4-turn with the wrench.
- Remove the nose cap on the front of the Dremel if your accessory requires a special attachment, such as the multi-purpose cutting guide. Turn the nose cap counterclockwise to remove it from the Dremel and thread the extension onto the Dremel clockwise until it is tight.
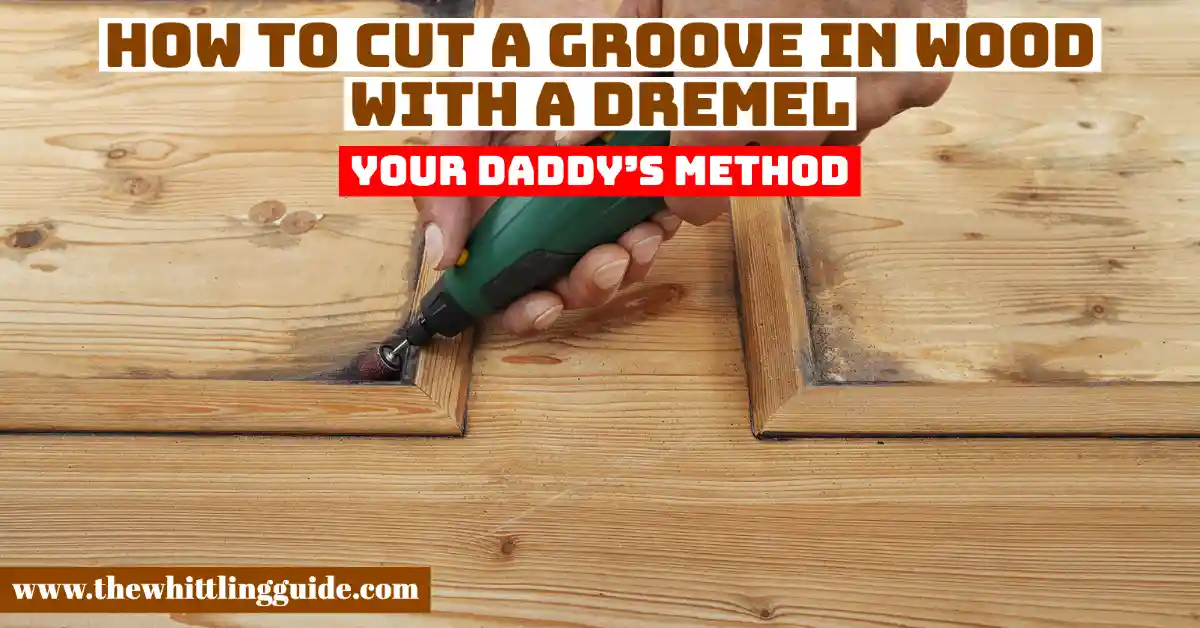
How to cut a groove in wood with Dremel
The Dremel is ideal for cutting small grooves into the wood. Use the rotary bit for cuts, and the chances of having precise cuts are high. The rotary bit is also small, and making Long cuts takes time. Long cuts are possible to make but making clean cuts is difficult.
For clean edges, start by cutting using a utility knife. That prevents splintering of the edge. As much as the Dremel is good at small cuts, it is easy to use. The Dremel tool comes with a powerful motor that cuts grooves into the wood. It works better when you have a specific task.
Steps
- Gather your materials and follow all the safety precautions. Put on your gloves and a face mask to stay safe from the sawdust. Wear safety glasses to protect your eyes from the sawdust.
- Decide where you want to cut your material as you prepare to cut grooves. Mark the exact position after measuring the area you wish to work into. Use a sharp pencil to mark the wood starting from where you are willing. Thick the marked area with a sharp knife, making the outline more visible.
- The choice of model and attachment determines productivity and quality. The Dremel attachment shows how long or deep the groove needs to be. Know how deep you want the groove cut before you start cutting, and choose your Dremel attachment. There are multiple attachments to choose from, and research before you choose one.
- Choose the appropriate Dremel tool for the task. Take a closer look at the models and choose the right one for the job. Choose a model you are comfortable with so that the process becomes bearable. The plunge router attachment works better on a Dremel.
- The plunge router changes your Dremel tool into one. It eliminates the need for a separate plunge router tool and makes the Dremel tool route circles cut letters, and signs.
- Choose the correct model and attachment, and get the Dremel tool ready in your marked area. Start cutting the groove into the wood as you start from where the groove cut starts. Continue cutting as you repeat the motions until the groove cut has reached the desired depth and length. Follow the outline and keep your Dremel tool and hands sturdy.

- Grain and Sheen: Teak Oil versus Danish Oil Uncovered - January 10, 2024
- The Cherry on Top: Crafting the Perfect Cutting Board - January 9, 2024
- Polyurethane Water-Based vs Oil-Based: Choosing the Right Finish - January 8, 2024