How to speed up drying of pressure treated wood
Preserving wood is a widespread technique that is used worldwide. It is usually done for wood that is often at the mercy of decay. Therefore, it is pressure treated to preserve its biochemical structure. You will find that the science behind this works as the chemicals penetrate the wood cells to force them into concentration.
It will then become a fortress against organisms that specialize in decay. The chemicals will also have a powerful smell that will hinder any termites from entering the wood. Once the chemical side of the treatment is complete, the process continues as the wood needs to be dried.
Drying the wood will reduce its moisture content to the lowest levels. What was usually a 100% moisture content limit will now turn to around 19%. This means that you will be experiencing benefits as a business that come in reduced construction time.
This is because you can perform this process in any weather; therefore, construction can occur 24/7. Reduced overall construction time also has a sub advantage of having to pay employees less.
How to dry pressure treated wood
If you are trying to figure out a way to dry pressure-treated wood, I can suggest two options.
The first is to use a homemade wood kiln to speed up the process and achieve a 100% sealed piece of wood. This method is well known to provide users with a significantly faster way of drying wood. Usually, taking about eight months to a year to dry will only take two to three days.
The second option that you can consider is to let it dry naturally. This option is not highly recommended because many people will notice excessive shrinking due to the lack of chemical preservatives used in this process.
Therefore, it is best to make sure that none of the wood you have is drying naturally; otherwise, it is easily exposed to termites. This exposure can lead to holes and gaps in the structural integrity of the wood you use.
How to dry pressure treated wood with a kiln
This is a highly durable option for people who want to use wood to beat all the weather elements. This method works hard to ensure that there is quite a significant reduction in the shrinking and warping factors that often make their way into the drying process.
Drying wood in this fashion will allow you to stain and seal it once it is whollyy done quickly. It is, therefore, prevalent amongst people who want to begin wood carving. This is because the wood becomes extremely easy to cut.
Many people will tell you that it provides a lifetime guarantee that states you would be protected when termites and decay. This procedure’s benefits include improved compatibility in terms of different steels you can use.
You will most likely notice that the dimensional stability soars through the roof combined with aluminum and carbon steel. It becomes a much lighter weight that you can easily handle when it is time for you to install and use this wood. Without using this process, you would find that it takes around eight months to dry a piece of green timber.
The process to do this is.
- You will first be expected to get the wood and put it in a large steel cylinder. This is often referred to as a vacuum pressure vessel or tank and will be the main machine used to suck out the moisture from the wood.
- The second thing you will need to do is ensure that the pressure tank is 100% sealed. This is crucial because if the tank is not adequately sealed, you may rip apart the wood piece.
- Once you have fully sealed the pressure tank, the next stage will be to extract all the oxygen within the chamber. Usually, you would make use of an industrial vacuum pump, which would ferociously remove all the air that exists within this tank. Remember that the oxygen will come not just from around the wood but from inside the wood. This is how the air content limit of the piece of wood goes down from 100% to around 19%.
- Once we have fully decreased the piece of wood’s air content limit, we must begin the preservation process. At this point, you will fill the tank with a preservative solution. The solution will combine several things, mainly water and insect repellent. Bear in mind that it is vital that the tank is complete and the wood is submerged totally. If you leave out any spaces, this is a potential area where air can begin to penetrate the wood. Using this method will ensure that this would be sealed for a lifetime.
- The fourth part of this process is for you to apply pressure to the solution. When you apply pressure to the solution, you will find that it penetrates the Woods oxygen holes and seals them entirely. Therefore, this form of sealing is well recognized worldwide.
- The final stage is to put a depressurized piece of wood in the Kiln. This airflow device will provide you with sufficient airflow that will allow the moisture reduction to come down to 80%.
Things to note.
It is essential that once this process has been conducted, you begin to drain the tank. Draining the tank will allow you to remove any additional preservatives while the drying process is executed.
It is also important to note that once you have completed this entire process, it is essential that you wait at least one or two days before you can begin operating with this would. This safety precaution allows you to have the best quality when you start.
Use a moisture meter
Remember when reading the previous section that this process will take a significant amount of time.
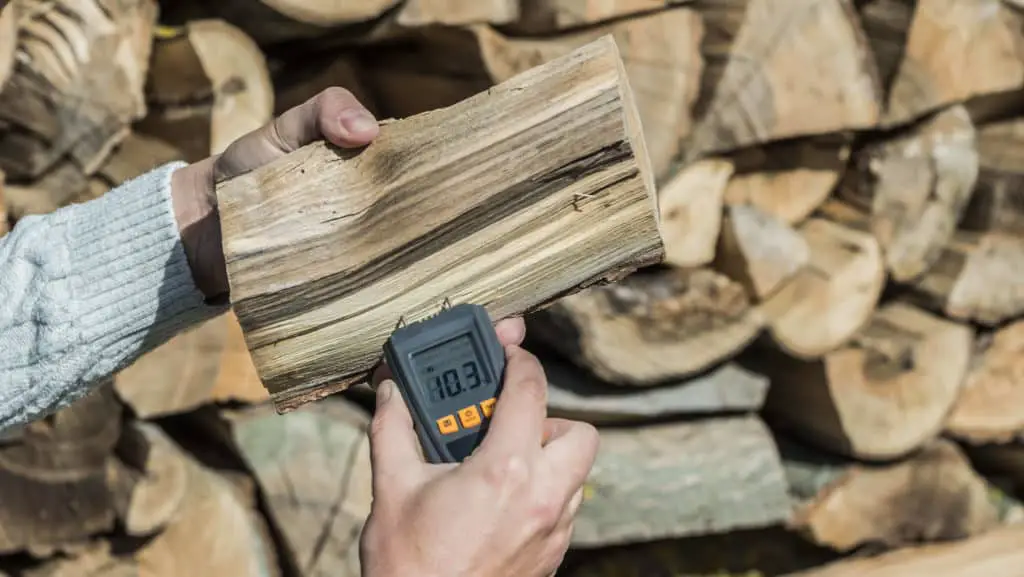
As usual, you must also remember that the wood piece will have a moisture content of around 25 to 30% after drying. To begin with, you must decide how you will use the piece which is in question.
To begin with, you must target how heavy and sturdy the piece of wood is since we are dealing with weight, density, and hardness.
Apply a sealer
Because the final stage of this process involves applying a sealant, you must use it correctly.
The most important part for you to remember is the application of a wood sealer. These sealers protect wood pieces before using them in any structure.
Therefore, you must use a quality sealer that will fully protect the piece from contamination or damage throughout its lifetime.
Apply a water repellent
The next thing to remember is that you must apply a water repellent. This ensures that this piece of wood will not get wet and will provide better resistance to decay and staining over time.
Remember, you must use a quality water repellent since its purpose is to help maintain the quality of your wood piece.
Allow drying
Once you have applied the sealer and the water repellent, you must allow the sealer to dry.
Before using your wood piece, ensure that you have allowed it to dry for a more extended period. This will give you a better guarantee that you will ultimately protect your wood pieces from any damage.
The finish, commonly used when finishing wooden products, is known as an oil finish or a Danish oil finish.
- Pyrography Techniques for Beginners: Textures and Shading - January 23, 2024
- Troubleshooting Jointer Issues: Why is Your Jointer Not Flattening Wood? - October 11, 2023
- Unlocking the Secrets of Jointing to Increase Width - September 29, 2023