Finish for turned bowls
Oil finish
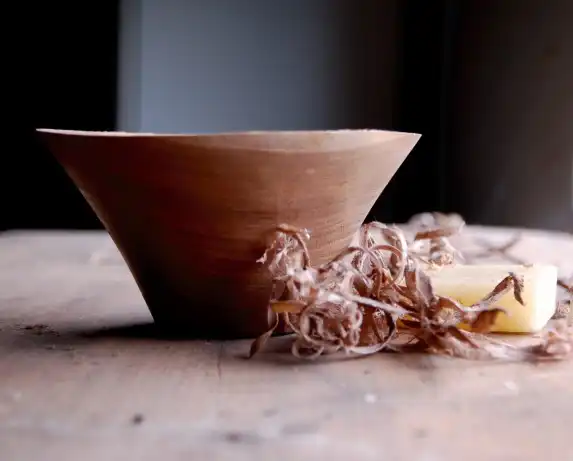
Oil finish is a coating for bowls applied to a bowl turned from green or dry wood. It inhibits water loss from the end grain. That is why a green bowl will dry more evenly. Less checking is required. Oil finishes seep into the wood and penetrate the wood’s fibers (Woodwork Details).
When the oil finish is applied, sand it into the workpiece. A combination of wet finish with sanding swarf creates a matched wood filler. Use a small container to keep it fresh. Blended oil finish works for most bowls.
Sand a green or dry bowl up to 180-grit, wiping on the first coat of finish. Sand the bowl with 180-grit again. A wet finish makes the sanding process more efficient because the mixture of wood dust and oil fills the wood pores and then hardens into a wood filler that matches the wood. Burnishing the applied and sanded finish with wood shavings enhances the pore-filling process.
Sand subsequent coats of finish into the wood at 24-hour intervals with finer sandpaper. Use 220-grit for the second coat and 320 for all other coats. Apply anywhere from three to five coats of finish, depending on the intended use and type of wood
Make the bowl handy by keeping it on the faceplate. Check the safety data sheets for whichever finish you choose.
Walnut Oil
Walnut Oil also works on bowls. For a food-safe finish, it is hard to beat walnut oil. The application process is easy. Start by rubbing it on the wood and replenishing it whenever needed. Pour some on the object and rub it in with your hands. Wipe off the excess.
You can use the object immediately, but it is better to wait three or more days for the oil to soak in and begin to dry. Walnut oil will dry quickly, but it is slow to polymerize and does not form a durable coating. Recoat any time you wish to good effect, whenever the wood begins to look dry.
High gloss finish for wood-turned bowls.
A high gloss finish requires more work and effort. Making a wood surface shine involves filling in all the pores and crevices. The process makes the surface more reflective. The results can be stunning.
Shellac
Start by sealing the wood surface and filling micro-crevices using Shellac finish. Making your Shellac is better than purchasing cheap canned Shellac at the hardware store with toxic metals and other components. However, that does not mean all Shellac is toxic. Homemade Shellac is superior, clear, and relatively easy to make.
It is available in different colors and ready in flake form to mix with denatured alcohol. It comes in blond, orange, and darker garnet. Use a clean jar and mix the Shellac flakes with denatured alcohol. The process is more affordable since the alcohol may be cheaper from the local hardware.
Allow enough time for the flakes to dissolve, and apply with an inexpensive chip brush. Shellac can be a stand-alone finish or used as an underlying foundation for a shinier, glossier final coat. Lacquer looks great when applied over a base of shellac.
This finish is a natural product made by combining a secretion from the female lac bug with a solvent such as alcohol. It gives a protective coat and adds a warm amber color to wood. It is safe once dried and hardened.
Note that it can be affected by heat. It enhances turned bowls. Apply with a natural bristle brush or a cotton rag for better results. Shellac is also food safe. You can accelerate the process by placing the bottle in a sunny window or outside on warm summer days. That will yield a supersaturated solution.
Dilute a full-strength solution by mixing one part full-strength shellac with three parts alcohol. That reduces it to 2-lb. cut for a padding application on the lathe. When the wood is saturated, start the lathe and burnish the finish. Use either shaving from the floor or a small piece of paper towel. Use more speed for this process to work.
Best finish for a walnut bowl
Lacquer
Lacquer is the best finish for finishing walnut. It dries fast and requires only two coats to seal and protect. It is user-friendly. You can choose airless or pressurized spray equipment to apply lacquer since they work almost the same. Start by filling a spray gun container with lacquer.
Hold the gun 8 inches from the walnut at a 30-degree angle. Spray an even, wet coat of lacquer on the wood. Allow it to dry for 30 minutes, then sand the walnut by hand with a folded piece of 180-grit sandpaper.
Finish by spraying another coat of lacquer on the walnut. Two coats are enough, but you can spray up to four coats for a deeper lacquer finish. It is unnecessary to sand after each coat, only after the first.
Lacquer is a modern wood finish impervious to water and maintains its transparency as it ages. Lacquer finish does not yellow with age, protects well against liquids, and requires little maintenance.
Lacquer provides an intense gloss finish often used on ultramodern furnishings. It is durable and resistant to damage. However, over time it can begin to discolor and become scratched. It is applied via a sprayer because it is thinner than the other finishes. Used a high-volume, low-pressure sprayer and a well-ventilated and spacious workspace to apply it.
How to finish a walnut bowl
There are multiple finishes to choose from that are food safe. Amongst the finishes is the Pure tung oil. It is from the nut of the china wood tree. It is difficult to apply since it requires many coats but good water resistance.
Raw linseed oil is from flax seeds. Flax seeds are high in fibre (Healthline) . It requires a long curing time, low water resistance, and frequent reapplication. Mineral oil comes from petroleum, is colorless, simple to apply, has low water resistance, and requires frequent reapplication.
Walnut oil is from the nuts of the walnut tree. It is easy to apply. Beeswax is mixed with oil to create a better smell. Choose the one that matches your experience, style, and wood type.

- Grain and Sheen: Teak Oil versus Danish Oil Uncovered - January 10, 2024
- The Cherry on Top: Crafting the Perfect Cutting Board - January 9, 2024
- Polyurethane Water-Based vs Oil-Based: Choosing the Right Finish - January 8, 2024
