The plunge router is one of the most useful and versatile woodworking tools on the market. By inserting the router into a hollowed-out workpiece and cutting away some of the material, the router allows you to create complex pieces you’d otherwise need special equipment or additional hands to accomplish. By using a plunge router, you can work with wood and plastic for furniture, arts and crafts, home décor, and more.
Although router tables are not generally thought of as entry-level tools, there are some tasks they can accomplish that a step above entry-level router tables cannot. For example, you can use router tables to create plunge cuts and to make dado joints in wood. This guide will show you how to use plunging routers, including how to assemble them and how to use them safely and effectively. Whether you’re a beginner or a seasoned professional, router tables offer a lot of versatility.
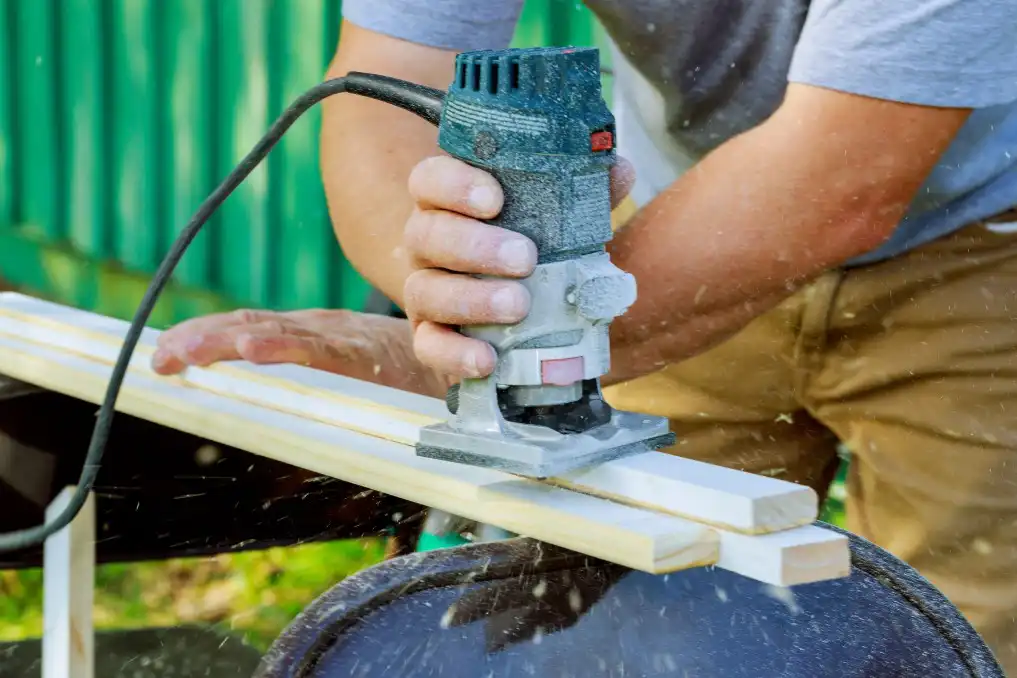
How do you use a plunge router for beginners
- Start by examining the plunge router and its different parts. The process involves noting its electric motor mounted between the two posts. The engine rests on top of the spring, attached to a flat base that guides it during the operation.
- Set In plunge router bit. The router bits come in different shapes and sizes. When straight cutting, they can create curved surfaces, bevelled edges, and tongue and groove joinery.
- Choose the right bit for the plunge router used for the project.
- Turn your router upside down and push the spindle release button close to the top of the device router.
- Loosen the spindle nut using a wrench, slide the bit through the spindle and tighten it in a clockwise direction. Do not overtighten.
- Clamp the working material in a stable work table since the spinning rate of the router bit is high. Stay alert since the plunge router can turn the material instead of digging into it.
- Try using a router mat with a non-skid surface to help you stay on the safe side. Secure the working material, so that the router can dig through it without difficulties.
- Use safety protection for your ears while working since a plunge router makes noise. Use glasses for your eye protection against splinters or small chips during the operation.
- Set plunge router depth. Set the device on its side and measure the depth you need to cut. Press the depth-in to release springs holding the bottom plate and push up the plate guide.
- Release the lever of the depth guide to lock into place the base plate and set up the device into your precise cutting position. Use a ruler to make exact measurements.
- Set the device on the working material by pushing the handle button that plunges the bit into the piece. That enhances the comfortable setting of the router in position without marring the wood material. You can also use jigs and guides in joining two pieces during the operation to improve the hardworking outcome.
- Move-in the correct direction. When cutting to the outside edge of the material, move the device counter-clockwise. Move it clockwise when plunging inside the border. Setting the device in the right direction will minimise the chances of adjustments when working, increasing performance and the outcome results. Use collet extension when making deeper cuts where your bit cannot reach.
- Plug the material, set the device in the appropriate position, and grab the router tightly using both hands. Use the slot view to ensure that the bit is at the right spot.
- Start spinning the router as you press the handle button for easy plunging the bit into the working material.
- Apply the same to pressure until the bit produces the desired depth, release the button, then run the router over the working wood to help in making the perfect cutting.
- For perfect circles mount the router to the device arm rotating around a fixed position. The plunger router can then make cuts of the workpiece from a blank without using the saw.
- You can also apply other bits in cutting, edging, or routing the workpiece. However, this requires setting the depth gauge according to the amount or size you are using.
What are the benefits of a plunge router
- Ideal for inlay grooves.
- On-board scale for fine adjustments.
- Built-in bit protection.
- It is for cutting mortises.
- Best for some specialised bits.
- The change cut depth while still in action.
- They make cuts directly in the middle of a workpiece.
Difference between plunge router and fixed
In the fixed base router, the depth is set, and the cutting bit goes beyond the base, while in the plunge base router, the depth of the cut is set. Plunge the cutting bit into the wood only to the depth set. The cutting depth is adjustable and can be set to your chosen depth, as a fixed base router.
A fixed wood router is for projects that require long hours due to its lightweight accuracy, whereas plunge wood routers are heavier. They are for tasks that require fewer hours hence less effort and physical strength. These are two basic types of wood routers (Thetoolsquare.com).
Tips for using a plunge router
- Always reset your fence.
- Use a pair of paths for precise plunges.
- Tape your way to tighter dadoes.
- Get a grip on small parts.
How to use a plunge router with a template
Start by making the template for your woodworking piece.
Select the template router bits.
- Place the template to your woodworking piece on your routing table. Stick the template onto your working piece by using double-sided tape. Use a few dabs of hot-melt glue for sticking it. Use enough tape so that the template can easily be placed onto the wood piece.
- Adjust the speed and the depth of the cut, making sure that you are cutting in the proper position on your board.
- Lock the lever and start cutting the template’s inside with the plunge router.
- Cut clockwise while you are cutting inside of the template. While cutting around the outside, cut the template counter-clockwise. When the template routing is completed, remove the template from the workpiece. Get exact duplicate parts of your workpiece in your woodworking projects. A template is a plunge-cutting straight with shank-mounted ball-bearing pilots (toolstoday.com).
Plunge router projects
- Wooden frame
- Stool
- Wooden Toy Boat
- Wine rack
- Router tray
How to use a router step by step
- Set up the fence.
- Push the material flat against the fence and down to the work surface as you run it through the router.
- Use consistent pressure and speed.
- Control the cut depth by changing your bit height.
- Move-in the correct direction.
- Plug the material, set the device in the appropriate position, and grab the router.
- Start spinning the router.
- Apply the same to pressure until the bit produces the desired depth.
- Mount the router to the device arm rotating around a fixed position.
- Apply other bits in cutting, edging, or routing the workpiece.
Can you use a plunge router for edges?
Plunge routers work fine for decorative edge cuts.
How to use a fixed base router
- The position of the router bit remains the same at all times.
- Set it to your desired depth, to get exact results every time. That makes it ideal for making repeat patterns in the wood.
- Use the correct bit and set it for the desired depth.
- Set the bit to the final depth of cut and leave it there.
- Start routing. Hold the router bearing near the edge.
What is a plunge router used for
- To preset the cut depth and lower the bit into the cut with the router’s base flat on the surface.
- It is for stringing and delicate inlay work.
- To cut in the middle of a piece of wood.
Plunge router bits
An up-spiral bit is for plunge cutting, so the chips will clear from the blind hole, and the sides of the hole will be shear cut by the spiral flutes. The carbide-tipped straight plunge router bits are available in many sizes. All spiral router bits can plunge cut.

- Grain and Sheen: Teak Oil versus Danish Oil Uncovered - January 10, 2024
- The Cherry on Top: Crafting the Perfect Cutting Board - January 9, 2024
- Polyurethane Water-Based vs Oil-Based: Choosing the Right Finish - January 8, 2024