Using chalk paint is not a walk in the park unless you are well-informed. If you do not have enough equipment to use, you may end up having the worst surface. Chalk paint gives the wood a distressed, vintage look with minimal preparation. Use a brush or roller, depending on what works better for you. Follow the instructions given in this article or the one on the packaging for better results.
Gather the necessary tools and materials
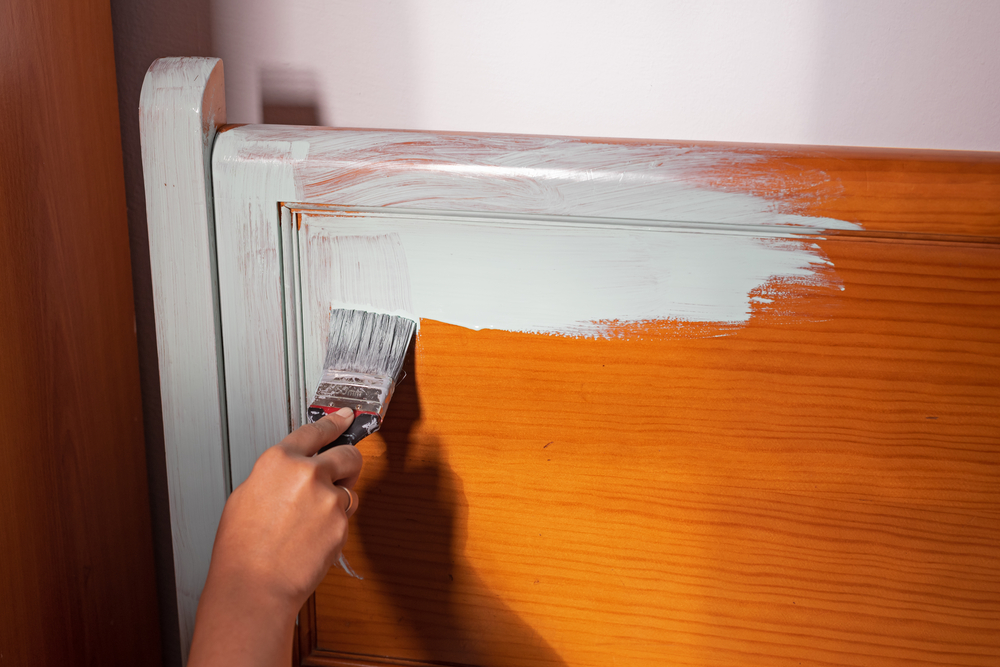
Paintbrush
Look for a better paintbrush for better results. The quality of your painting brush affects the outcome you want as a painter. A low-quality painting brush affects the final result and takes a lot of time to finish the painting. The bristles of your brush should be made from the best material and in the right shape (The Seeker.ca). If you cannot have a painting brush, use a roller.
Spray misting bottle
Fill spray bottles with different colors of chalk paint. You can spray different colors of paint onto the test piece. Encourage overlapping of colors so that blending and mixing occur. When done, allow the paint to dry.
Primer
Look for a better primer for taking dark pieces to lighter colors and blocking odors. Primer is a base coat used to help treat a surface before applying a topcoat. A primer ensures maximum adhesion. Better paint adhesion means your paint job lasts longer. A primer acts as a sealer for porous surfaces that may absorb the first few coats of paint.
Sandpaper
Collect assorted grit sanding papers to match your surface. For a smooth finish, sand to help prepare the area for painting application. Sanding removes imperfections for a smooth finish while at the same time adding adhesion by developing rough ridges for the paint to stick.
Wax
Waxing is not something you cannot work without, but use it to seal the paint for better results. There are two types of wax you can use. That is clear wax which does not impact the color and dark wax. The dark wax will influence the paint color, meaning there is a change in the appearance. For easy use, apply the wax you choose using a soft cloth.
Prepare the wood surface.
Preparing the wood surface for chalk paint includes cleaning the wood, sanding rough or uneven areas, and filling gaps or holes with wood filler.
Steps
- Clean your furniture before painting using a damp cloth and wipe it over the surface. For stubborn dirt and grease, use warm soapy water but do not use harsh chemicals. For shiny laminates, use a sanding pad and sand the surface. Wipe away any sanding dust before painting. Thoroughly clean the furniture piece before applying paint, making it easier for you when working. The paint will adhere better. You do not have to sand furniture in most cases. It takes a bit of time, but it makes the process smoother.
- Apply the knotting solution onto new, untreated wood onto any knots or open grain.
- If you see a stain bleeding through after you start painting, apply a clear shellac or stain blocker. Two coats of shellac should be applied evenly with a cloth pad to block the stain. When it dries, get on with your painting.
- Test before painting on wooden floors. Note that stains and tannins can bleed through the paint as soon as you apply varnish.
- Buy all the materials you need from your local shop.
Apply the chalk paint
- Offer step-by-step instructions for applying the chalk paint, including choosing the right brush or roller, applying the paint in thin, even coats, and allowing the paint to dry according to the manufacturer’s instructions.
- Start by choosing the piece you want to give a makeover. Suggest practising on small furniture before using it on a large wood piece to avoid mistakes and wastage.
- Gather all of your materials and tools needed for the project. Prepare yourself by gathering all these items beforehand to prepare for anything that may come up while painting. When painting at home, get a good drop cloth for spills. You can also use old wood blocks for sitting my furniture on to paint. This way, you can get around the bottom and feet of a piece well. Brushes are available in several options. Some paint brushes work with chalk-style paint. You can also use a foam roller.
- Clean and prepare your piece. Any dirt or grime showing through your paint or keeping your wood paint from adhering correctly. You can use Windex, soap and water, an all-purpose cleaner, TSP, or denatured alcohol, depending on the amount of dirt you are cleaning (Gatheredinthekitchen.com). Different pieces will need an amount of preparation. Fill any holes, gaps, or chips, with wood filler and sand smooth if you have other rough areas. Remove every bit of the finish using a sander. Keep in mind the color of the wood you are painting.
- Start painting. Wipe away all the dust from any sanding you have done. Run your paintbrush underwater to get it wet before painting, so it flows more smoothly. Carefully stir the wood paint in the can. If it is too thick, add a few tablespoons of water and stir again. Add a small amount of water if it has gotten too thick to reduce brush marks. Try to paint with the wood grain. For a smooth finish, use a foam cabinet roller or sand lightly between coats and on the final coat before applying the topcoat. Thin the last coat of paint out more than the previous coats with water for a smoother finish.
- Add a finish.
Distress and finish the wood
When it comes to distressing and finishing the wood after the chalk paint has been applied, try sanding the surface to expose the wood underneath. Apply wax or sealant to protect the paint, and add any desired finishes or accents of your choice.
Once the piece is dry, remove some paint and distress the piece with steel wool and sandpaper. If you painted two coats, use the steel wool to go over the waxed areas and reveal the base color.
For pieces with one color, use steel wool and sandpaper to remove the paint and show the bare wood beneath. Concentrate on the edges and corners and distress the piece, adding more damage until satisfied. Wipe paint dust or chips away with a rag or tack cloth before applying the finish.
For your finish, apply a stain or polyurethane. For an antiqued look, apply a wood stain to the piece. Apply one coat of the stain and then use a rag to wipe off the excess. Use a straight motion rather than rubbing in a circle. Let the stain dry. Protect your wood with Polyurethane. Apply a clear polyurethane to seal the piece and protect the color.
Conclusion
In conclusion, chalk paint on wood goes through a series of steps for a satisfactory look. Gather your painting tools before you start the project. Make sure your wood is clean to avoid pimples, and choose your finish carefully. Experiment with chalk paint on wood to create your own unique, vintage looks. Seek professional help or advice if you have any doubts or difficulties.

- Grain and Sheen: Teak Oil versus Danish Oil Uncovered - January 10, 2024
- The Cherry on Top: Crafting the Perfect Cutting Board - January 9, 2024
- Polyurethane Water-Based vs Oil-Based: Choosing the Right Finish - January 8, 2024