Joinery Techniques for beginners
Joinery is a woodworking process involving pieces of wood and engineered lumber to produce more complex items. Some woodworking joints use mechanical fasteners, bindings, or adhesives, while others use only wood elements.
Join wood pieces using various techniques, such as cutting notches in the wood to make them fit together. Wood joinery allows cabinetmakers to assemble different components of a wood piece into satisfactory items. Wood joints provide the project strength, flexibility, toughness, and appearance.
Different joinery techniques include Dowel Joints, Mortise and Tenon Joints, and Dovetail joints. Tools and materials needed for the woodworking techniques covered in this article include the knife, gouge, mallet, chisels, and many more.
Butt Joints
What is a butt joint?
A butt joint is a woodworking technique in which two pieces of material are joined by placing their ends together without shaping. It is a simple joint since it only involves cutting the material to the appropriate length and butting them together.
However, it is also the weakest unless some reinforcement is used. It relies upon glue to hold it together. Butt joints are fast and easy to make. With a bit of care and attention, they can be strong. The joint happens at a corner. Increase a butt joint’s strength by adding wooden gussets or metal brackets if necessary (Volterraproducts.com).
Step-by-step instructions on how to create a butt joint
- Mark the wood properly by measuring the desired length of each piece with the tape measure and use the pencil to make a small mark. Align the speed square with the joint mark and draw a straight line across the board. Mark with an X on the waste side of the board.
- Cut the wood to length squarely. Use a miter saw set to 90 degrees, or even a circular, table, or hand saw will work. Cut the board at the cut line, keeping the blade on the waste side of the line, and stay square.
- Dry fit the boards and drill. Place the end of the board against the face of the other wood board at the location where the butt joint will be. Draw a mark across the edges of both boards for easier alignment. Using the power drill and a drill bit slightly smaller than the screws, drill through the face of one wood board and into the end of the other in two spots. That can prevent splitting.
- Apply glue to the end of the board that will butt against the other wood board. End grain soaks up a lot of glue. You can go a little heavier.
- Reassemble the pieces of wood, so the reference marks on each board align. Avoid excess glue, as it might squeeze out at this point. You can wipe it up with a wet rag.
- Fasten the joint using glue. However, it is not strong enough to hold this joint together. Reinforce the butt joint by driving nails or screws through the predrilled holes. Wipe up any excess glue and allow the joint to dry. For more strength, install plywood gussets or angle brackets.
Tips and tricks for achieving a strong and secure butt joint
- Strengthen a butt joint with wooden gussets or metal brackets.
- Drill pilot holes before nailing or screwing hardwood boards.
- Apply more glue to the end grain for better adhesion.
- Cut the two boards square and use clamps to hold them in place.
- Reinforce the joint by driving nails or screws through predrilled holes.
Common mistakes to avoid when making a butt joint
Avoid using glue and nails for a butt-jointed solid wood frame. The porous end grain does not provide strength when glued, so that the glue joint will break easily. Use a nail gun and vise to prevent the wood from coming loose when nailing. Use a carpenter’s pencil to avoid marking. Use the correct fastener to avoid ruining the project or injuring yourself. Avoid long fasteners; they can split the wood or stick out the back. Finally, do not use too many fasteners, which can weaken the joint.
- Never use glue and nails to assemble an end-to-edge butt-joined solid-wood frame. The wood’s porous end grain is not strong when glued, so any flexing or stress easily breaks the weak glue joint and pulls the nails out.
- When nailing, use a nail gun and a vise to hold the wood, so it does not separate when you pound.
- Using a carpentry pencil leaves a mark.
- Do not use the wrong fastener; otherwise, you will ruin the project or hurt yourself.
- Do not use a long fastener. You can split the second piece or stick out the backside.
- Do not use too many fasteners.
Examples of when to use a butt joint in woodworking projects
Butt joints are in many wood structures. They work in building small projects, such as a birdhouse or planter boxes. They work in more detailed and complex wood structures, such as the construction of walls on a building, such as a home or place of business. A few butt joints appear where boards come together. That is why they require reinforcement techniques for maximum strength.
Dowel Joints
What is a dowel joint?
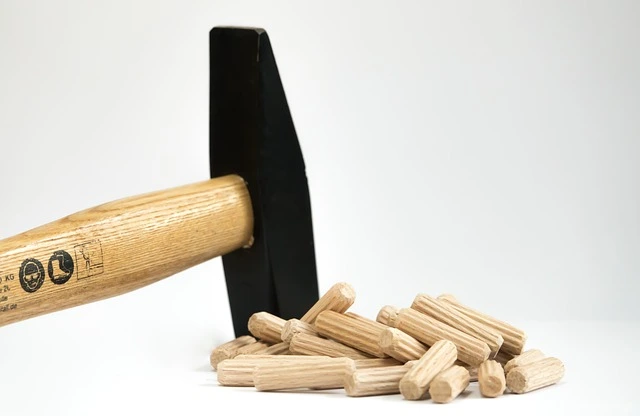
A dowel joint connects two pieces of wood by drilling dowel holes in each piece, using a wooden peg to attach them. The wooden peg is known as the dowel. The dowels act like mechanical fasteners.
They bridge between the two boards and hold them together. They also swell when covered with wood glue, locking the joint in place. Do not worry about appearance since they are invisible once assembled.
Dowel joints are stronger than butt joints. They also use each board’s long grain rather than the end grain at the end of a butt joint. Dowels are made from wood, and they come in specific thicknesses. There are plastic and metal dowels, but for adjustable shelving construction.
Step-by-step instructions on how to create a dowel joint
- Lay out the dowel locations. Take the two pieces of wood and place them next to each as if they are assembled. The horizontal piece has to be butted up to the vertical joint piece. Hold the combination square 1/2-inch down from the end of the stile, and draw a line across the stile and onto the rail with a pencil. Move the combination square down one inch and draw another line. These lines are the dowel locations.
- Clamp the doweling jig in place by sliding it over the workpiece. All jigs have reference markers that you can use to align them. Align the reference marker with one of the lines drawn in the last step and clamp the jig into place.
- Drill the hole using the drill bit that matches the diameter of the dowels you intend to use. Clamp it in your drill. Jigs have depth gauges that you can set to prevent from drilling deeply, but you can also use a piece of masking tape wrapped around the bit as the marker. Place the bit in the appropriate guide, squeeze the drill’s trigger, and drill the hole.
- Repeat stage 3. Loosen the clamp and move it to the next hole, drill holes, and move the jig to the next location until all holes are drilled.
- Test fit the joint. There is no need to apply force. It should be snug, and the dowels should reach into each board sufficiently. The joint should also be flush and tight without gaps, and dowels should not be visible. If you drilled too deeply, cut a small plug off a spare dowel and place it in the hole. If you did not drill deep enough, make it deeper.
- Glue and clamp the joint. Squeeze a bit of wood glue into the holes, and insert the dowels into one board before sliding the two boards together. Use clamps to hold the joint together until it dries.
Tips and tricks for achieving a strong and secure dowel joint
First, choose the right size and type of dowel for your project to achieve a strong and secure dowel joint. Use marking tools called dowel centers to ensure accurate dowel hole alignment. Before drilling, mark the exact location of the dowel holes to avoid mistakes. Drill the holes with a drill bit that matches the diameter of the dowels, making sure to drill the holes straight and to the correct depth. Apply glue to both the dowels and the holes and insert the dowels, making sure they are firmly seated. Clamp the joint together and allow the glue to dry completely before removing the clamps. Finally, trim the excess dowel material flush with the wood surface for a professional finish.
- Use marking tools known as dowel centers.
- You should know the subject of wood joints.
- For edge-gluing, the dowels align the pieces and keep their surfaces flush.
- Drill the hole using the drill bit that matches the diameter of the dowels.
Common mistakes to avoid when making a dowel joint
Common mistakes to avoid when making a dowel joint include using the wrong tool, not aligning the dowels properly, using too much force when inserting the dowels, and adding too much glue, which can cause excess glue to be forced out of the joint and weaken its strength. It is important to use the correct drill bit size for the dowels and make sure the holes are drilled straight and evenly spaced. Proper clamping and glue drying time are critical for a strong and secure joint.
- Do not use the wrong tools.
- Keep your wood carving tools in place.
- Do not apply force.
- Do not squeeze more glue in the hole.
Examples of when to use a dowel joint in woodworking projects
Dowel joints work in woodworking and cabinetmaking. The dowels better secure butt joints for cabinet doors or align two boards for a flat edge joint, such as a tabletop. They also work for drawers, picture frames, and other projects where glue alone might not be enough.
Mortise and Tenon Joints
What are mortise and tenon joints?
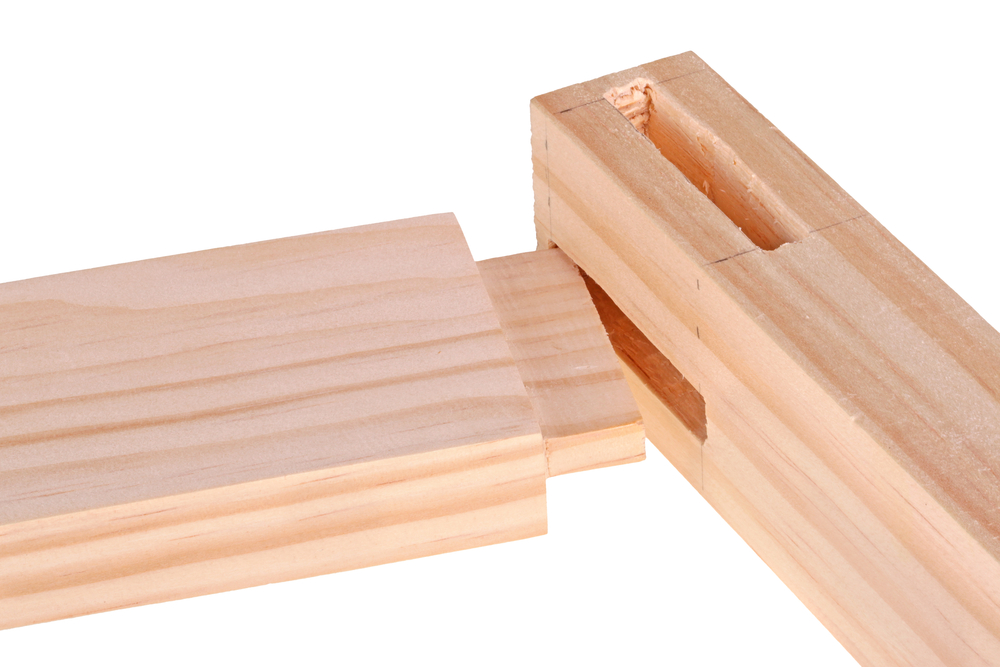
A mortise and tenon joint is a woodworking technology that connects two pieces of wood. It works when the adjoining pieces connect at right angles. Mortise and tenon joints are strong and stable joints popular in many projects. They furnish a strong outcome and connect by gluing or locking into place.
The mortise and tenon joint also gives an attractive look to your item. However, it is difficult because of the precise measuring and tight cutting required. This type of joint has variations, and the basic mortise and tenon have two components: the mortise hole and the tenon tongue.
The tenon fits into a square, or rectangular hole cut into the other corresponding member. Cut the tenon to fit the mortise hole. It has shoulders that sit when the joint enters the mortise hole. The joint may be glued, pinned, or wedged to lock it in place.
Step-by-step instructions on how to create a mortise and tenon joint
- Mark the tenon shoulder line by laying your boards out on your workbench and butt the tenon board against the mortise board. That helps you see where you want them to join. Make reference marks on the face and edge of each board, so you remember which faces and edges you should mark. Mark the shoulder line. The shoulder is where the tenon will stop against the mortise. Lay the tenon on top of the mortise and decide how deep you want it to go into the mortise.
- Mark the tenon and the mortise boards with a marking gauge or a mortise gauge. A mortise gauge will hold two measurements at once. Not every board has the same thickness, so do all your marking from the same reference face to ensure the tenon will fit into the mortise.
- Set your mortise chisel on the top edge of your tenon board and set your mortise gauge’s inner cutter to touch the edge of your mortise chisel.
- Scribe the inner cutter around the end of the tenon, from shoulder line to shoulder line. Run that same inner cutter on your mortise board.
- Set the outer cutter to line up with the outer edge of the mortise chisel.
- Scribe the outer line on the mortise board.
- Use a back saw to cut the tenon cheeks or the faces of the tenon (Howstuffworks.com). Use a backsaw with ripped teeth to cut down with the grain. If you are cutting a small tenon, a small dovetail saw will work fine.
- Use a bench chisel to cut out a little notch to give your saw a track for starting into the cut.
- Remove the tenon cheeks and shoulders from the tenon. Use a different back saw with crosscut teeth.
- Secure your tenon piece against a bench hook and deepen your shoulder line with a wide bench chisel and wooden mallet. Place the chisel precisely in your shoulder line.
- Cut the tenon sides.
- Layout the Mortise.
- Chop the mortise and fit the joint. Try dry fitting your tenon first to see how tight it is but do not force it.
Tips and tricks for achieving a strong and secure mortise and tenon joint
- Start with a chisel as wide as the mortise ends and use it to square both ends of the hole.
- Secure with dowels or wedges to strengthen the joint.
- A tenon’s thickness should be one-third the stock being mortised.
- You may need to make a tenon thinner or thicker to achieve a good fit.
- You can secure the joint with pegs if you prefer not to use glue.
Common mistakes to avoid when making a mortise and tenon joint
- Do not cut Mortise-and-tenon joints unevenly.
- Fill the gaps in with a lot of glue.
- If the proportions are incorrect, the wood can shear on either side.
- Do not chisel all the way through.
Examples of when to use a mortise and tenon joint in woodworking projects
Woodworkers have used it for years to join pieces of wood when the adjoining pieces connect at right angles. A mortise and tenon joint works to join two pieces of wood at 90 degrees. It makes tables, chairs, cabinets, bed frames, doors, windows, and paneling.
Dovetail Joints
What is a dovetail joint?
A dovetail joint is a joinery technique used in woodworking, which consists of one or more tapered projections known as tenons on one piece, which interlock with corresponding notches or recesses known as mortises in another.
Dovetail joints are popular for their strength and resistance to being pulled apart. It features a series of pins and tails in a trapezoidal shape. Once glued, a dovetail joint does not need mechanical fasteners—Dovetail joints inside the tombs of ancient Egyptian mummies.
Step-by-step instructions on how to create a dovetail joint
- Determine which piece of wood will be the tail board and which will be the pin board. The tailboard withstands more pulling tension. So it depends on what you are building and how you will want to situate the pins and tails.
- Use your marking gauge to measure the depth of the pinboard. Since the depth of the pin board matters, adjust it to the thickness of the pin board.
- Mark around the tail board with the marking gauge.
- Mark and measure the tails. Determine the size and number of tails. How you mark the joint tails will depend on the tool you are using.
- Cut the tails starting at the top using your dovetail saw.
- Cut towards the base of the tails on both sides. Cut away the wood to leave the wood tails. Use the dovetail saw to cut across the wood to the tail base on each side of the wood. Follow your mark. Do this on both sides.
- To remove the wood between the tails, begin by chiseling along your mark.
- Chisel away from the front. It takes some time, and you should not rush it by chiseling away too much at once.
- Once you have reached the center, flip the board and continue. Do not chisel through to the other side of the wood because you will risk damaging the other side.
- Clean up the tailboard. Clean up any uneven or rough edges with a file or sandpaper. The edges should be as straight as possible, but do not remove too much of the wood.
- Measure the depth of the tail board and mark all four sides of the pin board.
- Line up the wood to measure your pinboard.
- With your marking knife, trace the edges of your tailboard onto the end of the pinboard.
- Mark the edges of the pinboard. Use a square to ensure the marks are straight.
- Cut down the top of the pinboard. Use the dovetail saw to cut down the top of the board on all four marks.
- Use a chisel to remove the wood in between the pins. Remove small pieces of wood until you reach the center of the board, then flip it.
- Clean up the pin board using a file or sandpaper to flat uneven edges or remove wood leftover from the saw.
- Place your pieces together and admire your work. Examine where the wood is too tight and fix this with a file or sandpaper.
Tips and tricks for achieving a strong and secure dovetail joint
To make a strong and secure dovetail joint, first, ensure that both ends of the wood are cut so that the tails and pins fit tightly together. Clean the dovetail surfaces thoroughly to remove any contaminants or imperfections. The corners of the dovetail joint should be reinforced with glue, and the pins and tails should be the same width to ensure maximum strength. Also, using larger bits will result in stronger joints. Practice and patience are the keys to mastering the dovetail joint technique.
- Cut both ends of the wood, so the tails and pins fit together.
- Clean up the dovetail surfaces.
- The corners should be strong enough to support the joint corners.
- The larger the bit, the stronger the joint.
Common mistakes to avoid when making a dovetail joint
When making a dovetail joint, be sure to use a knife wall, cut the shoulders to the line, and avoid showing gaps in the joints. Proper chip flushing is also essential to ensure a tight fit.
- Failure to use a knife wall.
- Failure to cut the shoulders to the line.
- Joints should not show gaps.
- Improper chip flushing.
Examples of when to use a dovetail joint in woodworking projects
Dovetail joints are commonly used in woodworking projects requiring strength and durability. They are ideal for joining shelves to cabinet sides, cabinet shelves to sides, horizontal partitions to shelves, and adjacent sections of expandable table frames. Dovetail interlocking provides a strong and reliable connection that can withstand heavy loads and frequent use. In addition, dovetail joints have an aesthetic appeal that can add to the beauty of a project.
Conclusion
In summary, several types of joinery techniques are discussed in this article. These include dovetails, dowels, mortise, and tenon joints. These are for different pieces of wood. Practice and master carpentry techniques for successful woodworking projects. This way, you’ll get accurate projects, and you’ll be less likely to waste materials. Do not stick with one wood joining technique, experiment with different techniques to find the best solution for the project.
FAQs
What are some common types of joinery?
Other common types of joinery include the dovetail joint, finger joint, tongue, groove joint, and miter joint. Each type has unique features and uses, so choosing the right one for your project is important. The proper tools and techniques to create a strong and secure joint are also essential.
How can I improve my joinery skills?
To improve your carpentry skills, you need to master measuring techniques, understand the properties of different types of wood, and practice using different tools. Studying different carpentry techniques and gaining experience with various projects, such as making different joints and constructing furniture, is also helpful. Consider taking a class or workshop to improve your skills, and get feedback from more experienced woodworkers to identify areas for improvement. Dedication, patience, and attention to detail are critical to becoming a good woodworker.
How do I choose the right joinery technique for my project?
When choosing a joinery technique, it is important to consider the specific requirements of your project, such as load-bearing capacity and esthetics. Research and try different techniques to determine which is best for your project. Factors to consider include the type of joint, the tools and materials needed, and the level of skill and experience required. If you take the time to choose the right technique, the finished product will be stable and esthetically pleasing.
What are some common mistakes to avoid when making joinery?
When making joinery, it is important that you do not leave gaps in the joints. Proper measuring, marking, and using the right tools can help ensure that joints are tight and secure. Also, if you take the time to prepare and test parts before gluing or fastening properly, you can avoid common mistakes and ensure a successful project.
How can I make sure my joints are strong and secure?
Although plywood straps may provide some reinforcement, other factors must be considered. Joint design, glue selection, and clamping pressure are important to ensure strong and secure joints. Consult a woodworking guide or expert for more tips.

- Grain and Sheen: Teak Oil versus Danish Oil Uncovered - January 10, 2024
- The Cherry on Top: Crafting the Perfect Cutting Board - January 9, 2024
- Polyurethane Water-Based vs Oil-Based: Choosing the Right Finish - January 8, 2024