Woodworking is an art that involves crafting beautiful furniture, toys, and other items from wood. To achieve a professional finish, there are several techniques that you can employ to make your creations stand out. These techniques encompass woodworking methods, such as wood carving, joinery, and woodturning.
In this article, we will share five woodworking techniques that you can use to create stunning decorative objects from wood. Whether you are a seasoned woodworking enthusiast or just starting, these techniques will help you achieve a professional finish that will impress anyone who sees your work.
So, whether you want to make cabinets, fine tables, instruments, bowls, or any other wooden object, keep reading to discover some of the best woodworking techniques that you can use to take your craft to the next level.
As a beginner, you can start simply by learning basic woodworking skills. With every project, you will gain new expertise. Woodworking has an impact on both children and grown-ups. It has a significant impact on children’s self-esteem and confidence, and it develops a sense of agency. It leaves room for professionals and amateurs to express their creativity and imagination.
The idea that you do not have to make the same items others make allows you to try new ideas. Woodworking does not only help you on the creative side, but it has many health benefits. That is why some decide to take it as a hobby. It also develops one’s critical thinking as you are allowed to deal with the possibilities of the woodwork.
You should be knowledgeable enough to know your tools if you are a beginner. Professional woodworking tools help you achieve the results you are looking for and deliver customer expectations. The importance of achieving a professional finish for projects lies in how it changes how the wood looks and feels.
Professional finishes provide protection and appearance. It protects wood from outside elements, corrosion, wear, and rust. That is how essential woodworking finishing techniques are as they finish your woodworking projects. The 5 techniques in the article are sanding, staining and finishing, jointing and edge treatment, framing and panel cutting, and hardware installation.
Technique 1: Proper Sanding
The importance of sanding in the woodworking process
Sanding wooden planks helps remove stains. The planks are for both domestic and commercial uses. The chances are low that during their lifetime, wood stains will occur. Try cleaning products first before sanding. Remove tough stains with something much stronger, like sanding.
Sanding removes the stain by touching the flat surface lightly with a sander to remove the stain and keep its finish. That can be done directly onto the floor or with a belt sander for the finer wood stains.
Sanding increases durability. As your wood planks age, they naturally become less durable because the plank works more, increasing its overall wear and tear. That wear and tear can cause the wood to lose its look and safety. If a heavy amount of damage is inflicted, the plank can chip, making it unsafe. That is where sanding comes into play, preventing this from happening.
Sanding improves comfortability. Wooden planks can be used for kitchen flooring, hallway flooring, and many DIY projects, meaning they need comfort. Comfortable flooring can be difficult to achieve without sanding. Wear and tear can cause the planks to become less comfortable over time. Sanding the wood surface will make the surface smoother and more comfortable to stand or touch.
If your ultimate goal is easy maintenance, try sanding. Due to the surface being smoother and flatter, it becomes much easier to clean (Unitedrentals.com). Sanding wood improves the overall look and health of the plank. Sanding avoids splinters; some wood pieces contain rough projections that could become splinters since the uneven surfaces contain imperfections. To take care of them, sand the wood surface. You cannot sell a project if it gives the buyer splinters.
The various grits of sandpaper and when to use them
The materials used go through a sifting machine to get a uniform grit size across your sandpaper’s surface. The filters on this machine only allow specific-sized particles of the materials to pass through each level. The grit size determines how many particles can fit through a 1-square-inch filter. The larger the particle, the less it can fit through at once.
Grit sizes range from fine enough to resemble the size of cooking flour to larger grits that look like granulated sugar. There are two numbers used to correlate with grit sizing. The numbers are close for larger grit sizes but differ with smaller grits.
Grit sizes vary to match specific tasks. Different grit sizes are for varying surface types. Higher grit numbers are used for smoothing wood and painted surfaces between coats, whereas the lower grit number works on tougher surfaces for heavy sanding, stripping, or cutting hard surfaces. To get a smooth surface, you should go through the grits, meaning you would start with a coarser grit working your way down to finer and finer grits to create an even and smoother surface.
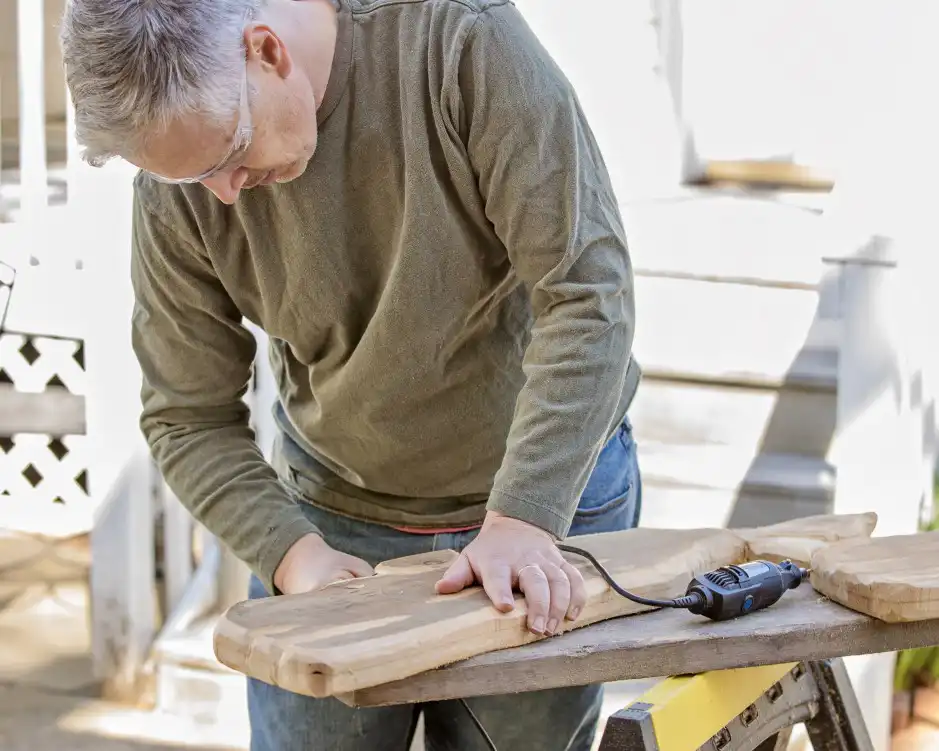
Step-by-step instructions for proper sanding techniques
- Familiarise yourself with the different grit sizes available and choose one that matches your project needs.
- Start with coarse grit sandpaper and move to finer grits gradually.
- Prepare your sanding area by clearing it of any debris or objects that may cause damage.
- Remember that you may be working with mixed wood densities, so take care when sanding.
- Sand between coats of finish to ensure a smooth and even surface.
- Clean up any mess created during the sanding process.
Tips for achieving a smooth finish
For a smooth finish, remove sanding dust using a vacuum. Brush on a coat of gloss polyurethane to start. Use a sanding block for flat surfaces and sand between coats. Allow the primer to dry before sanding.
- Use a vacuum to remove sanding dust.
- Start by brushing on a coat of gloss polyurethane.
- Use a sanding block for flat surfaces.
- Sand between coats.
- Allow the primer to dry before sanding.
Technique 2: Staining and Finishing
Different types of stains and finishes are available
Oil-based stains
These are formulated with a linseed oil carrier, forming a thick, deeply penetrating finish. They are ideal for interior wood projects, especially those that require extra protection. Oil-based stains give a more richly colored finish that you may not have from other stain types.
Apply your oil-based stain with a rag or a brush (Renopaintmart.com). They are slow drying but easier to achieve a smooth finish because brush or wipe marks have longer to flow out as the stain settles and hardens. Use mineral spirits to clean your brush. When using a rag, let it dry.
Water-based stains
These are faster when it comes to drying than most oil-based stains. They offer the best protection against mold and mildew and can use a brush or rag. Be careful when using a brush, as you might overbrush the product. It is quick to dry time and could lead to visible brush strokes.
Water-based stains do not penetrate wood fibers as deeply as oil-based stains. That is why more coats are the richest color. Water-based stains are water soluble when wet, making clean-up easy.
Gel-based stains
These are thicker than oil- and water-based stains. Gel stains make wood finishing easier since there is no need for careful brushstrokes. Use a rag for application. Gel-based wood stains give more or less color based on how hard they rub into the wood. They adhere well, hiding natural defects in wood that might lead to blotchy results. Gel products clean up best with mineral spirits.
Lacquer
Lacquer is not a wood stain but a finish cured by a chemical reaction. Apply lacquer on top of non-film-forming stains to add protection and sheen to the woodwork. It is fast drying, so apply it with spray equipment rather than by hand. It cleans up with a volatile solvent called lacquer thinner, which has the same base ingredient as lacquer.
Varnish
Like lacquer is a clear film-forming finish, varnish is any clear wood finish that forms a film. Polyurethane, lacquer, and shellac are some of the varnishes. The solvent used to clean varnish depends on the product.
Guidelines for selecting the right stain and finish for a specific project
Type of wood
Before you stain and finish any piece of furniture, look at it as you decide if it is cherry, maple, mahogany, rosewood, aged pine, or any rare wood. These should not be stained as they look best in their natural color. If the wood is light, with an undistinguished grain, it may benefit from the stain. Beech, birch, poplar, ash, gum, and new pine are stained before finishing. Woods, like oak, are attractive, stained, or unstained. If you are not sure if the stain would improve the wood, do not stain.
Final appearance
Besides the type of wood, your preference should be the deciding factor on the stain you would want to have. To get an idea of how the piece of furniture would look unstained, test an inconspicuous spot on your wood furniture with a finish you plan to apply. The wood finish will darken the wood and bring out the grain. When you like the way it looks, do not stain the wood. When you want a darker color or a more pronounced grain pattern, proceed and wood stain it.
Tips for achieving a consistent and professional-looking finish
- Carefully read and follow specific manufacturer’s instructions for each stain product you use.
- Run your scraps through the sanding process and use them to test finishes.
- Sand with the grain when hand sanding or using a belt sander.
- Turn out the lights and shine at a low angle across the wood to reveal imperfections.
- Use a quality brush.
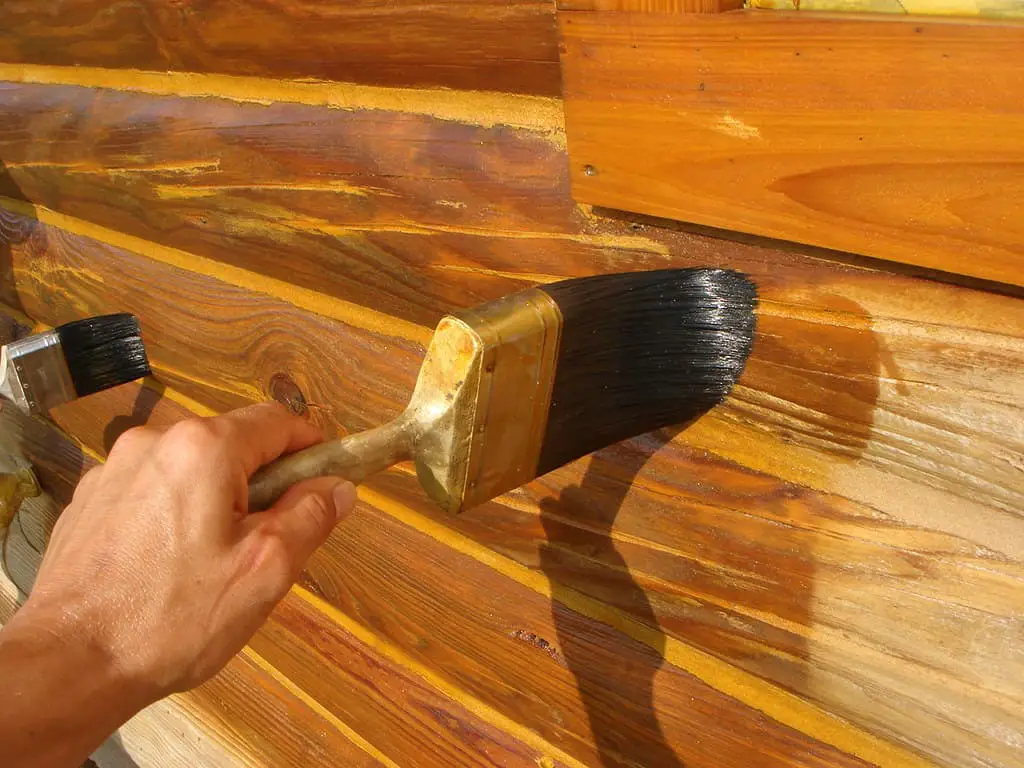
Step-by-step instructions for staining and finishing techniques
To achieve a beautiful finish on your woodworking project, follow these steps:
- Sand the wood: Use a range of sandpaper grits, starting with coarse and progressing to fine, to create a smooth surface.
- Stir your stain: Mix the stain thoroughly to ensure an even color.
- Apply the stain: Use a brush or cloth to apply the stain toward the grain. Wipe off excess stains with a clean cloth.
- Let the wood dry: Allow the stain to dry completely before applying a sealer or topcoat.
- Apply a sealer: Apply a sealer or topcoat to protect the wood and enhance the finish. Follow the manufacturer’s instructions.
- Clean up: Clean your brushes and tools with the appropriate solvent or cleaner.
Following these steps, you can achieve a professional-looking finish showcasing your woodworking skills.
Technique 3: Jointing and Edge Treatment
The importance of jointing and edge treatment in achieving a professional finish
Edge joinery is for contemporary woodworkers with boards that come in smaller sizes. Reinforce edge joints with cross-grained splines or biscuits. These mechanical aides help with alignment, although they do provide some strength and additional glue surface.
Edge joints are also sometimes formed using tongue-and-groove cutters. That approach is for unglued joints, like butting together stock for a floor or a cabinet back. Cabinetmaker uses a simple butt joint held together with a better adhesive. Butt joints are stronger than other alternatives. They can also be stronger than the wood adjacent to the joints.
The jointer belongs to the stock-dressing wood machines, including the table saw and thickness planer. The job is simple as it revolves around straightening and flattening stock, but the tool frustrates many woodworkers because jointing requires some finesse. When set up and used, a jointer will be precise and efficient, which no other machine can.
With a jointer, a workpiece fed across the infeed table is cut by knives set at the top center to the height of the outfeed table. The outfeed table supports the cut surface as the remainder of the board is jointed. That is why the tables are parallel to each other. You will not have a straight cut when they are not, or if the knives are set too high or low.
Different types of joints and edge treatments are available
Butt Joint
A butt joint is a wood joinery that joins one piece of wood butts into another at a right angle or square to the other board. Use mechanical fasteners for joining wall framing on construction sites.
Mitered Butt Joint
A mitered butt joint is just like a butt joint. The two boards join at an angle instead of a square. It does not show any end grain, making it beautiful, but it is not that strong.
Half-Lap Joint
Remove the half-lap joint where half of the two boards joined so the two boards join together flush with one another. That weakens the strength of the two adjoining boards but is stronger than the butt joints.
Tongue and groove joint
When joining two boards square to one another along a long edge, you can butt the joint together and hold it with fasteners. The tongue and groove joint is much stronger and provides more adjoining surface areas.
Mortise and tenon joint
The mortise and tenon is a classic wood joinery method amongst the strongest and most elegant methods for joining wood. Learn the jointing methods for creating tight, beautiful mortise and tenon joints.
Straight line edge band
Different materials, such as wood veneer, high-pressure laminate, and PVC, have thicknesses from 0.5mm to 12.7mm thick for this type of edge band. The jointing machines used can produce clean results for any straight-edged part. That is fast and efficient. With capabilities ranging from corner rounding to polishing, there is no straight-edge band job that you cannot handle.
Contour edge band
Contour edge band machines are controlled using CNC and laser trimming systems for quality contour edging. With this type of control over the quality of edge-banded parts, you get better results and virtually invisible seams where the edging material meets up. It does not matter if the shape of the edge part is round, radius corners, or any other shape; that type of edge band makes quick work of it.
Guidelines for selecting the right joint and edge treatment for a specific project
- When selecting a joint for your project, consider strength, durability, and aesthetics.
- Choose an edge treatment that complements the joint and enhances the project’s overall appearance.
- Ensure that the mating surfaces are flat and square on both faces of the board before applying glue.
- Use a long straightedge to scribe a straight reference line on one wood surface to ensure precise cuts.
- Practice and perfect your technique before beginning the project to achieve a seamless and professional finish.
Tips for achieving a tight and seamless finish
Tips for achieving a tight and seamless finish:
- Ensure all surfaces are properly prepared and sanded.
- Apply a wood conditioner to even out the surface.
- Use a stain or finish that matches the wood’s natural color.
- Apply the stain or finish evenly, following the manufacturer’s instructions.
- Sand between coats for a smooth finish.
- Use non-visible connectors such as pocket screws or dowels for a seamless look.
- Avoid over-applying glue, as excess glue can cause the finish to appear blotchy.
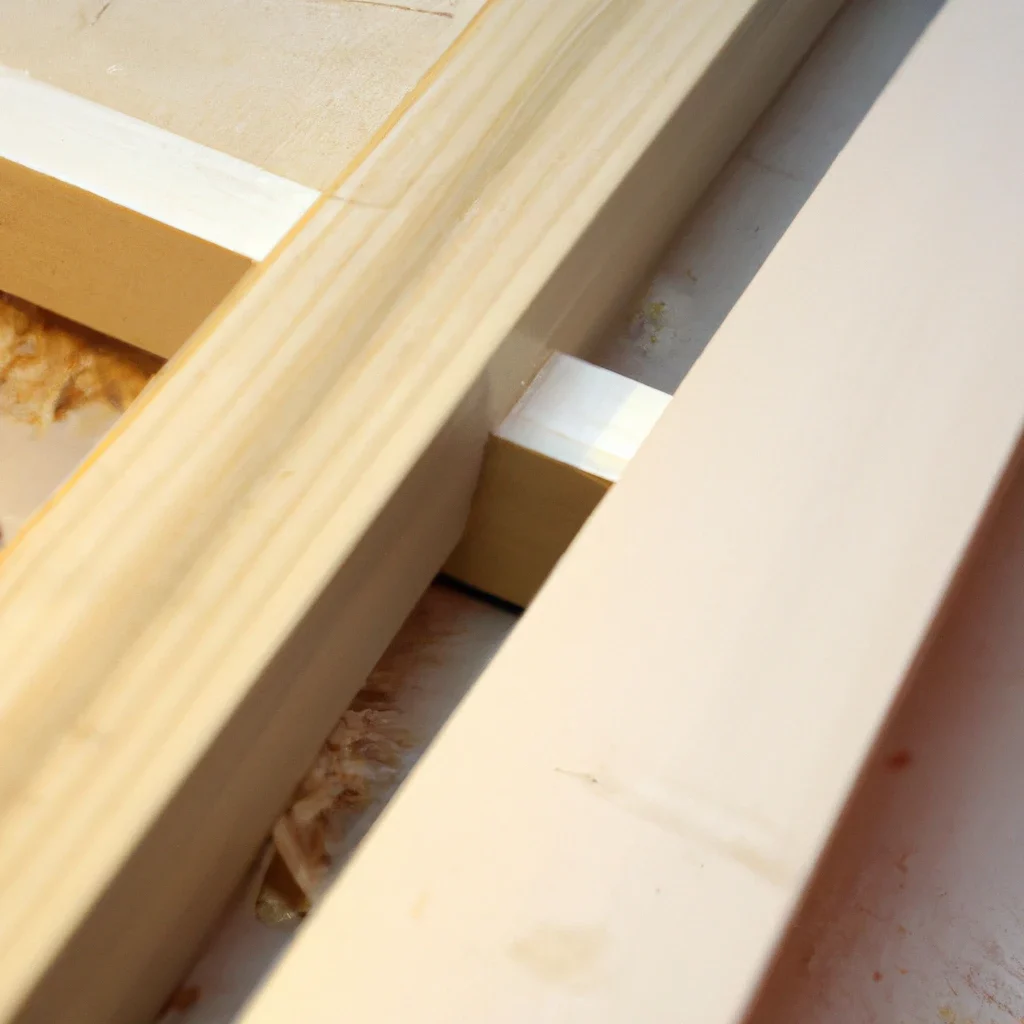
Step-by-step instructions for jointing and edge treatment techniques
When jointing, ensure that the jointer tables are properly aligned. Next, ensure that the two mating surfaces fit perfectly with no gaps. Then, lay the two boards flat and check for fit. Clamp the boards together until the glue sets. When using dowels, allow them to mate the holes and tap them gently. Set the joints and square the ends for a clean finish.
- Check the tables of your jointer for proper alignment.
- The two mating surfaces must fit together perfectly with no gaps.
- Lay the two boards together on a flat surface and check for fit.
- Clamp the boards together until the glue sets.
- Allow the dowels to mate holes.
- Tap dowels.
- Set joints.
- Square ends.
Technique 4: Framing and Panel Cutting
The importance of framing and panel cutting in achieving a professional finish
Frame and panel construction, also known as rail and stile, is a woodworking technique used to make doors, wainscoting, and other decorative features for cabinets, furniture, and homes. The woodwork technique captures a floating panel within a sturdy frame, unlike other woodwork techniques used for a slab solid wood cabinet door or drawer front.
The door is several solid wood pieces running vertically or horizontally with exposed end grains. The wood panel is not glued to the frame but is left to float within the movement of the wood comprising the wood panel and does not distort the wood frame.
Frame and panel construction comprises five parts: the panel and the four members making the frame. The vertical members of the wood frame are called stiles, while the horizontal members are known as rails.
A frame and panel item consists of a top rail, a bottom rail, two stiles, and a panel. That is a method of constructing cabinet doors, and these are known as five-piece doors. In larger panels, divide the panel into one or more sections. To house the extra panels, dividing pieces known as mid rails and mid stiles or muntins are added to the frame.
The frame-and-panel construction offers stability to a wooden door, allowing the large floating panels within the framework to expand and contract with changes in humidity. Wood frames and panels can be arranged in multiple ways to maintain consistency with different architectural styles.
The different types of framing and panel-cutting techniques available
Post and Beam framing
Post and beam framing is similar to timber framing. Post and beam framing uses metal plates for joints. The disadvantage is that condensation can collect on the metal joints and cause the wood to decay. The joints are different materials, so it is easier for the wood and metal to work loose from each other.
Plank and Beam Framing
Plank and beam framing is an elegant and historic method of framing. It uses large beams with planks of wood in between them. The planks are two inches wide and wider. Multiple methods join the planks. The planks can be tongue-in-groove or grooved with a spline. That is a method of framing ceilings since the ceiling is exposed. It works for the ceiling if you want to add a custom touch.
Platform or Western Framing
Platform framing works on a type of framing used in residential construction. It is also known as Western framing. It comes with support posts called studs that run from the bottom of one story to the top of that story. Each story is a separate unit. This type of framing is almost modular. This type of framing makes it easier to position studs where they are needed. You can use smaller beams and less wood overall. Platform framing is safer for workers because it uses simple tools.
Balloon Framing
Balloon framing works in building houses. In balloon framing, the studs form the height of the building, from the floor to where the roof begins. It is a negative term used to describe this light way of framing when construction framings were done with heavy timbers.
Guidelines for selecting the right framing and panel-cutting technique for a specific project
The right framing and panel-cutting technique for your project depends on cost, durability, and aesthetics. Consider eliminating unnecessary blocking and bridging, evaluating construction costs, and choosing lumber with specially cut ends to ensure a secure and long-lasting project. Take the time to research and choose the right technique to achieve the desired outcome.
- Eliminate redundant studs and unnecessary blocking and bridging.
- Evaluate upfront construction costs and long-term expenses.
- Lumber ends are specially cut.
Tips for achieving a precise and clean finish
To achieve a precise and clean finish in woodworking, it is essential to start with well-prepared wood. This includes ensuring that the surface is clean and free from dust or debris. Use fine-grit sandpaper to sand the wood, and be sure to sand with the grain to avoid scratches or other imperfections. Consider using a wood conditioner before applying any stain or finish to ensure an even application. Use a sharp blade or chisel to make clean cuts and avoid splintering or tearing for more intricate or delicate work. Finally, take your time and work carefully, frequently checking your progress to ensure you achieve the desired result.
- Get rid of excess dust.
- Sand the work through.
- Prepare your wood for framing.
- Cut the infeed table with knives.
Step-by-step instructions for framing and panel-cutting techniques
- Choose your wood depending on availability, economy, grade, strength, and workability.
- Lay the foundation for wood frames.
- Work on its components like studs, vertical members within the walls; joists, the wooden beams that support the floor; sloping beams on the roof called rafters.
- There are two methods of framing which are heavy-frame construction and light-frame construction. Choose between the two to complete your framing plans.
Technique 5: Hardware Installation
The importance of hardware installation in achieving a professional finish
Woodworking hardware adds functionality and connects different parts of a wood product. This hardware is not the same as woodworking tools. Tools modify and shape wood, whereas hardware holds completed pieces of wood together. Hardware falls into several types, including fasteners, door and lock components, drawer hardware, and caster hardware.
Hardware binds loose pieces of woodworking. These include nails and screws as the fastener varieties. Adhesives such as wood glue are classified as fasteners. Fasteners play a role in any woodworking project. All fastener hardware uses friction to limit the movement of different wood pieces and prevent boards from coming loose.
Door hardware enables different parts of a woodworking product to open and close easily. Hinges are a type of door hardware that can rotate while still providing a solid connection. Door knobs create a convenient handhold for moving doors and allow moving parts to latch tightly when not in use (Access-hardware.com).
Woodworking hardware keeps woodworking projects such as cabinets and closets secure. Lock hardware keeps doors closed and safe from unauthorized access. Lock hardware uses a bolt that prevents the door from moving when engaged. A key can disengage the bolt and open the door. Childproof lock hardware requires manual dexterity to unlatch a door and keeps young children from an unsafe storage cabinet.
Drawer hardware works when a woodworking project needs a part to slide out and away from the rest of the unit. This type of woodworking hardware uses rails mounted horizontally to guide rollers and a safety stop to prevent a drawer from falling. Install drawer hardware on office desks, kitchen cabinets, and bedroom sets.
Caster hardware is often installed on the bottom of products, moving a heavy object easily. This type of hardware has wheels that can swivel in all directions. Casters make moving items conveniently, allowing people to roll a woodworking item with minimal effort. Rolling casters are on kitchen islands, bedroom dressers, and other large objects.
The different types of hardware available
Hardware falls into several types, including fasteners, door and lock components, drawer hardware, and caster hardware.
Fastener hardware
It binds loose pieces of woodworking. These include nails and screws. Adhesives such as wood glue are known as fasteners. They work on any woodworking project. All fastener hardware uses friction to limit the movement of different wood pieces and prevent boards from coming loose.
Door Hardware
It enables different parts of a woodworking product to open and close easily. One of its hardware options is hinges, a type of articulating door hardware that can rotate while providing a solid connection. Door knobs conveniently create moving doors, allowing moving parts to latch tightly when not used.
Lock hardware
It is for safety since it keeps doors closed and safe from unauthorized access. The use of a bolt prevents the door from moving when engaged. A key is there to disengage the bolt and open the door. Childproof lock hardware keeps young children from getting into an unsafe storage cabinet.
Guidelines for selecting the hardware for a specific project
When selecting hardware for a woodworking project, consider factors such as function, safety, performance, aesthetics, quality, and post-sales support. Do not compromise on these parameters, impacting installation and long-term maintenance. Before researching products, list essential features, and ensure the hardware meets the project’s requirements.
- The selection of hardware depends on the application purpose, the end user experience, safety, function, performance, aesthetics, endurance, customization, and quality.
- Do not compromise on quality, safety, and performance parameters, as that will affect the installation, long-term maintenance, and safety.
- Consider the post-sales support and serviceability of the hardware selected, provided by its manufacturer.
- Consider how much space you need.
- Before you start your research on necessary features, make a list of essential woodworking features that your business uses regularly.
Tips for achieving a secure and seamless installation
Select the hardware that matches your woodworking vision and the current market trends to achieve a secure and seamless installation. Consider using hardware with anti-microbial properties to ensure longevity and hygiene. Additionally, ensure that the hardware is installed correctly according to the manufacturer’s instructions to prevent any issues down the line.
- Use hardware with anti-microbial properties.
- The hardware selected should go hand in hand with the vision of the woodworker.
- Choose hardware by analyzing the current market trend and its requirements.
Step-by-step instructions for hardware installation techniques
To install hardware in your woodworking project, follow these steps:
- Choose the appropriate hardware for your project.
- For nail-on hardware, mark the location and nail in place.
- Attach one side to the cabinet and the other to the door or lid for hinges.
- Install knobs or pulls by screwing them into the pre-drilled holes.
- Choose drawer slides that match your application and install them according to the manufacturer’s instructions.
- Ensure each pair of drawer slides is at precisely the same height and parallel.
These steps will help you achieve a secure and functional hardware installation in your woodworking project.
Conclusion
In summary, the 5 techniques discussed in this article are sanding, staining and finishing, frame building and panel cutting, hardware installation, and jointing and edge finishing. Each woodworking technique has its specifics that contribute to a professional finish. Practice and perfect these techniques for a professional finish on their woodworking projects. To continue learning and improving, read as many blogs as you can.
FAQs
What are the best sandpaper grits to use for woodworking?
The best sandpaper grit for woodworking depends on the task at hand. For rough sanding and removing material, use coarse sandpaper with a grit of 40 to 60. For smooth surfaces, use medium grit sandpaper from 80 to 120. Use fine-grit sandpaper ranging from 150 to 180 grit for finishing touches and achieving a smooth surface. Always start with a lower grit and work up to the finer grits for the best results.
How do I achieve a consistent finish when staining wood?
To achieve a consistent finish when staining wood, start by sanding the wood to a smooth surface. Apply a wood conditioner before staining to ensure an even absorption. Work in small sections, wiping off excess stain with a clean cloth. Avoid overlapping strokes and allow each coat to dry completely before adding another. Always stir the stain before using it to keep the color consistent throughout the project.
What are the different types of joints, and when should they be used?
Many types of joints are used in woodworking, including butt joints, lap joints, mortise and tenon joints, dovetail joints, and more. Each joint has strengths and weaknesses and is best used for different applications. For example, butt joints are simple and easy to make but not very strong, while dovetail joints are strong and beautiful but more complex. Choosing the right joint for your project is important based on its intended use and desired aesthetic.
How do I ensure precise cuts when working with panels?
Using a straight edge to guide your saw is important to ensure precise cuts when working with panels. You can clamp the straight edge to the wood or the workbench to ensure it does not move and then use your saw to cut the straight edge. Additionally, it’s important to ensure your saw blade is sharp and in good condition, as a dull or damaged blade can cause inaccuracies in your cuts.
What are some tips for securely installing hardware in woodworking projects?
Before installing hardware, make sure you have the right tools and materials. Measure carefully and mark the hardware locations—pre-drill holes to avoid splitting the wood. Use appropriate screws, bolts, or nuts for the hardware being installed. Check for level and alignment during installation. Finally, ensure that the hardware is securely attached to prevent any accidents or damage to the project.

- Grain and Sheen: Teak Oil versus Danish Oil Uncovered - January 10, 2024
- The Cherry on Top: Crafting the Perfect Cutting Board - January 9, 2024
- Polyurethane Water-Based vs Oil-Based: Choosing the Right Finish - January 8, 2024
