It is a woodworking tool that contains a circular saw blade set on an arbor with an electric motor driving it. The blade extends through the top of a table, supporting the material cut, commonly wood. After setting the blade’s height and angle, the operator cuts by pushing the stock into the blade.
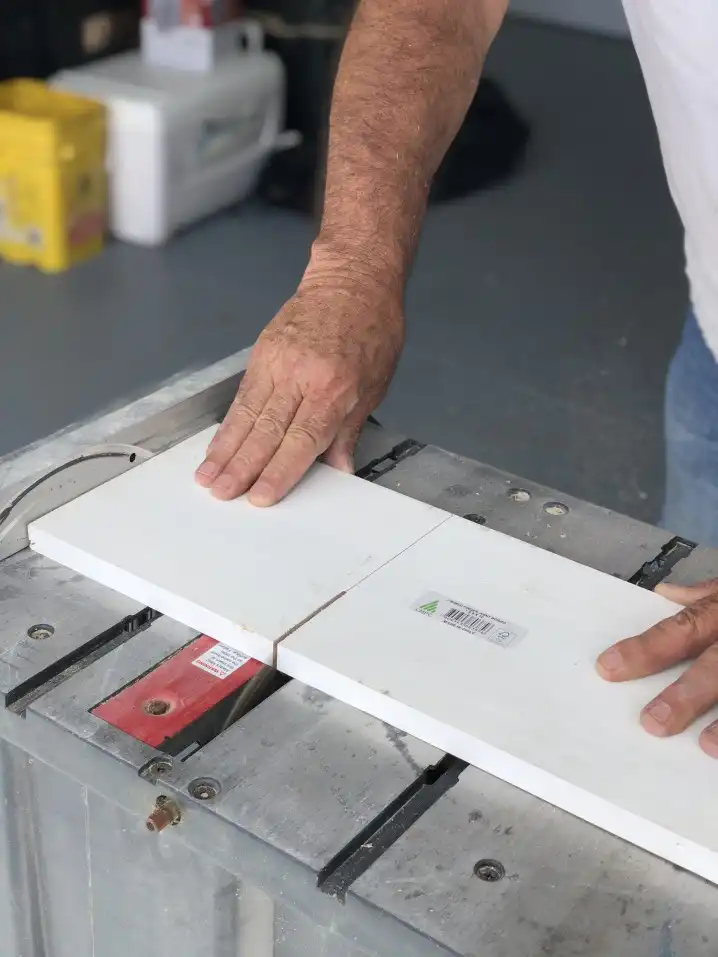
Table saws are multi-purpose saws that are ideal for cutting across (crosscut) or with (rip) the wood grain. Ripping is the most prevalent application. Table saws are essential to increase accuracy, save time, and reduce the effort required to achieve a straight cut.
Types of table saws
Benchtop
Benchtop table saws are tiny and light. They nearly always have a universal motor with direct drive (blade driven directly by the engine). Homeowners and DIYers are the most famous users of this sort of saw.
Small induction motors were utilized in specific early models, which were not particularly powerful, made the saw heavy, and created a lot of vibration. Most current saws can be lifted and transported by one person to and from a specific spot. Steel, aluminum, and plastic parts are commonly helpful in these saws, designed to be compact and light.
Jobsite
Jobsite table saws are a little bigger than benchtop ones and are generally ideal with a folding or stationary stand. The majority of saws in this category feature 15-amp universal motors that are tiny yet powerful. On the Jobsite, carpenters, contractors, and tradespeople usually use these saws.
The motors in many higher-end saws are gear-driven. The majority of these saws are light in weight, and you can move them to a job site, and many of these saws are built to last longer and are more precise than entry-level benchtop ones. The motors, gears, and casings are all made to resist the damage that construction sites can dish out.
Compact
Compact table saws are substantially larger than portable ones, and they come mounted on a fixed stand. Some saws have cast iron tops and resemble larger contractor saws in appearance; however, the tables are usually smaller, and the build is lighter. Some models include sliding-miter tables with an integrated miter sled that you can tilt to various angles. Although the motor is still a universal kind, small toothed belts typically power it.
Contractor
Contractor table saws have long been the preferred option of professional woodworkers as a smaller, more manageable alternative to cabinet-style table saws used for skilled carpentry and construction, medium to big furniture and construction projects, heavy-duty home renovation, and do-it-yourself tasks.
Cabinet Table Saw
The cabinet table saw appears supreme among table saws. Other table saw styles can only hope to match the cabinet table saw’s mix of accuracy, power, and rip capacity. They’re most commonly famous as the focal point of professional woodworking shops, where they serve as the center of activity for all building and furniture-making projects. They’re bulky, pricey, and not at all transportable.
Parts of the table saw
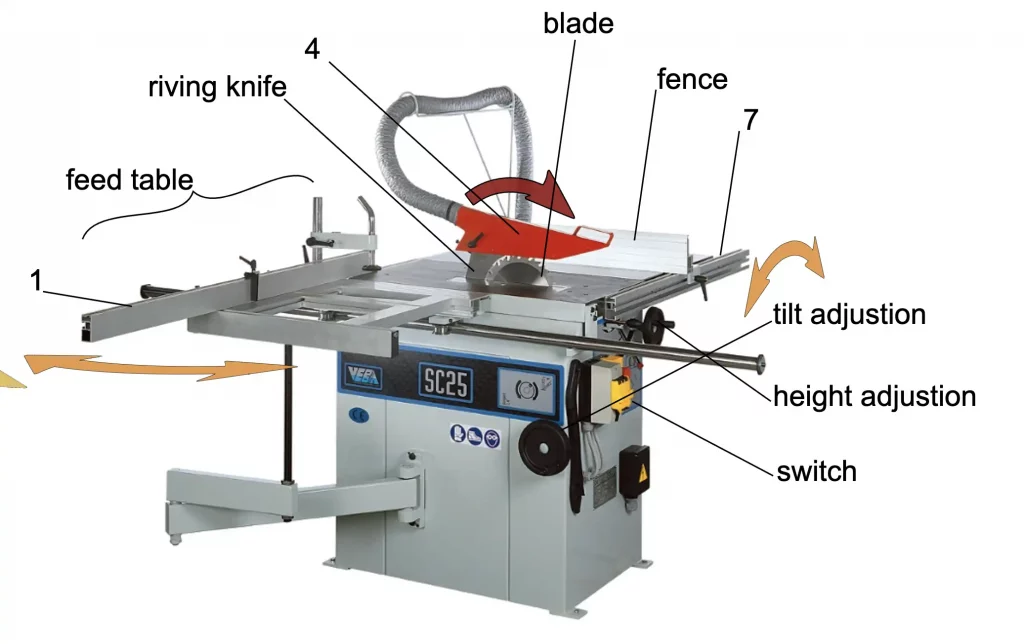
- Tabletop
The workpiece sits in this section of the power saw while fed into the blade. The tabletop of a table saw is one of the most crucial components since its straightness affects the precision of the cut.
- Blade
The blade of a table saw is the portion that cuts the workpiece. It comes in a variety of styles and sizes. You should use the proper blade size for your table saw to avoid injury and damage to the power tool. When choosing a table saw blade, other factors are the teeth’ material, number, and geometry. These characteristics can impact the blade’s performance on the cutting task at hand.
- Throat Plate
You can remove this table saw component to access the arbor and blade. For general cutting, a throat plate is ideal. It usually has a comprehensive slot that allows the blade to be angled.
- Arbour
The blade is held in place by this shaft in the table saw. It also determines the table saw’s blade size.
- Elevation and Tilt Handles
The blade raises, lowers, and tilts using the elevation and tilt handles/tilts. The last step is crucial since it allows you to produce bevel cuts.
- Blade Guard
This table saw safety feature protects the user during a cutting motion. It simply prevents you from being cut by the blade’s top edge. On top of the blade, there is a plastic or metal cover.
- Riving Knife
A riving knife is another safety feature of table saws. It protects users by preventing pinching or bunching of the workpiece’s two faces. The workpiece will not kick back and damage you. It is connected to the blade’s arbor directly. With the blade, it lowers and elevates.
- Dust Collection Port
Dust collection refers to any element designed to remove dust from the table saw during a cutting operation. However, a dust collection port or system is built into the blade guard in most cases. It has a port above the blade guard where users can connect a vacuum line to suction out dust.
- Rip Fence
The blade goes parallel to this section of the table saw. You can adjust this to either the left or right. When creating a rip cut, it acts as a guide for the workpiece. It cannot only keep you safe, but it also assures that you can make a precise cut.
- Mitre Gauge
This component of the table saw is designed like a protractor and aids in making accurate straight and angled cuts. On the power tool, it essentially sets the angle for miter cuts. It has a rail meant to slide into one of the table saw’s grooves.
- Push stick
This element of a table saw makes pushing the workpiece to be cut safer. It eliminates the need to move the workpiece with your hands. It must have a firm grasp to press the workpiece without slipping.
What you can do with a table saw
- Ripping
Cutting larger boards into smaller, easier-to-work-with pieces is typical for any table saw. Ripping, or cutting wood to width, is done with the grain running parallel.
- Crosscutting
Crosscutting is a technique for cutting wood to length. This type of work is ideal when using a sliding crosscut table guide and named because of cutting the grain of the wood.
- Cutting Rabbets and Grooves
Rabbets can be cut out of the board’s far edge with a table saw, while grooves cut closer to the middle.
- Bevel Cuts
Table saws can modify the angle of the blade, allowing for bevel cuts. Tilt the saw blade to the desired angle and use an angle measure to double-check its correctness.
- Cutting Joints
Aside from rabbets and grooves, a table saw can do several joint cuts. As previously stated, this may need removing the blade guard and riving knife; in these cases, be highly cautious when cutting joints.
- Kerfing
Regularly spaced saw cuts can almost sever a strip of wood, giving it enough local flexibility to make a tight bend. This approach of removing parts of a board, known as kerfing, can provide even thick hardwoods with a curve. The faster the bend generated, the closer the kerf spacing is.
Do I need a table saw
A table saw is suitable for cutting dados, although a circular saw isn’t practical. A table saw is steady and allows you to move the materials you are cutting into the saw rather than guiding the saw yourself. The table saw produces more accurate cuts.
A circular saw is the best option if you’re looking for a more versatile power instrument. While table saws are ideal for woodworking, they can cut long rip-cuts, crosscuts, miter, and bevel cuts.
Tips for working with a table saw
- Use feather boards for an extra set of hands
Use feather boards to hold the wood against the fence for a straight cut. Pull out a feather board for clean, straight cuts when keeping a board aligned with the fence. A series of wooden fingers on feather boards hold wood tightly against the saw fence.
- For sophisticated crosscuts, add a fence to the mitre gauge.
Attach the miter gauge to a straight piece of wood. When crosscutting, most miter gauges’ limited breadth provides poor support, significantly when cutting at an angle. Attach a wood fence to the miter gauge for further help.
- Create a simple outfeed support system.
When ripping longboards, use outfeed support.
It’s nearly impossible to tear the last few feet of a longboard without assistance or support from the other end. You can solve the problem with expensive roller support.
- Push sticks can help you save your fingertips
To feed lumber through the saw blade, have multiple push sticks on hand. It’s time to grab a push stick if your hand is within a foot of the table saw blade.
- Using a sliding jig, cut narrow strips
Attach a handle and a strip of wood to a 1*6 to make a sliding jig. Join the end of a 4-ft—1*6 with a short strip of wood that is somewhat slimmer compared to the width of the rip cut. You don’t have to remove the blade guard or shift the fence for each cut to generate a succession of identical narrow strips for shelf edging.
- The blade should be roughly 14 inches above the surface of the wood.
Most saws have a wheel that raises and lowers the blade to set the blade depth.
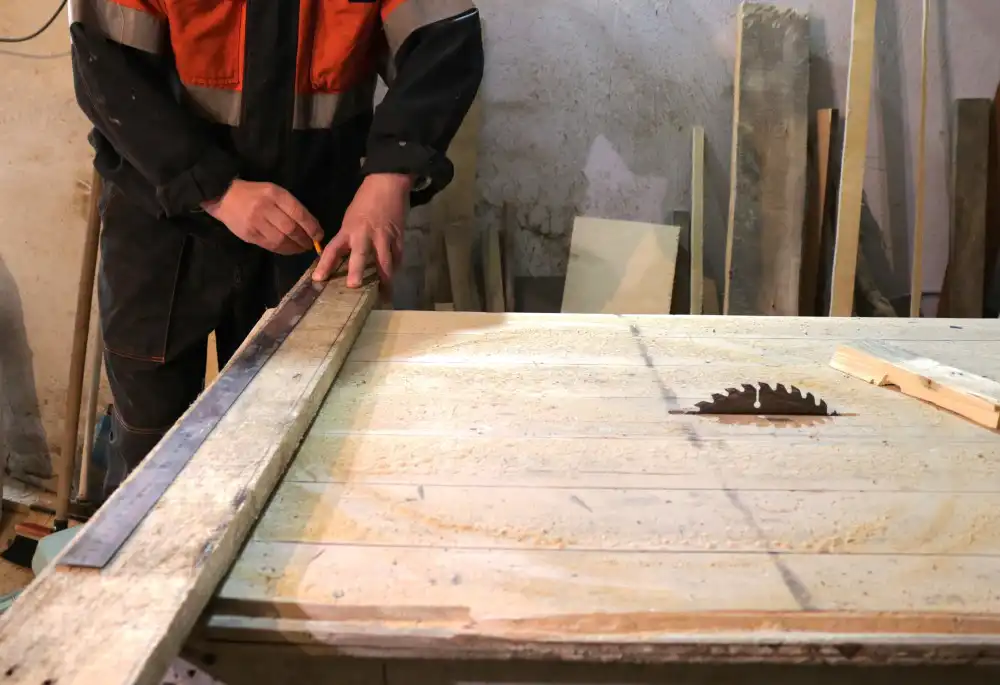
- Always focus your gaze on the board’s position rather than the cut
It’s natural to want to keep an eye on the cut when utilizing tools to ensure straight. When ripping a board with a table saw, however, one of the most crucial techniques is to keep your eyes on the location of the board against the rip fence.
How does a table saw work
A table saw is ideal for different purposes, but here are the general steps on how a table saw works or how you can use a table saw for any cut.
- Remove the plug from the saw.
- Make the area as straightforward as possible.
- Set the blade height to 34 inches above the size of your workpiece.
- Make any necessary mitre angler or rip fence modifications.
- Fill the workpiece with materials.
- Please turn on the saw after plugging it in.
- Using your hand or a push stick, run the component through the blade.
- Turn the saw off and unplug it once the item has been entirely cut.
Who invented the table saw
The table saw’s history may be traced back to 1777 when Samuel Miller constructed the first actual circular saw, but he most likely received the basic idea from other sources. He was still the first to take the initiative and create one. His saw was a round disk with sharp pointed teeth.
Cost of a table saw
The top table saws range in price from $300 to $3000+. The fact is that there are numerous table saw models available, each with its own set of functions, accessories, features, and costs. For around $200-250, you can get a well-used table saw that works well.
What is a table saw trunnion?
When the tilt of the blade is in alignment with the same axis of rotation, a trunnion is helpful. The blade must tilt in the exact location as an axis rotate the blade. They can’t be in the same room at the same time. A trunnion rotates around the radius without using an affixed center point, where the blade lies.
A trunnion shifts the mechanical rotation below the blade’s axis. It is the most effective mechanical answer for any tilt arbor. You can keep the same axis as the blade by using a radius track and a cam follower, and the sword will always tilt level with the top of the table.
How to choose a table saw
Consider the place and how you will use it
Take a moment to consider two crucial factors before going out to buy a table saw: 1) How are you going to use the saw, and 2) where are you going to use it? Firstly, consider what you intend to do with it.
Choose the category that best describes you.
Now that you know how and where you’ll be utilizing the saw, you can look over the many table saw categories to see which one best suits your needs. The three basic categories are benchtop (or job site), contractor, and cabinet.
Make a list of the table saw features that are most important to you.
It’s time to choose a specific saw now that you’ve decided on the category of saw you desire. It all comes down to product features and personal preference.
What is table saw rip capacity?
Rip capacity on a table saw refers to the distance between the table saw’s edge and the fence’s edge when you fully extend the fence. A 24″ rip capacity table saw can rip a 4-foot wide sheet halfway down its length. You’ll need a lesser rip capacity if you’re working on smaller tasks like furniture. A rip capacity of less than 22″ will suffice in this instance.
When ripping wood, a table saw’s rip capacity is one of the most crucial factors to consider. It’s also a significant factor in how much a table saw costs. As a result, you must know what rip capacity is and how much you’ll need for your workshop.
- Pyrography Techniques for Beginners: Textures and Shading - January 23, 2024
- Troubleshooting Jointer Issues: Why is Your Jointer Not Flattening Wood? - October 11, 2023
- Unlocking the Secrets of Jointing to Increase Width - September 29, 2023