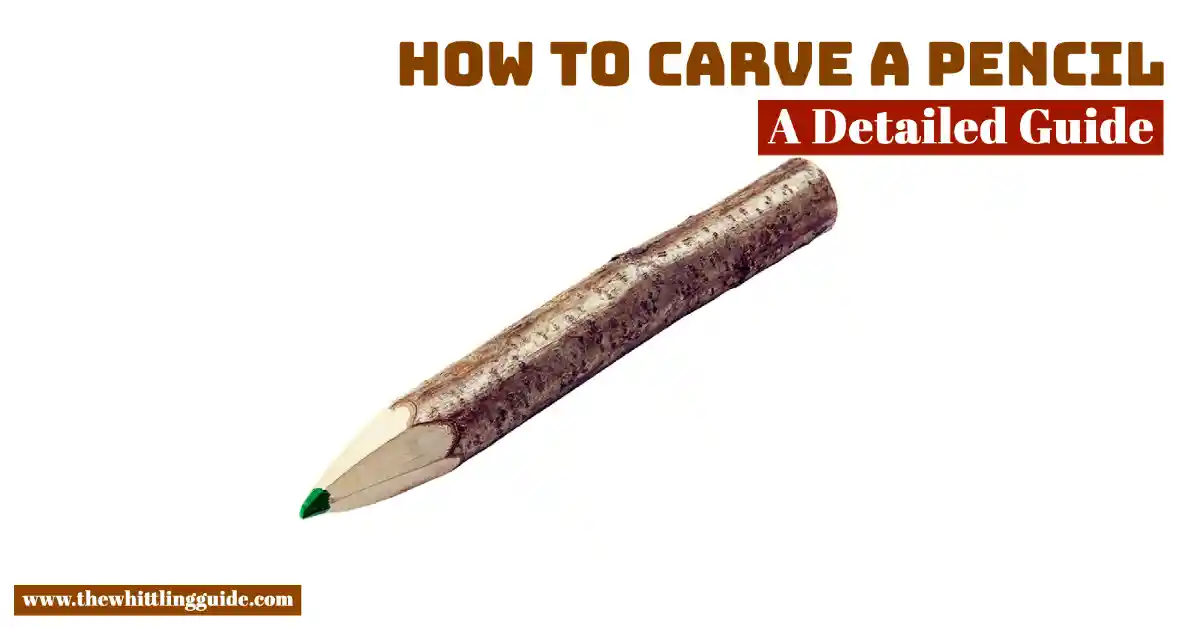
Wood carving is one of the oldest art forms, and getting started is relatively easy. You only need an artistic eye, a steady hand and a sharp knife. If you want to learn how to carve a pencil, read on! In the instructions below, you’ll find step-by-step instructions with some helpful tips to help you complete your project.
To begin carving, you’ll need to find a block of wood. (You can find this at most hobby stores.) It would help if you also had a pencil with a graphite core. (Note: For this lesson, we will use a #2 pencil because the graphite is soft and easy to carve. You can use a pen, but the graphite core will be harder to carve.)
Wood types to use
The best wood to use is cedar. It is soft and easy to carve, but it can be expensive. If you decide to use cedar, buy kiln-dried lumber since it is not easy to warp or crack. You can also use basswood, which is easy to find.
Tools you will need
A carving knife – if you have the right knife, you can carve a pencil without breaking the blade, even if you’re carving very hard. Regarding carving, patience and skill are your best friends, and sharp knives are essential.
Materials Needed
A pencil with a graphite core – a #2 pencil will work great.
A sharp, quality-made knife (examples: Wüsthof and Mac)
A pencil sharpener for sharpening your knife. You can find these at most good hobby stores or online retailers.
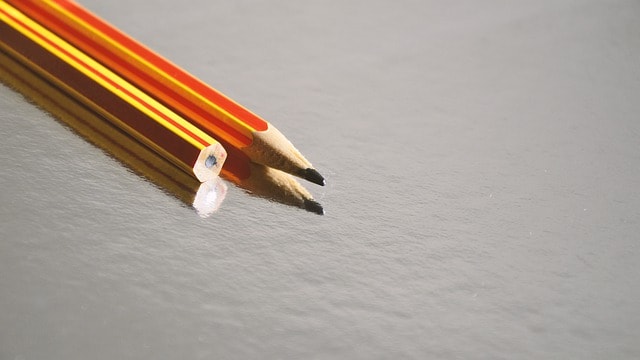
Easy pencil carving
Once you have the knife and wood, all you need to do is follow these steps, and you’ll have a pencil that looks like this:
Step 1: remove the wood from the pencil. Try to keep the graphite intact.
Step 2: carve away some of the wood until your pencil looks like this:
Step 3: You can take it from here and finish your project. If you want to make your pencil into a keychain, add some washers or means of attaching a ring to secure it.
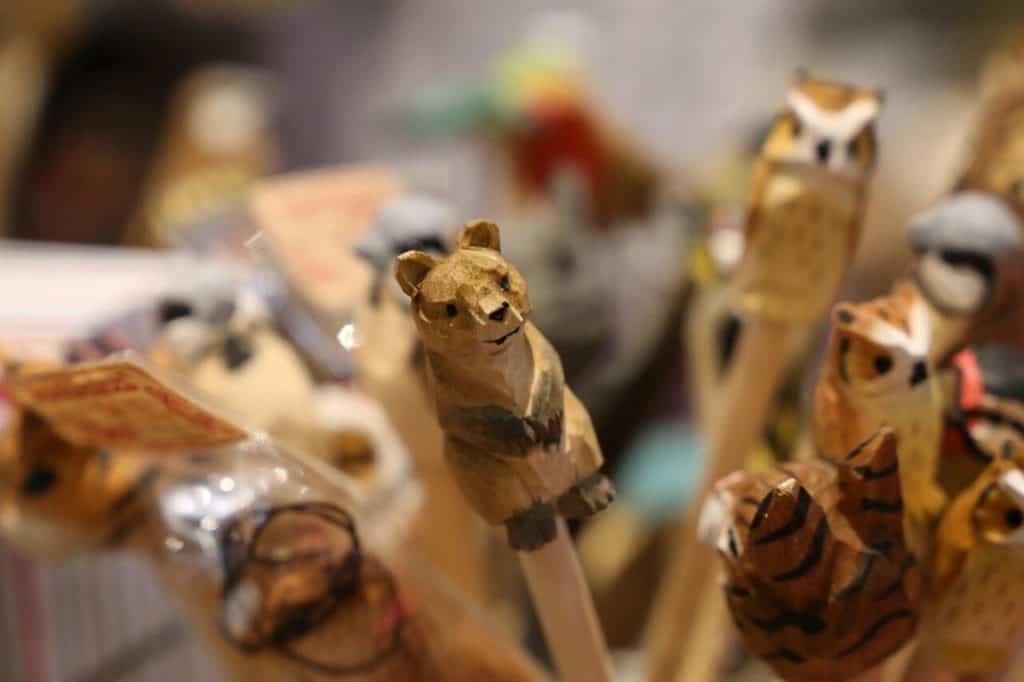
Step 4: If you’re going to make another pencil, try carving it to look like something else. For example, you could carve an owl, a bird, or an animal that appeals to you.
Hard pencil carving
Try doing a harder project if you want to learn how to carve a pencil. Something like this:
Step 1: Remove the wood from your pencil. Be sure not to poke through the graphite and into the wood. Then use an awl or another tool that is needle-like to make some divots in the graphite core.
Step 2: Using the awl, drill a hole into your pencil, as shown in the photo above. When drilling wood, keep it sharp. If you have a dull awl, try sharpening it before using it to drill through the pencil.
Step 3: Drill a second hole through the center of your first hole.
Step 4: Add washers to your pencil by gluing them on with glue or hot-melt glue. Then glue on a ring or other means of securing your pencil to your keychain. When doing this part, pull out the graphite core until the wood is completely covered and secure. A washer can be any size you desire, as long as it’s not too large.
Step 5: Carve it in if you want to add a picture to your pencil.
Getting all the pencil wood off
Sometimes, when you get all the wood off, you will have a little graphite left. If that happens, follow these steps:
Step 1: Use the knife to carve away the last of the pencil wood. Go all around it to make sure it’s smooth and round.
Step 2: drill a hole through the center of your pencil with an awl or other tool. Make sure you use a sharp awl if drilling hard material; otherwise, your awl might become dull and need sharpening.
Step 3: If you want, add a charm to your pencil by gluing one with hot-melt glue.
Step 4: Your pencil is ready to use!
Aftercare
After you have finished carving your pencil, the tip of it might break. If that happens, put some wax (or polish) on the wood and buff it with a soft cloth. This will make it look new.
Sanding down the edges
If you find it difficult to hold the pencil or want it to be cleaner and look smoother, sand the edges with some fine sandpaper.
Wood carving, particularly relief carving, is a traditional decoration for furniture and wooden objects. The most common relief carved wood items are the wooden plaque or tablet and wood engraving.
Video Tutorials
The videos below will show pencil carving for beginners and more experienced carvers.
Source
http://www.justforfunfairs.co.uk/crafts/carving_pencils.htm
http://www.hgtv.ca/hgtv/how_to/article/0,,HGTV_3544_2733782,00.html
http://www.makezineblog.com/?p=1718&cpage=4#comment-2262890
http://mollyumms-pencil-sharpenerreviews.blogspot. com/2012/02/how-to-make-a-pencil.html
http://www.artisandcrafts.com/Articles/ArticleDetail/articleId/1455
http://web.archive.org/web/20110717005223r_/http://www.diywoodworkingtips.com:8080/?p=5210
http://younggeekystuffblogger.blogspot.com/2012/10/make-your-own-pencil.html

- Grain and Sheen: Teak Oil versus Danish Oil Uncovered - January 10, 2024
- The Cherry on Top: Crafting the Perfect Cutting Board - January 9, 2024
- Polyurethane Water-Based vs Oil-Based: Choosing the Right Finish - January 8, 2024