Wood carving is one of the oldest woodworking techniques from the Middle Paleolithic. However, more evidence has been destroyed due to the rapid rate of wood decaying in most environments. Only isolated ancient artifacts remain.
North American Indian carving is in everyday objects such as wooden fish hooks and pipe stems. Wood carving is also present in architecture. Woodcarving as a hobby or profession comes with multiple benefits.
Wood carving is for your health as it lowers stress, blood pressure, and heart rate. As a professional, woodcarving is relaxing and requires a few tools. Although woodcarving requires skill, creativity, and artistry, it gives you quality pieces that can help you make money.
There are different wood carving techniques, such as relief, in-the-round, and chip carving. These processes use chisels, knives, gouges, and rasps. For more information, read the article below.
Techniques
Basic steps of woodcarving
- Decide what you want to carve. You cannot start gathering wood carving tools and machines before you know what you are making. What determines the tolls is the carving you are making.
- Make a scale drawing or plan for that carving.
- Set up the workbench for carving. Before you start carving wood as a beginner, set up the carving table. It includes bright lighting and a lamp with an integrated magnifying glass. Pay attention to the proper height of the workbench. To work safely and without injury, install a clamping device. Ensure your carving tools are sharpened, stable, and hardened for better results.
- Choose a piece of wood that suits that carving. The woods are into two: softwoods and hardwoods. When starting, use softwood. Linden wood is soft and easy to carve with a fine grain (Paladimstudio.com). It has a creamy tint, is ideal for beginners, and is found in most cheap craft shops. If you are a starter in carving wood and have no experience, choose woods and rough logs clean to avoid too many knots. They are more difficult to carve, making them ideal for carving wooden figurines. Find out what kind of hardness each wood has in this article.
- Gather your wood carving tools. For basic carving tools, look for a workbench, gouges, a wet brush or sponge, a pencil, paint, and sandpaper. A chisel comes in different sizes. When carving wood, the blades become dull. Use ceramic whetstone to sharpen the carving tools.
- Prepare the wood for carving. The wood should be well-dried before carving. Greenwood is soft but contains too much moisture to create high-quality, long-lasting carvings. Carving requires patience. You can wait if you want to use wood from your courtyard because well-dried wooden blanks are always available in various stores.
- Trace your carving.
- Transfer your drawing or plan to the piece of wood.
- Rough out or ground your carving.
- Model it.
- Add your details.
- Work on the finishing by applying a finish of your choice. Sand for smooth carving. Apply as many coats as you want.
Types of wood carving techniques
Chip carving
Chip carving is a woodcarving style in which knives or chisels remove small chips of material from a flat surface in a single piece. That was a transfer to metalwork, a technique already used in woodcarving. Chip carving is beautiful, distinctive, and decorative.
Any project that works on a flat slab works. Master the cuts, handle the tools properly, and thoroughly understand the technique to make chip carving simple. Any type of wood carving is simple once you master the craft.
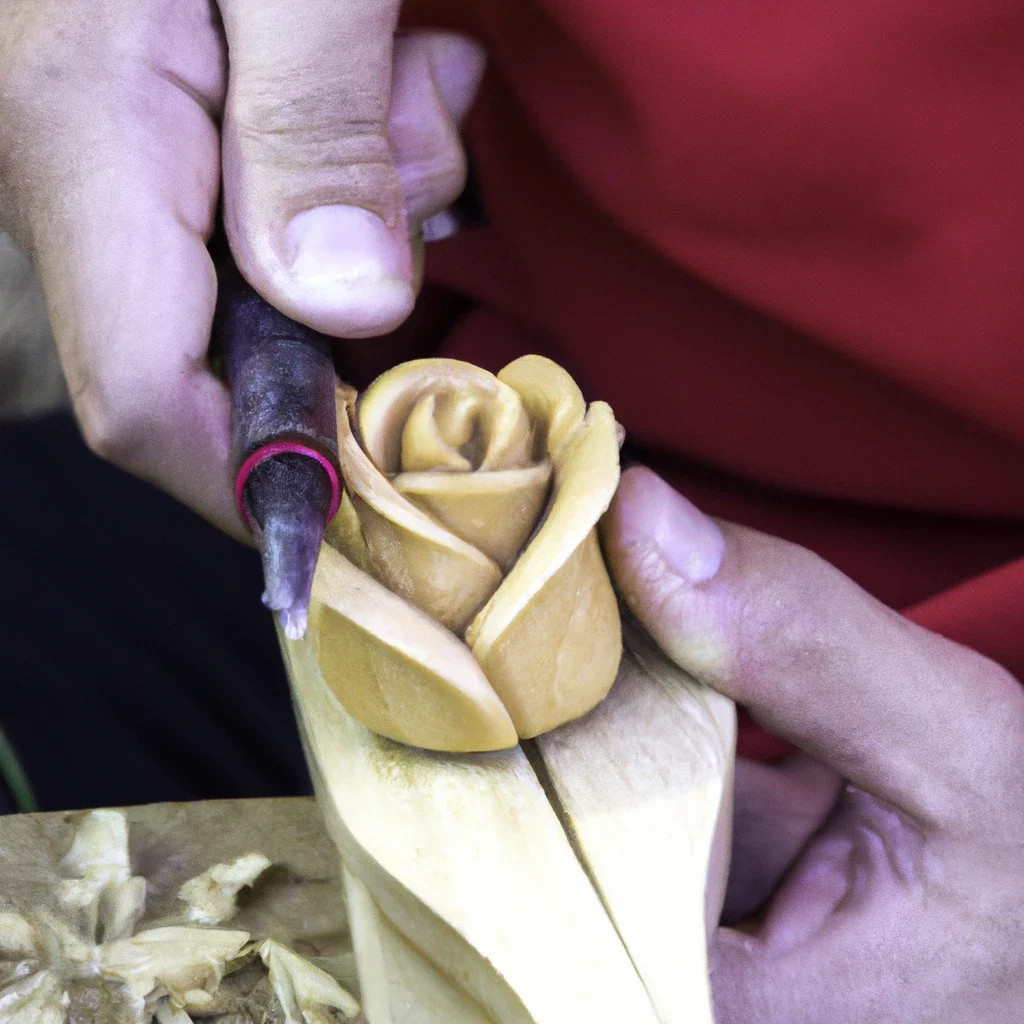
Relief carving
Relief carving is a woodworking technique where figures or patterns are carved in a flat wood panel. Depending on the degree of projection, reliefs may be as high or medium relief.
Relief carving is carving pictures in wood. It involves removing wood from a flat wood panel so that an object appears to rise out of the wood. Relief carving begins with a design idea, put to paper as a master pattern transferred to the wood surface. Relief carving is done with hand tools, chisels, and gouges, which require a mallet to drive them through the wood. Model the wood objects as soon as the background. Trim the object edges to the pattern lines.
Choose the right type of wood for a particular project
Choose the wood based on its function. Softwood is easy to carve and does not dull knives, unlike hardwood. Please pay attention to the wood grain direction since it decides the finish. Ensure the wood is safe and causes no allergies, and avoid carving on wood that has a strong smell.
The type of wood you choose will affect the final product. Different woods have different characteristics, such as strength, durability, and appearance (Woodassistant.com). Softwoods like pine are more affordable and easier to work with. However, they may not be as strong or long-lasting as hardwoods like oak or cherry.
The importance of proper planning and design in wood carving
Planning and design in wood carving ensure you have a successful project. Even if you are a pro, you still need to plan. The above tips will help you design and plan your projects like a pro. Before you start wood carving, understand the purpose of your project. That will help you choose the appropriate materials and design for your project.
Tools
Types of wood carving tools
Carving knife
Carving knives are in different sizes and shapes. Each size is optimized for a specific type of cutting. The knife’s shape determines how fine the details can be and maintains accuracy when carving wood pieces. Amongst the blades is the straight or curved, short or long edge. Know the type of wood you plan on using for your project. That helps you know the amount of force and pressure required during carving. Keep your knives sharpened for better results.
Chisels
Chisels are versatile tools for shaping wood. They come in different shapes and sizes, each having its unique purpose. Some chisel types are for cutting through the wood, while others drive nails into boards. A wood carving chisel can be struck with a mallet and driven through the wood.
There are multiple chisels to choose from, such as beveled edge bench tools and mortise cutters which can handle larger projects like furniture or cabinets.
Gouges
A gouge has a different shape that separates it from chisels. It looks like the scoop of a spoon, with curved edges and concave curves. A gouge is a cutting tool for creating deep or shallow hollows in the wood. It can create curved edges, which make objects more satisfied with their shape.
Skew chisel
It is a chisel with an angled blade featuring a bevel-edged tool with the cutting tip at an angle. It works on complex shapes like those found in furniture making or sculpture to perfection, without any difficulties.
Spoon Knife
The spoon knife features a curved edge for scooping out wood chips and smoothing the insides of rounded surfaces. The cutting edge is sharp and durable. It will not bend or break with the pressure you put on it.
How to properly sharpen and maintain wood carving tools
To properly sharpen and maintain wood carving tools, use coarse sandpaper or a sharpening stone to remove any nicks or dull edges. Progress to finer grits to remove scratches from the previous paper or stone. You can use diamond, oil, or water stones for this.
Shape the blade’s bevel using a coarse stone, and then work your way through the finer grits. After finishing with the stone, use a leather strop to remove any wire edge and polish the cutting edge. Repeat the process until the wire edge is gone and the edge is polished.
Using the strop frequently is important to keep your tools in top condition. Please don’t wait for the tools to become dull before sharpening them.
- Start with coarse sandpaper and use finer grits to remove the scratches from the previous paper. A sharpening stone works the same way. The grit wears away the blade metal as it passes over the surface. You can use diamond stones, oil stones, or water stones.
- Use a coarse stone until the bevel is shaped. Work your way through the finer grits.
- After finishing with the stone, use a leather strop to remove the wire edge and polish the cutting edge.
- Repeat the process until you remove the wire edge and polish the edge.
- Use the strop frequently to keep tools in top condition. Do not wait for the tools to become dull before sharpening.
Benefits and drawbacks of different types of tools and when to use them
- Chip carving knives offer a secure and comfortable grip, while chisels may be less precise and dig into the material.
- U-gouges are versatile tools that can be used for various tasks, while V-gouges are better suited for intricate work.
- Bent and spoon gouges are useful for working on tight or inaccessible sections of a piece.
- Skewed chisels are ideal for achieving smooth and clean corners in dovetail joints.
Tips on how to select the right tools for a particular project
When selecting tools for a carving project, consider the carving you will be doing and choose the appropriate tools. Look for tools with the right size, shape, and cutting edge to match the wood you will be working with. Invest in high-quality tools that will last longer and produce better results. Choose tools with comfortable, easy-grip handles to reduce hand fatigue and improve control. Look for tool versatility, as some tools can be used for multiple tasks. Choosing the right tools will help you achieve better results and enjoy your wood carving projects more.
- Purchase a wood carving tool set.
- Opt for higher quality than quantity.
- Keep your wood carving tools with better edge retention.
- Look for tools with handles with good grip.
- Consider versatility.
Safety
The importance of proper safety measures when woodcarving
Woodcarving tools can be dangerous if not used properly. Taking specific precautions to minimize the chances of accidents and injuries, especially when handling power tools. Safety measures keep you from the risk of electrical shock or getting cut by hand tools. They maximize productivity and limit risks, improving employees’ work environment and job satisfaction.
How to properly handle and store wood carving tools
Proper handling and storage of wood carving tools are essential for keeping them in good condition. Here are some tips:
- Store your tools in a storage case or wrap them in a thick fabric such as burlap or canvas to protect them from damage.
- Use dividers or fabric between each tool to prevent them from touching and scratching each other.
- Keep your storage case secure, so it won’t roll around or get knocked over.
- Avoid storing your tools in a damp or humid environment, as moisture can cause rust and corrosion.
- Before storing your tools, clean them with a soft cloth and a light oil coating to prevent rust from forming.
Tips on how to avoid common hazards and injuries associated with woodcarving
To avoid common hazards and injuries associated with woodcarving, it is important to take precautions such as wearing safety glasses and appropriate clothing, avoiding drugs and alcohol, and disconnecting power before blade changes. You should also use gloves to protect your hands from splinters and take frequent breaks to prevent strain or fatigue.
- Wear safety glasses
- Wear appropriate clothing
- Avoid drugs and alcohol
- Disconnect power before blade changes
- Use gloves to protect hands from splinters
- Take frequent breaks.
Conclusion
In conclusion, woodcarving is a process that requires one to use tools such as chisels and gouges effectively. As a beginner or professional, know what is required before starting any wood carving project.
Select the ideal wood before you mess up your project. Observe safety precautions before you hurt yourself or damage your items. When selecting the right wood carving tools, consider quality and better edge retention. Follow the tips and stages mentioned above for better results. Please do not limit yourself to the above information; explore the world of woodcarving and its many benefits. Equip yourself by following some online blogs or buy yourself the Home of the Woodcarver Online Magazine.
FAQs
What are the difference between relief, in-the-round, and chip carving?
Relief carving involves carving away portions of a flat surface to create a design that is raised from the background. This type of carving is viewed from a single vantage point. Round carving, or round sculpture, is a three-dimensional carving that can be viewed from multiple angles. Chip carving involves making small cuts or French fries in the wood to create a design, often with only one knife.
What are the best types of wood for woodcarving?
- Basswood
- Walnut
- Maple
- Cherry
- Red Oak
- Mahogany
Many types of wood are suitable for wood carving. Some of the best are linden, walnut, maple, cherry, red oak, and mahogany. Basswood is popular because of its softness and fine, even grain. Walnut is a harder wood with a rich, dark color that can contrast strikingly in a carving. Maple is a light-colored hardwood prized for its durability and ability to hold fine detail. Cherry is a medium-density wood with a warm, reddish-brown hue that can add warmth to a carving. Red Oak is a strong and durable hardwood with a distinctive grain that can add texture to a carving. Mahogany is a reddish-brown tropical hardwood known for its good workability and detail. When choosing a wood for your carving, consider the hardness, grain, color, experience, and details you want to carve.
How do I sharpen and maintain my woodcarving tools?
Sharpening and caring for your woodcarving tools is essential to ensure they are effective and safe. Some tips for sharpening and caring for your tools include using a whetstone or strop to sharpen the edge, maintaining the angle of the bevel, and sanding the edge with fine grit abrasive to maintain a razor-sharp edge. It’s important to regularly inspect your tools for signs of damage, such as chipping or cracking, and store them properly to prevent rust and other forms of corrosion. You should also treat your tools with a protective coating or oil to prevent rusting. Finally, it’s important to use your tools properly to avoid damage. For example, avoid excessive force or prying with your tools, which can dull or damage them.
What are some common hazards and injuries associated with woodcarving?
Woodcarving can be a dangerous activity, and it is important that you are aware of the potential risks and injuries associated with this craft. Common hazards and injuries include cuts and lacerations from sharp tools, injuries from repetitive strain while carving over a long period, respiratory problems from inhaling dust, and eye injuries from flying debris or splinters. Slips, trips, and falls can also occur if the work area is cluttered or uneven. To reduce the risk of injury, it is important to take proper safety measures, such as wearing eye and hearing protection, using sharp tools, using proper technique, and keeping the work area clean. It is also recommended to take frequent breaks and stretches to avoid repetitive strain injuries and properly maintain and sharpen tools to ensure they are safe and effective.
What resources are available for learning more about woodcarving?
There are a variety of resources to learn more about woodcarving. Some options include buying books on the subject, watching instructional videos, taking online classes, attending local workshops or classes, and joining woodcarving forums or communities. In addition, the online magazine Home of the Woodcarver is a popular resource, and numerous online blogs are devoted to woodcarving. Consider a combination of these resources to improve your woodcarving knowledge and skills.

- Grain and Sheen: Teak Oil versus Danish Oil Uncovered - January 10, 2024
- The Cherry on Top: Crafting the Perfect Cutting Board - January 9, 2024
- Polyurethane Water-Based vs Oil-Based: Choosing the Right Finish - January 8, 2024