Shelf
You can make an extra shelf that rests between the legs if you wish to store lathe accessories or add sandbags for some weight. The plywood should be ripped into two equal pieces to be assembled between the legs. Use screws to attach the plywood to the 2×4 supports.
Tool Basket
For installation, mount the bracket to the inside of the lathe leg with two hex socket cap screws, four flat washers, and two hex nuts. The two set screws on the bracket should be below the bolts and accessible from the backside for adjustment.
Place the arm of the tool basket into the bracket and secure with a set screw and tighten the 5/16imch hex nut. Line up the notch in the arm with the set screw so the tool basket can pivot. Adjust the set screws on the bracket to swing the tool basket at a level. Tighten the two hex socket cap screws.
Guard
Attach the guard to the bracket by inserting the rod and lifting it on the plunger. Make use of two detents that will hold the guard in place. One is for turning, and the other is when you need the guard up and out of the way. Tighten the bushings against the bracket with two setscrews.
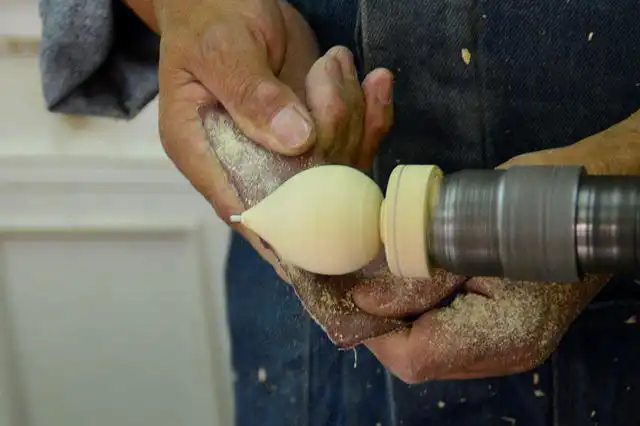
Headstock Lock Handle
Unlock the handle to position the head along the lathe bed. It locks the head in position. Tighten the lock handle when positioned—pushpin in to keep the spindle from turning. Never press the headstock spindle lock while the spindle is turning.
The siding headstock is for outboard turning. The sliding headstock pivots 360° and features 7 preset positions. That allows for the comfortable turning of larger pieces like trays or bowls. It operates on an electronic variable speed range. The new headstock locking handle is on the front side, so you no longer have to walk to the backside of the lathe to release the headstock.
The headstock is placed in an extended spindle nose with dual bearings for stronger hold and stability of the workpiece. The top of the headstock is fitted with a rubber pad to put aside your tools comfortably.
On/Off Button
Pull the button out to turn “ON” the lathe. Push the button in to turn the lathe “OFF.”
Headstock RPM Knob
Turn the knob to the desired RPM. Two-speed ranges are offering “speed” (0-3200) and “torque” (0-1,200). Release the knob and let it seat itself with an audible click when the headstock reaches a positive locking position. It contains the spindle in two preloaded ball bearings (Sherline.com).
Forward/Reverse Switch
Use the toggle switch to change the direction the spindle turns. Do not change direction when the spindle is still running.
RPM Readout
It displays the spindle RPM. It features an easy-to-read digital readout, and a frequency inverter secures the speed regulation with an inbuilt EMI filter. It connects to a digital display. The display is on the front side of the headstock.
Spur Centre
The spindle taper is MT-2. It is for turning between centers. Remove spur center by inserting drift rod through the opposite end of the spindle and knocking spur center out.
Faceplate
A faceplate is for turning bowls and plates. When used well you can turn a bowl on a lathe without a chuck. There are multiple screw holes for mounting the workpiece. Thread the faceplate onto the spindle, and tighten two set screws. Remove the faceplate by loosening two set screws. Push in the headstock spindle lock and use the provided rod in the faceplate holes to unthread the faceplate.
Indexing Hole
Thread the indexing pin into the indexing hole, ensuring it locates in the spindle hole. There are 12 holes in the spindle 30° apart. Three holes in the headstock casting accept the indexing pin. These holes are 20° apart.
The combination of holes allows you to mark your workpiece for evenly spaced features. Never start the lathe with the index pin engaged in the spindle.
The indexing ring built into the headstock provides up to 98 indexing positions. Indexing creates evenly spaced features in a workpiece while keeping the lathe spindle locked, like cutting flutes on a spindle blank with a hand-held router, while the spindle blank is between lathe centers.
The Jet lathe provides multiple indexing positions at 10-degree increments. Rotate the spindle using the handwheel until the index pin aligns with the desired hole. Screw index pins into the hole until it engages the spindle. Unscrew the index pin until the spindle is released. Rotate the spindle to the next desired hole, and repeat. Disengage index pin.
The indexer creates evenly spaced features in a workpiece while keeping the lathe spindle locked. Index positions are inscribed on the spindle, matching hole locations on the handwheel. The spindle blank is between lathe centers.
To use the indexer, loosen the handle and position the arm until the indexer pin aligns with the desired array of holes. Rotate the spindle to the position by observing the scale on the spindle. Push the indexer knob until the pin enters the handwheel hole. Rotate indexer knob to engage threads and secure handwheels.
Tighten the indexer knob until the pin fully engages the hole, and the spindle will not turn. Do not overtighten, as this could cause deflection in the spindle. Operate on the workpiece and unscrew knurled knob until the indexing pin releases. Turn the handwheel to the next indexing position, and re-engage the indexing pin.
Tool Lock Handle
It locks the tool rest body in position. To operate, unlock the handle to position the tool rest in any location
along the lathe bed. Tighten the lock handle when positioned. The handle locks the tool rest in position. Unlock the handle to position the tool rest at a specific angle or height. Tighten the handle when positioned. The quill lock handle locks the tailstock quill in position. Unlock the handle to position the quill. Tighten the lock handle when positioned.
Handwheel
Turn the handwheel to position the quill. The tailstock quill lock handle must be loose to position the quill.
Live Centre
Quill taper is MT2. It is for turning between centers. It removes the live center by retracting the quill until the live center loosens. Remove, or add different tips to the live center by inserting the provided rod through the holes in the center’s shaft. Unscrew the tip and change as needed.
Disconnect the machine from the power source before operation. Loosen the locking handle and lift the tensioning handle to remove tension from the poly v-belt. Position the belt in the desired speed range.
The high-speed range (120-3200rpm) provides maximum speed, whereas the low-speed range (50-1200) will provide maximum torque. Lower the tensioning handle so that the weight of the motor provides the needed tension and tightens the locking handle.
AC Inverter does not require any programming since it is pre-programmed from the factory. Use only controls on the front of the headstock. Do not change the buttons and knobs on the face of the inverter.
Tailstock
The 8inch diameter chrome-trimmed tailstock handwheel is for smooth, rapid adjustment. The tailstock uses a high-quality and proven Acme thread improving its movement, accuracy, and set-up. The tailstock is robust and features a new wedge locking system. That allows a firm and stable connection to the lathe.
The tailstock slides along the bedways and has a non-rotating spindle concentric with the main lathe spindle (Toolnotes.com).

- Grain and Sheen: Teak Oil versus Danish Oil Uncovered - January 10, 2024
- The Cherry on Top: Crafting the Perfect Cutting Board - January 9, 2024
- Polyurethane Water-Based vs Oil-Based: Choosing the Right Finish - January 8, 2024