Fundamentals of gunstock checkering
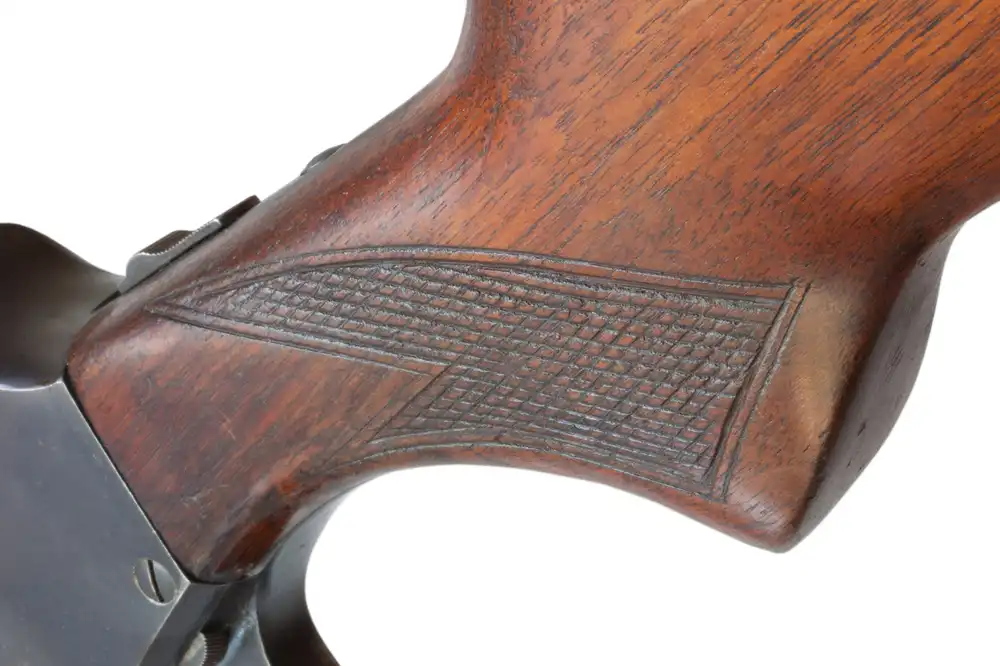
Pointed Checkering
Pointed checkering is a standard and straightforward method for beginner woodworkers who wish to checker their gunstock. Many guns are made with this type of checkering design, and with good reason. It is created by making rows of parallel grooves. These grooves are angled at 90-degrees. Variations can include a 60-degree angle. The end shape of this checkering is a diamond shape. It is basic but works well to help improve the aesthetic of the gunstock and enhance the grip.
Flat Top Checkering
Flat top checkering is one of the first types of checkering done on gunstocks on British Military rifles. This traditional technique makes use of tools to form a zero-degree angle design. Grooves with this shape are shallow but have parallel walls in the wood. It is less common in today’s world but still relatively easy to do, making it attractive for at-home designs. This type of checkering is quite decorative, but the grooves can get dirty quite quickly. Debris will increase the amount of stock maintenance required. The main disadvantage with this option is the checking is flat, not sharp. This feature means the grip offered is less effective; however, it is more easy-going on the hands. It would help if you considered this option for heavy recoiling guns or long shooting afternoons.
Semi-Flat Top Checking
This option of checkering is a middle ground for pointed and flat-top checkering. Choosing the semi-flat top checkering technique will require making shallow 60-degree angled grooves. It does not come with pointed tops to the diamonds and was designed to mimic English flat-top checkering. It is an excellent option to consider because it has solved the problem of grooves being filled up with dirt.
When recutting old checkering what tool should be used?
A V-cutter is one of the top options you can consider using when you need to recut some old checkering. The V-cutter will help you get perfectly cut lines with ease. It is advisable to use a V-cutter because it can provide you with good artistry that is neat and clean.
How is checkering done?
You will need to scribe lines onto the gunstock using a V-cutter to create a checkering pattern. The pattern can be of your choosing, which means infinite possibilities. Borders define the precise lines you hedge into the edges of the checkering patterns. The consumer often chooses the panel space within the frame to the checker. They add angular checkering variations or fill-in patterns. Angular designs are often the most difficult to achieve, but they are also aesthetically pleasing. A result is a diamond form that has accurately aligned tips. When purchasing a higher quality weapon, it is more likely to have an angular pattern. This form is mainly reserved for higher-grade stocks because of its complex application process.
What is gun checkering?
Gun checkering is a process that adds grooves to the handle of a firearm to help enhance its performance capabilities. Many gunstocks come with a basic finish that can often be improved. Consumers will often use this type of surface treatment to aid the weapon’s grip. Checkering has health benefits for your wrist and forearm. The other reason people do this is that it has lovely decorative advantages. The checkering process works by designing grooves formed through intersecting lines on the wooden gunstock. With modern technology, it is possible to order a gun that has been machine checkered, but a good number of consumers still perform checkering by hand. It can be considered an art, but it needs the correct checkering tools.
How much does it cost to refinish a gunstock?
You can expect to pay up to $450 for refinishing a gunstock. This price is the average you will find on the market today, starting from around $385 for most stocks. To figure out the cost, you are likely to pay, you will need to incorporate variables such as the type of wood. Walnut has a deeper, aesthetic color that requires a more expensive finish than regular pine wood. If there is an older finish on the wood, you will also need to pay to have that stripped off. This process can be done by using a chemical stripper. If the wood is in bad condition and has several dents, gouges, and scratches, then the wood will also likely require sanding. The sanding process will need high grit sandpaper between 180 – and 300. If you wish to achieve a high gloss and durable finish, then it is likely that you will need between 3- and 8 coats. Combined, these variables will form the cost paid to have a gunstock refinished professionally. It would, however, be much cheaper to perform this process yourself at home.
How to checker a gunstock
You need to engrave several parallel lines onto your gunstock to checker a gun. As you progress with the lines, you can come back and make each one deeper. Ensure that you have detached the gunstock appropriately and that the firearm is disarmed.
Commonly beginners struggle with this process because it becomes challenging to checker the corners. Unless you are skilled enough, it is not advisable to go around curved surfaces. Ensure that the pattern you choose divides the fore-end into three sections and leaves those empty. You can add a cool design like an arrow in these open spaces. It is essential to take your time during this process. Patience will help you to achieve the best results.
- 6 Tips To Craft The Perfect DIY Woodworking Project - August 1, 2022
- Six Reasons You Need an Air Filter In Your Wood Workshop - August 1, 2022
- American made wood lathes - May 26, 2022
